Shortcuts (Bookmarks & Drilldowns)
Introduction
Shortcuts is an extension of the navigation method within the Sycope system. They have been created to facilitate and streamline the work within the system.
Shortcuts are divided into two basic types: Bookmark and Drilldown.
Bookmark
A Bookmark functions like a traditional bookmark known from web browsers. It allows for direct access to a previously defined and frequently visited location within the system, such as a dashboard with preset additional filters, or a specific widget, or even an external link to a frequently visited page, chat, or another system that we work with on a daily basis.
Accessing Bookmarks
"Take a Shortcut!"
For a quick and easy access to availabale Bookmarks and Drilldowns from anywhere in the system click on the Bookmark icon in the upper-right corner.
Access the Shortcuts (Bookmarks & Drilldowns) Section
Access the Shortcuts section via [Configuration > Favorites] which automatically takes us to the Shortcuts (Bookmarks & Drilldowns) tab.

Adding New Bookmark
New bookmarks can be added in various ways, as presented below.
Quick and Basic Way
While in the selected location within the system, click on the bookmark icon located on the right side.
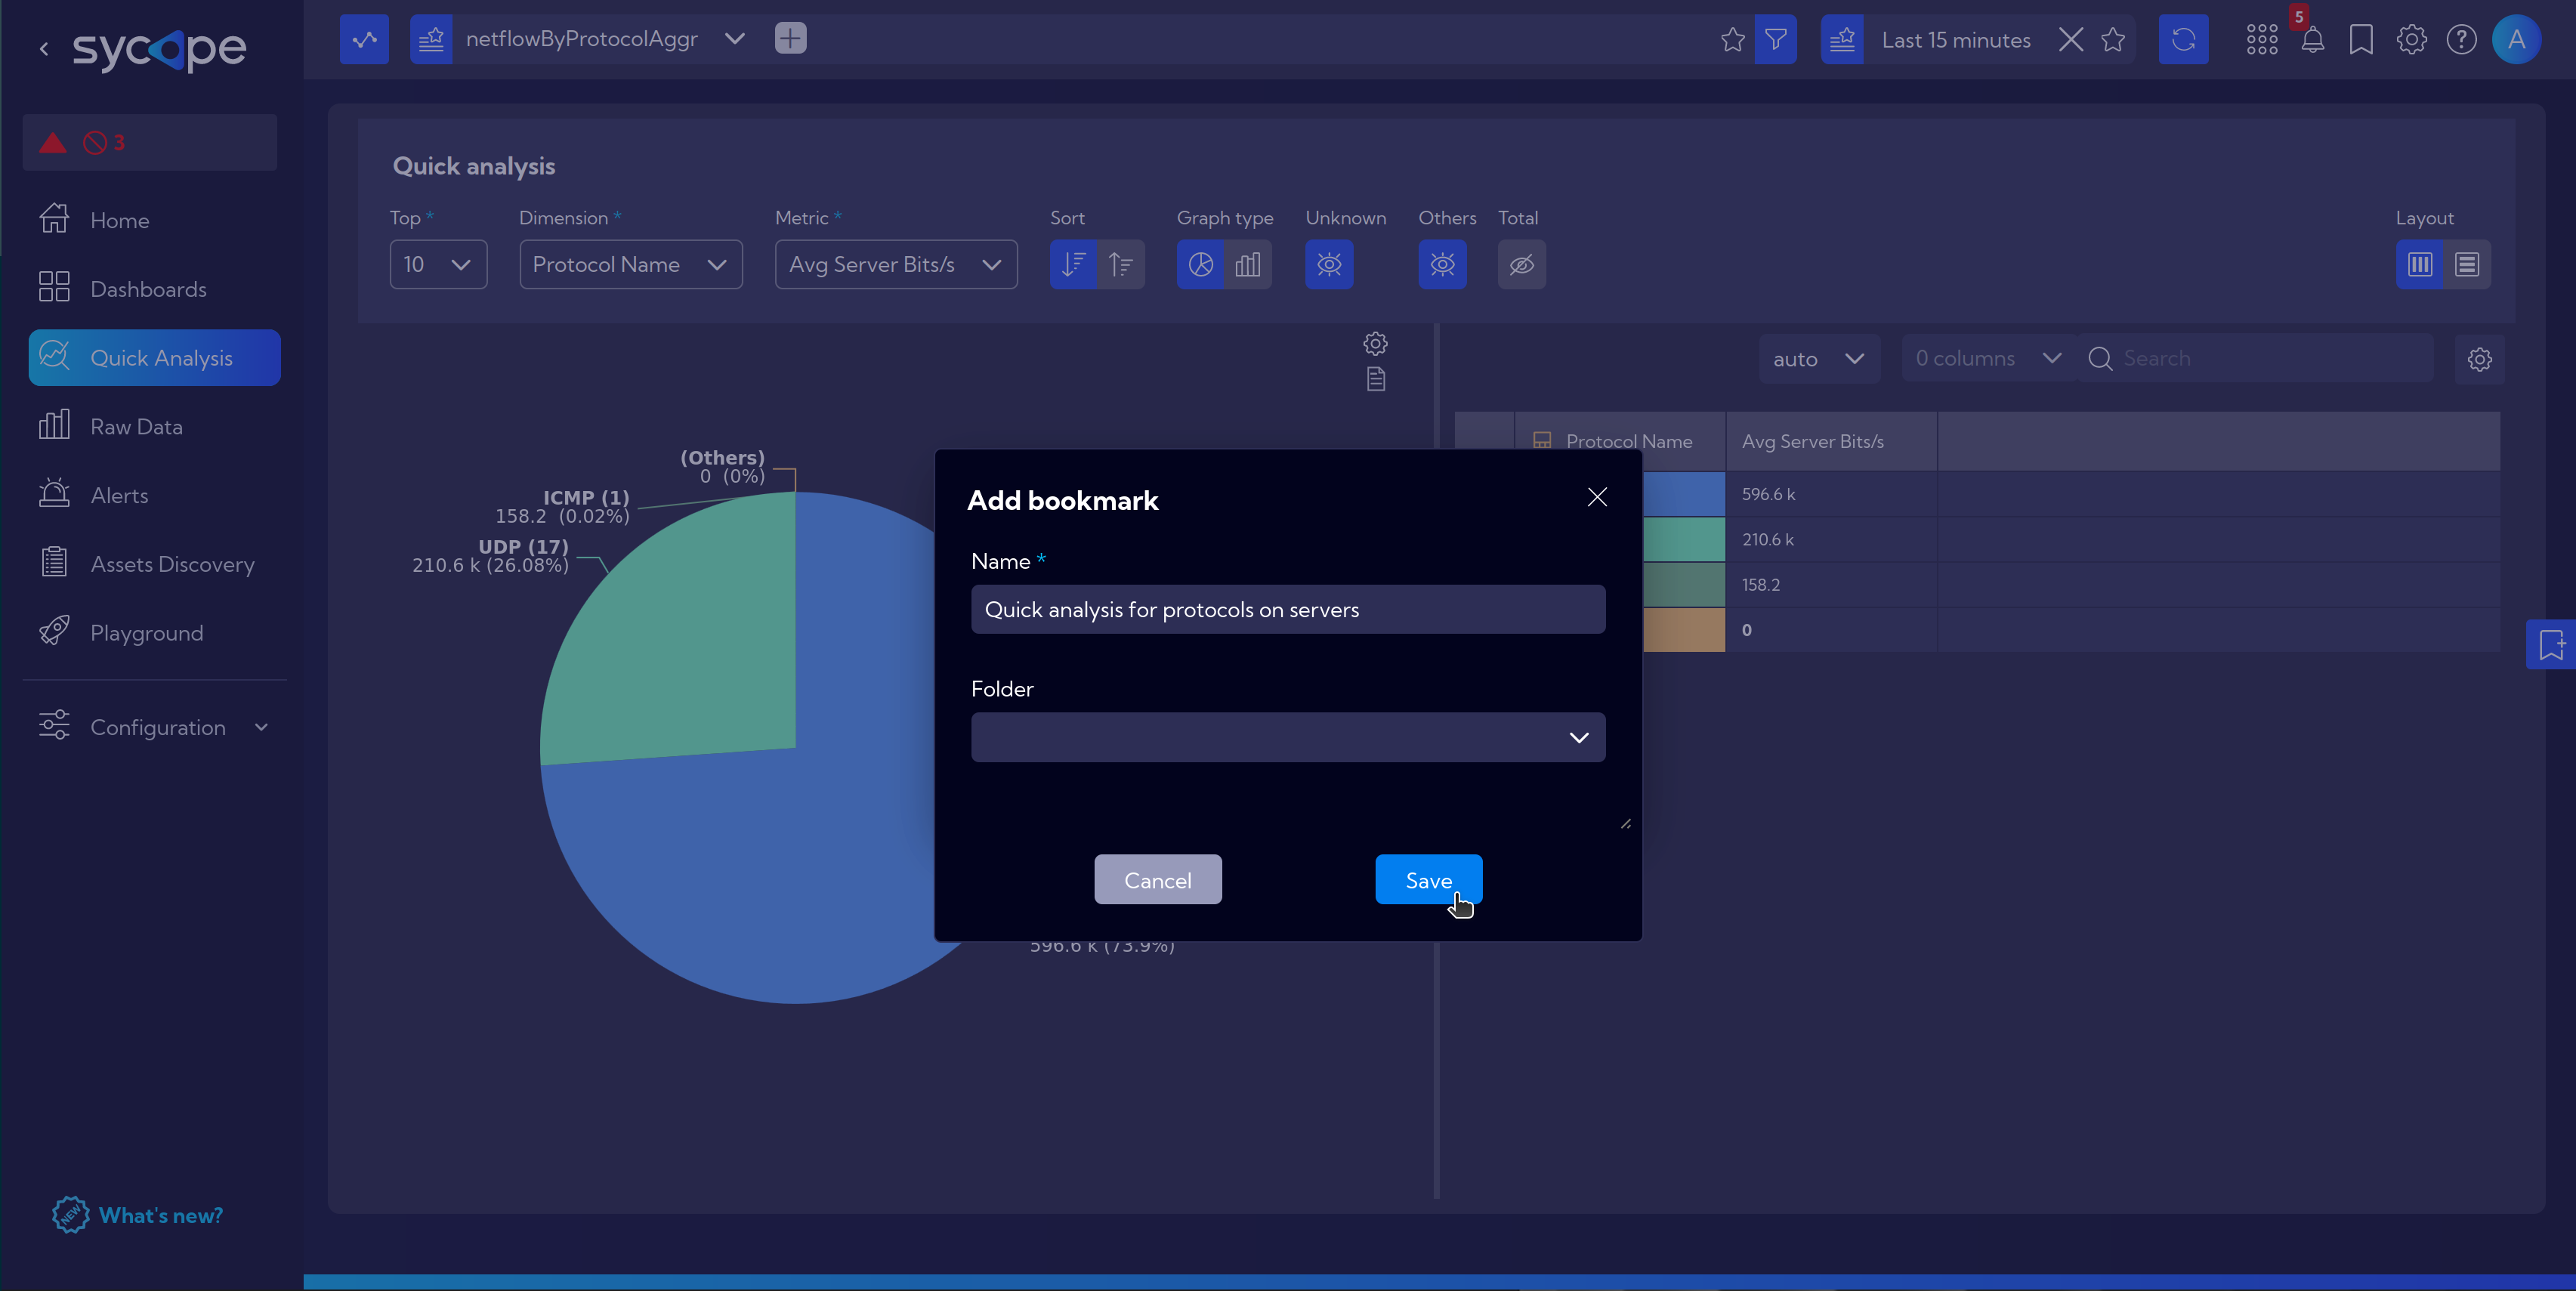
We set the Name and Folder where we want the bookmark to be saved, then save it.
Advanced Way
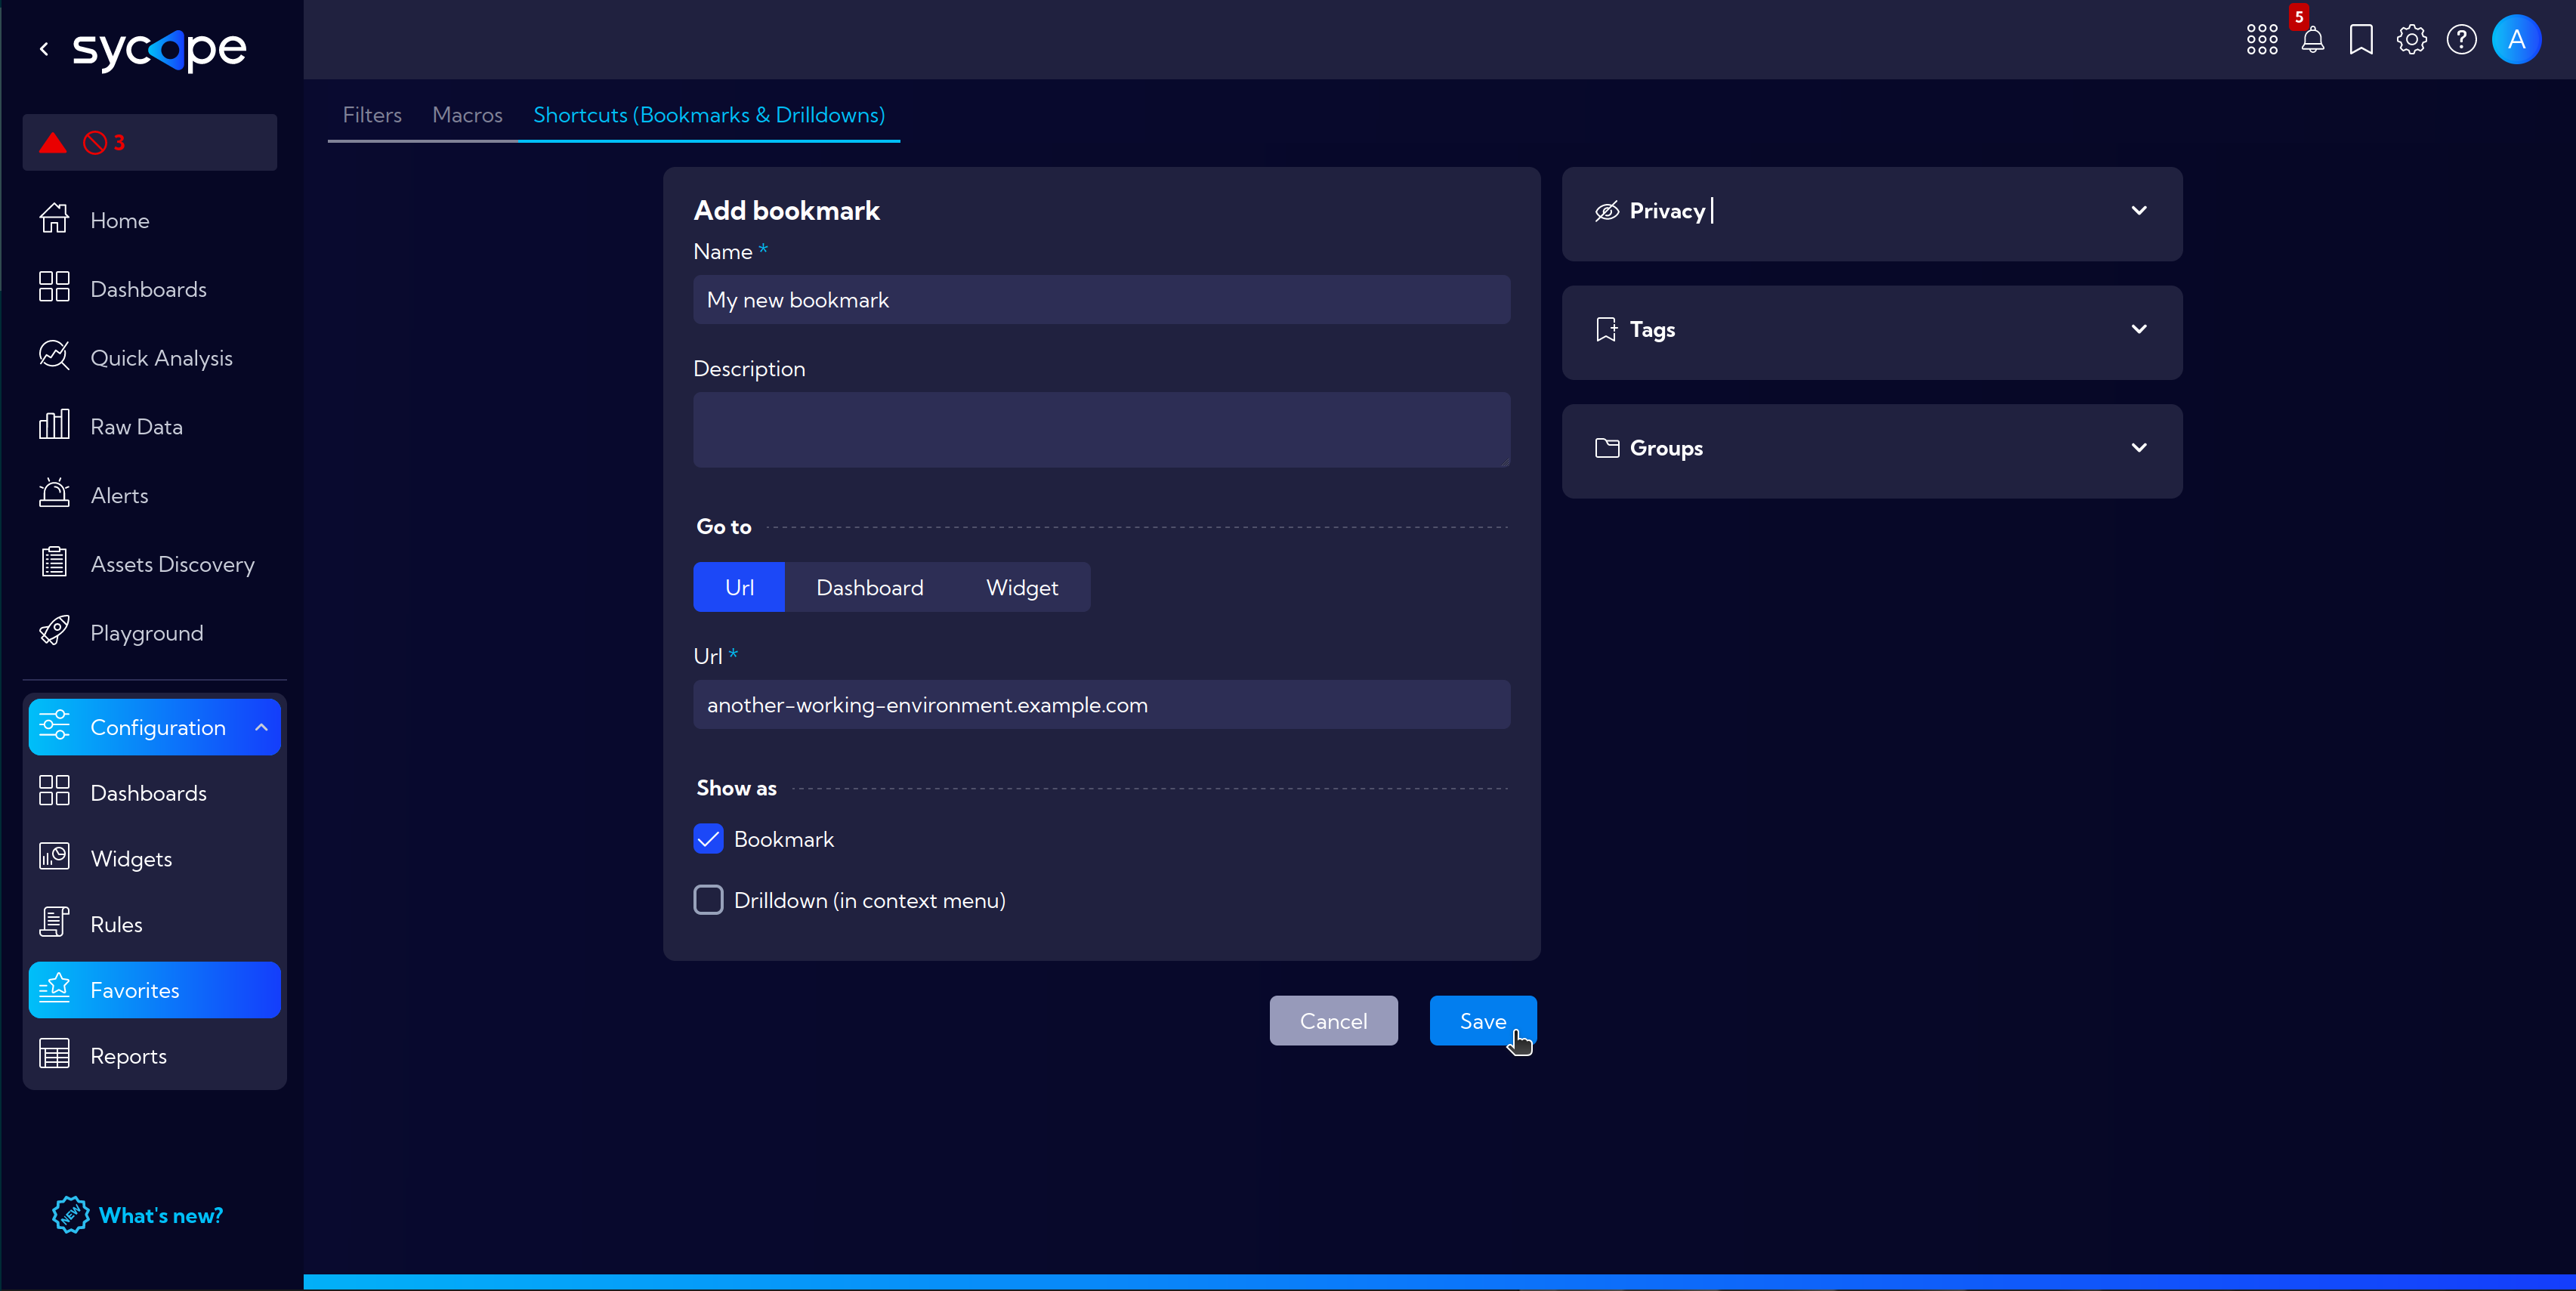
Navigate to [Configuration > Favorites] and click Add shortcut.

- Fill in the fields Name and Description.
- In the Go to section, specify the type:
- Url - for an external webpage address or an internal link within Sycope.
- Dashboard - choose the dashboard to which it should navigate.
- Widget - select the widget to which it should navigate.
- In the Show as section:
- Bookmark
- Drilldown (in context menu) - more about Drilldown
Drilldown
Drilldown functions similarly to a Bookmark, with the key difference being that when a drilldown is invoked, a filter is immediately applied to customize the content to which we navigate.
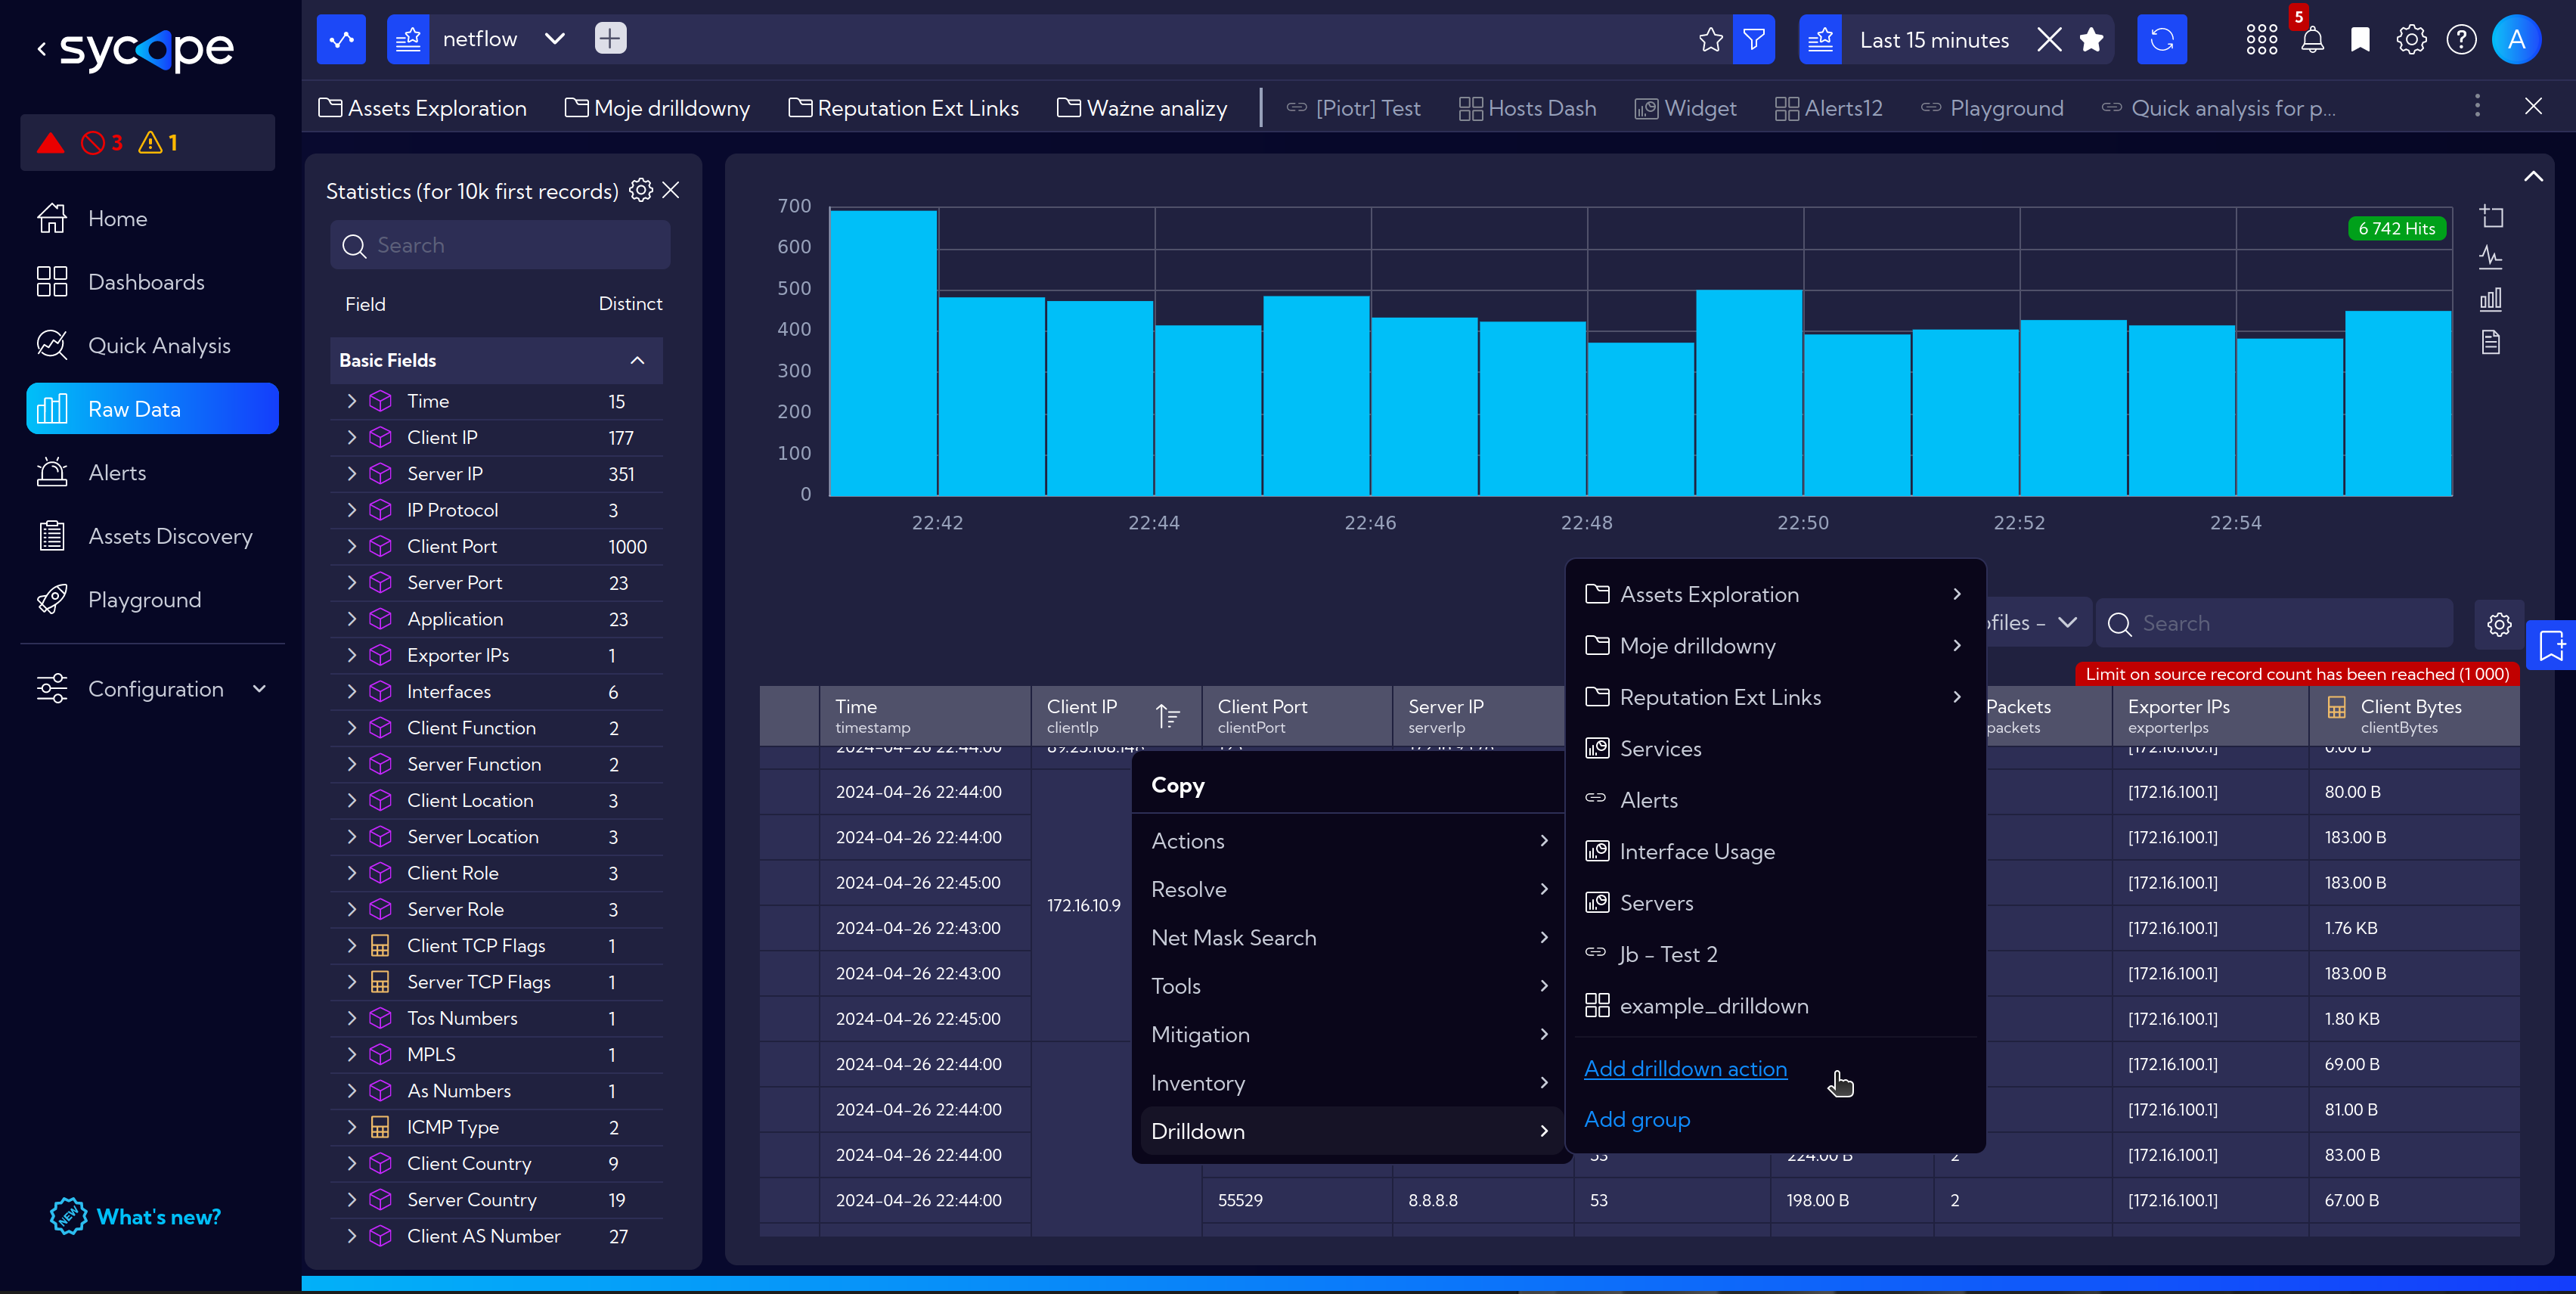
It can be easily accessed via the context menu (right-click), then Drilldown folder and selected Drilldown, which opens a 'bookmark' with an applied filter based on the field value on which the right-click was performed as shown in Basic Usage section.
This functions as a new navigation method in Sycope, eliminating the need to know exactly where a particular widget/dashboard is located. After defining a widget, you can simply right-click on a specific field type anywhere in the system, and immediately see information from the widget/dashboard in the Drilldown.
If something is missing, you can also add a new one from the right-click context menu without necessarily having to search in the settings.
Basic Usage
For example, in [Menu > Raw Data] right-click on the field with the selected IP address, then navigate to Drilldown.
Here, available drilldowns with settings appropriate to the selected field are displayed.
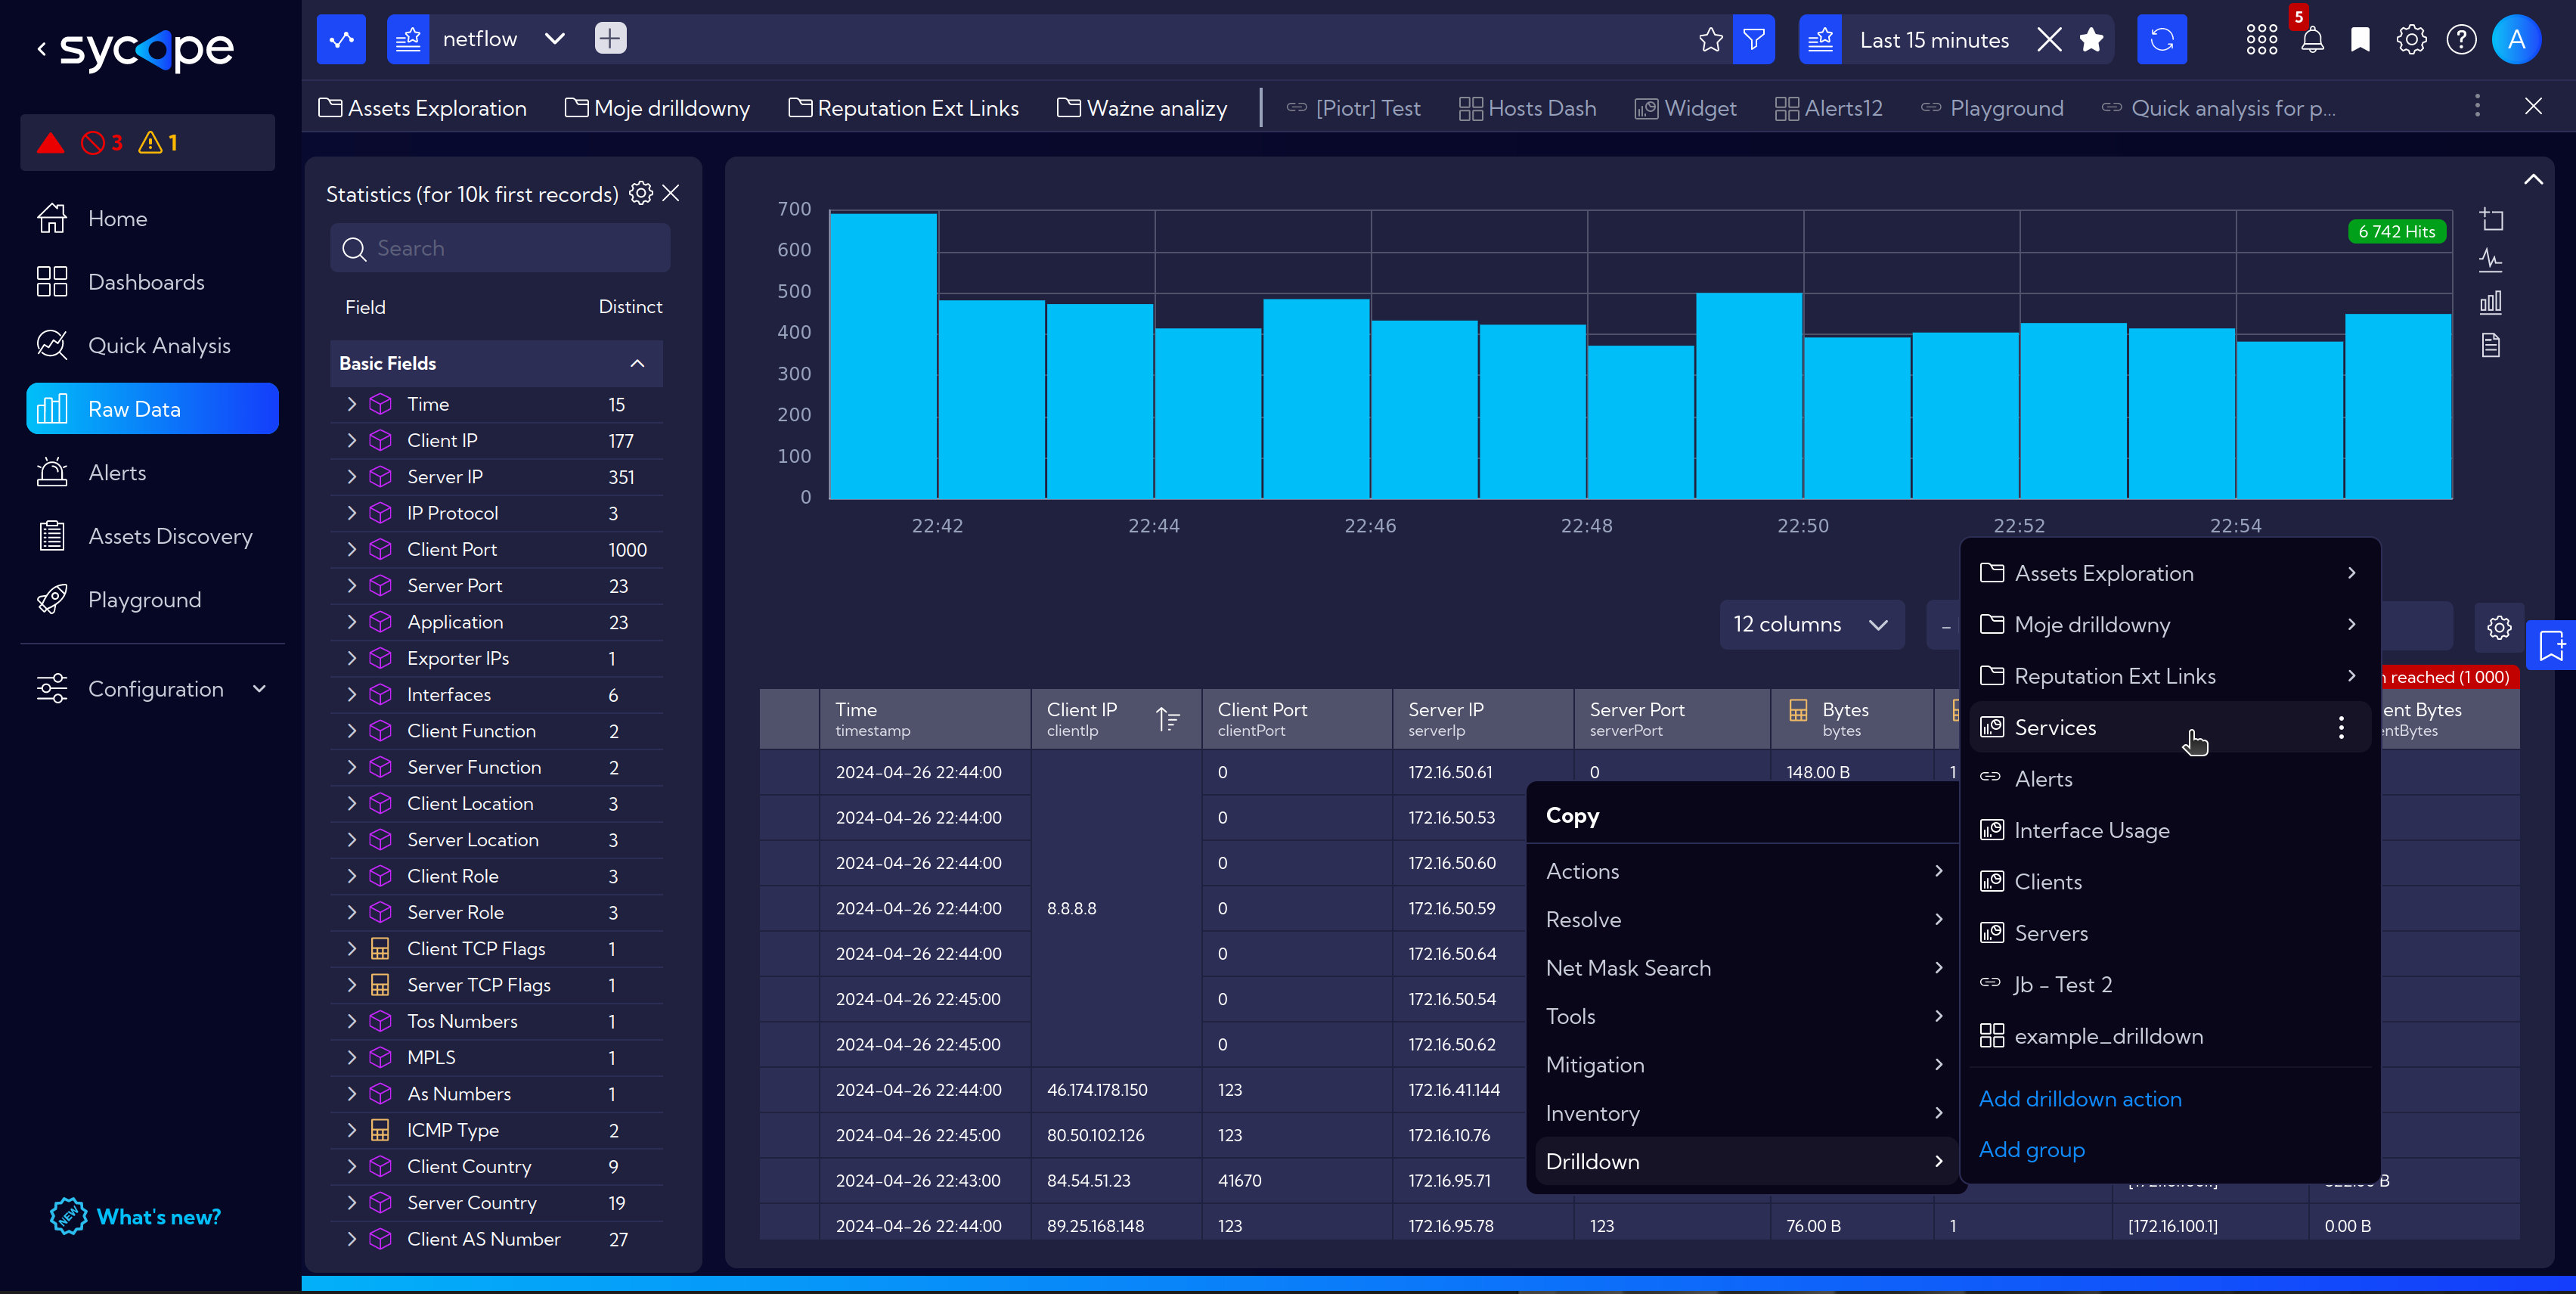
In this case, selecting Services displays a pop-up window with services running on the chosen host.
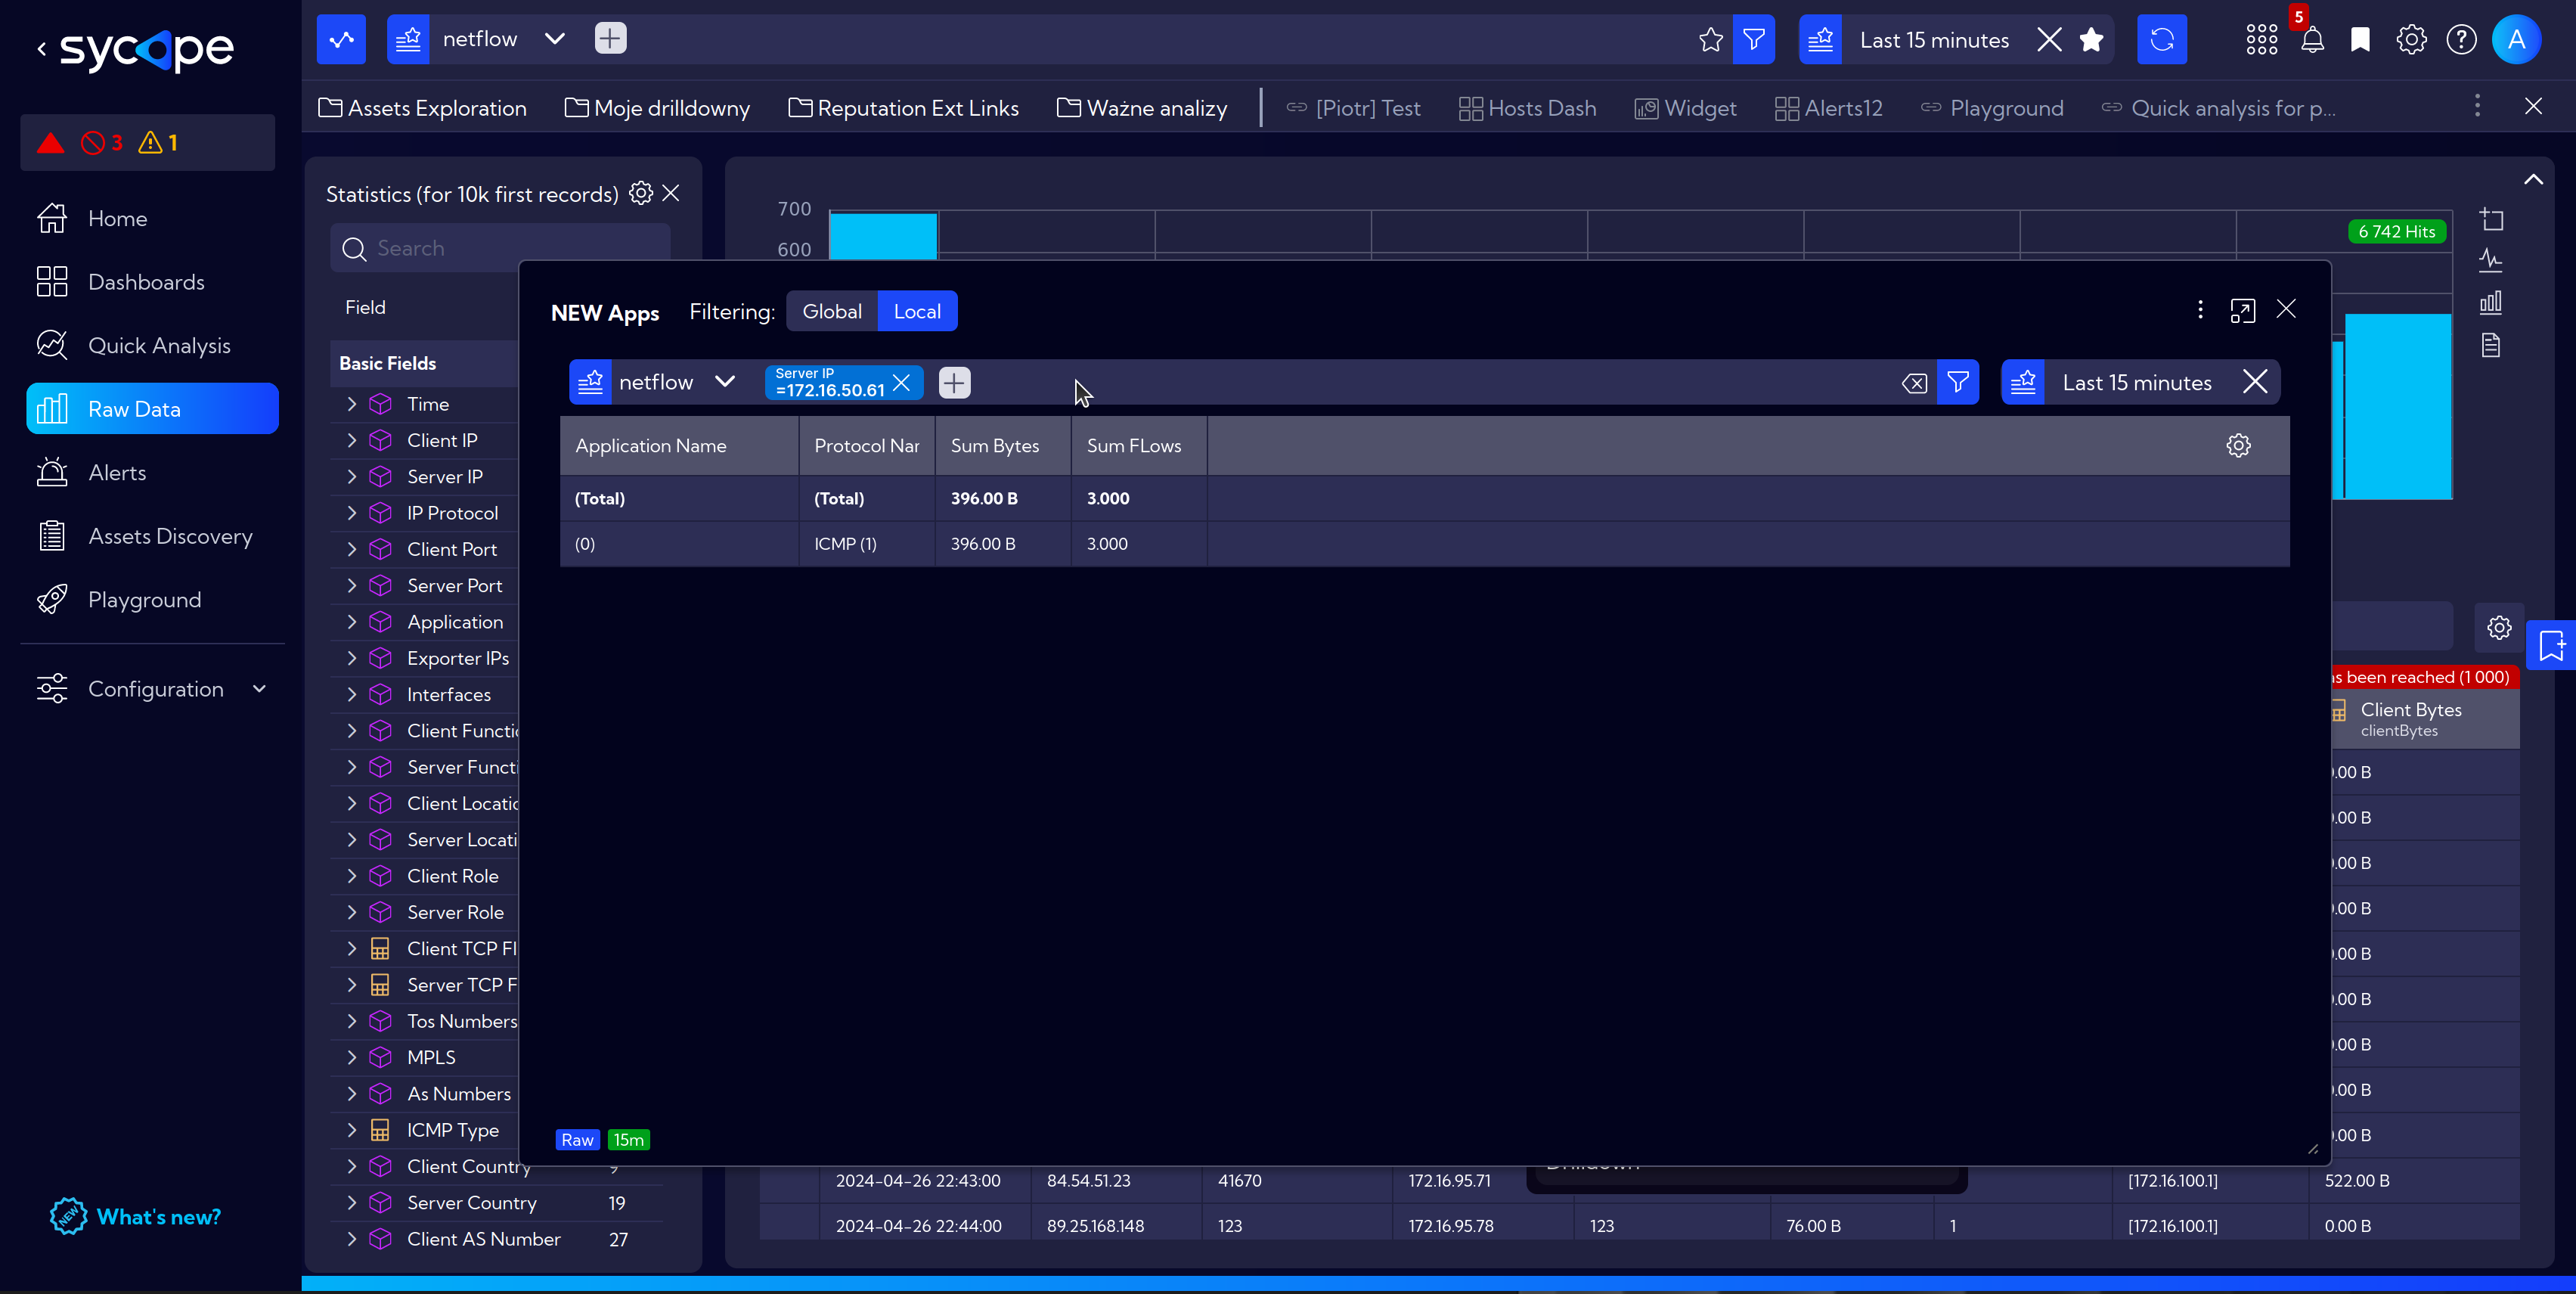
Notice the autmatically applied IP address filter in the Top bar.
Adding New Drilldown
Two equivalent ways to add a Drilldown:
- By clicking on the
Bookmark Icon, thenThree dotsandAdd bookmark - or navigate to [Configuration > Favorites] and click
Add shortcut
The third option for convenience is to add a drilldown from the context menu by right-clicking:
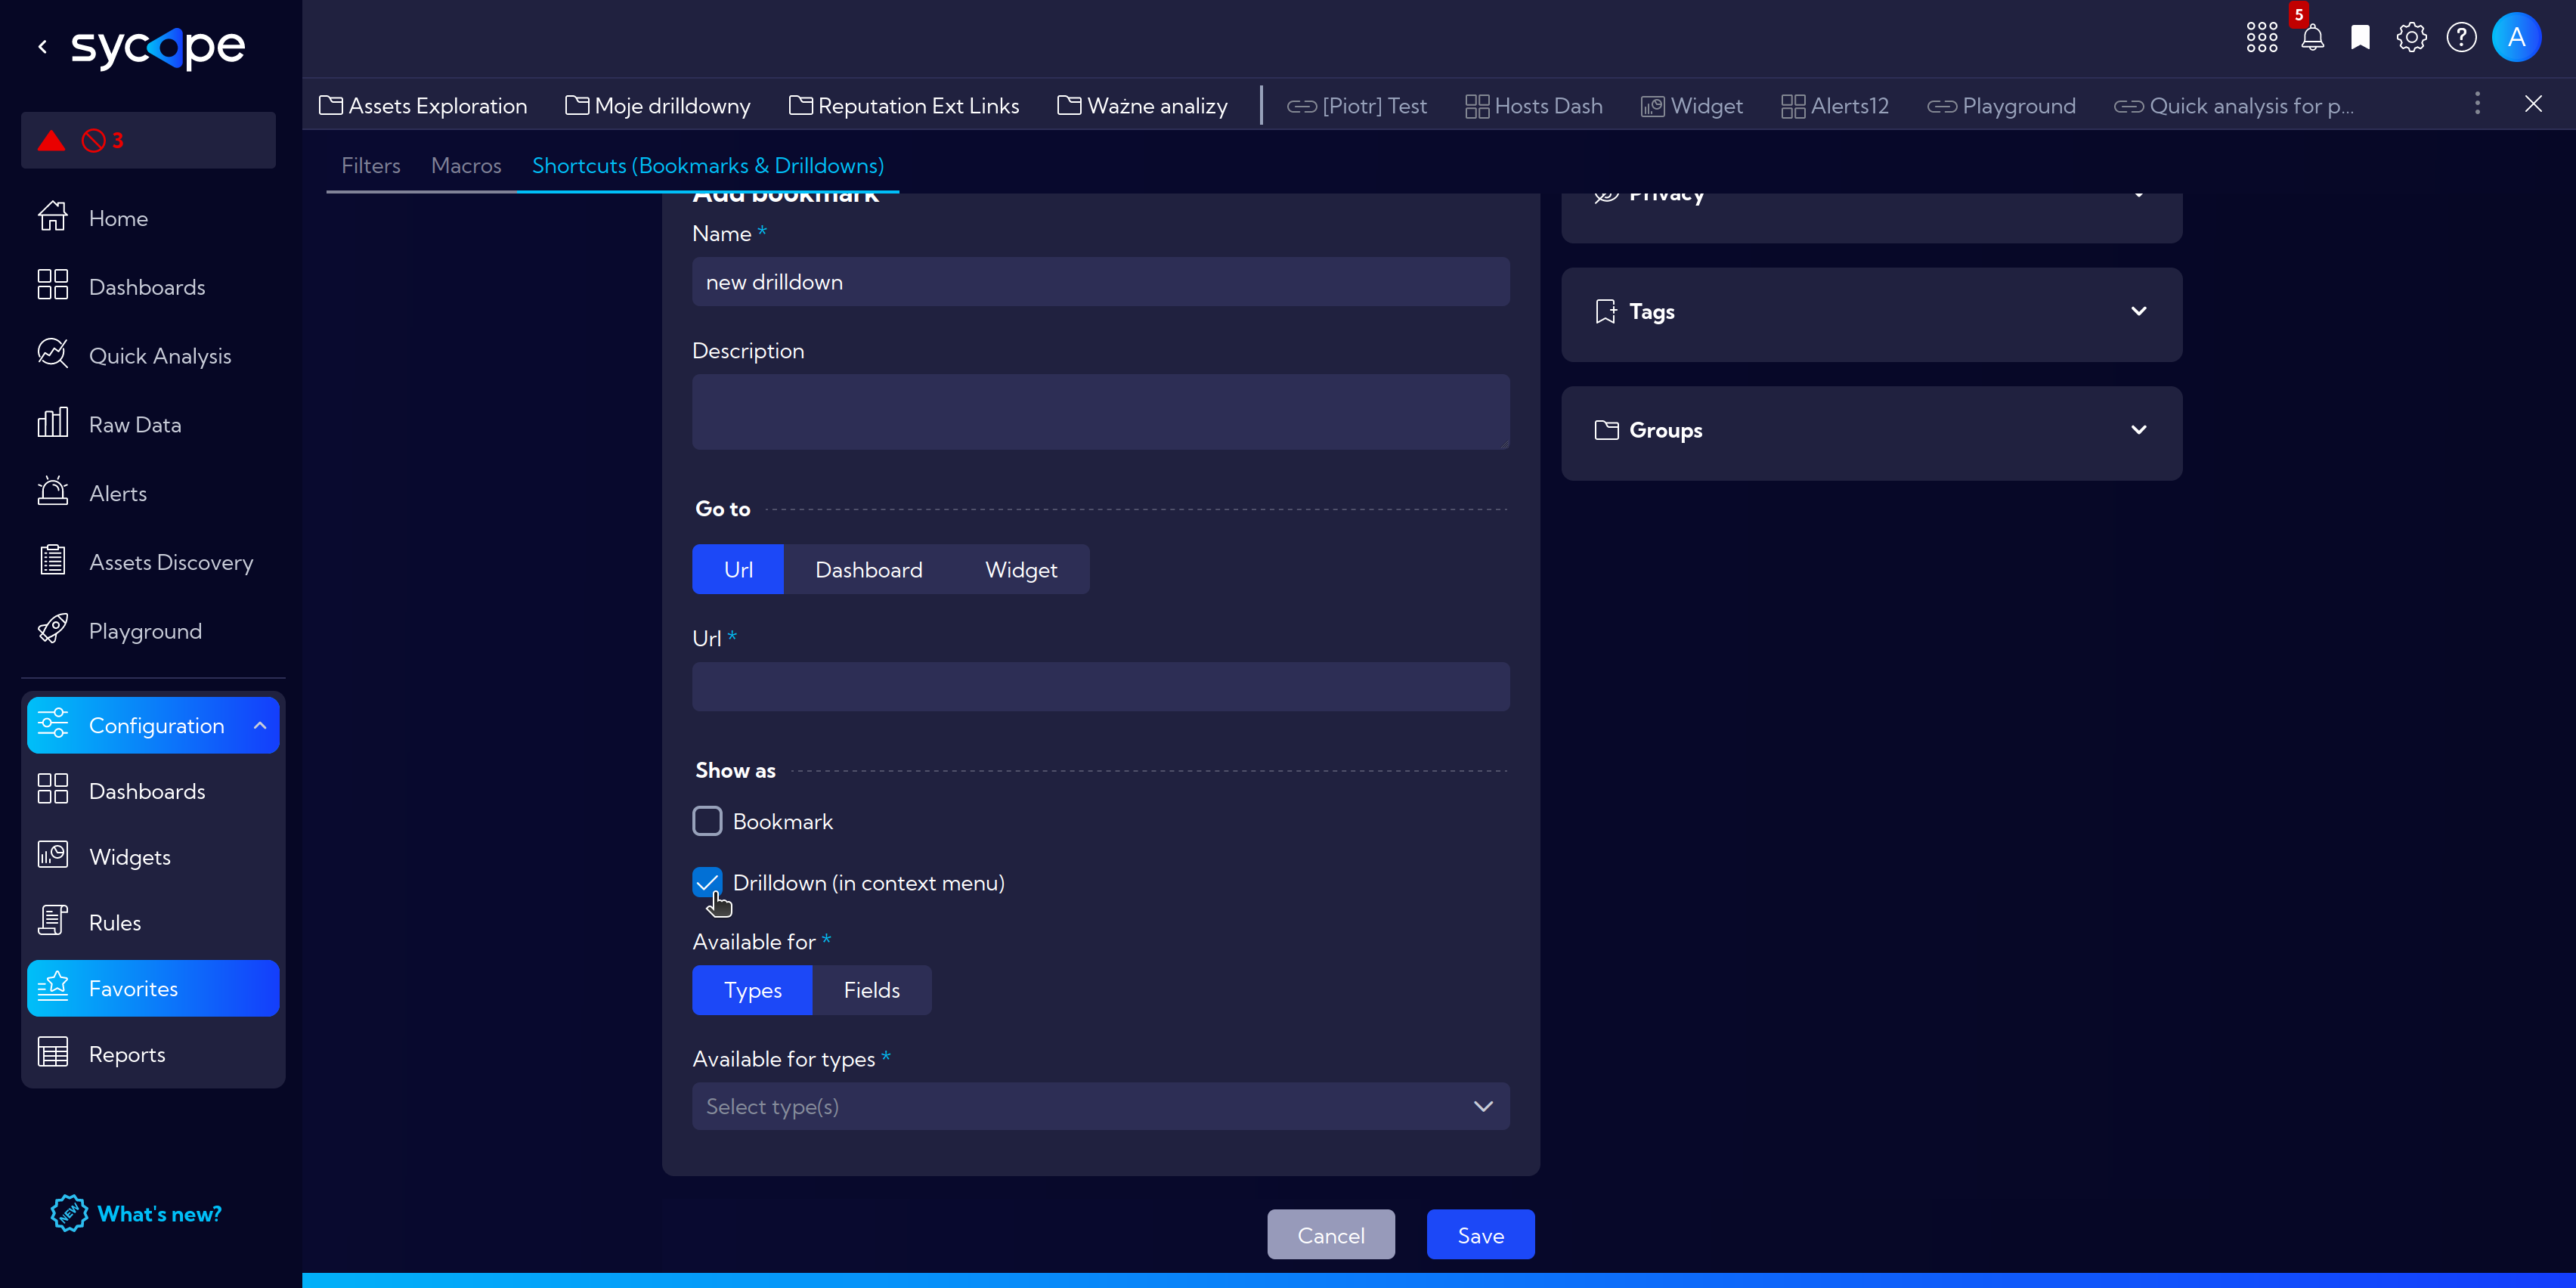
Next, in the opened window, similarly to creating a Bookmark in Advanced Way:
- Fill in the fields Name and Description.
- In the Go to section, specify the type:
- Url - for an external webpage address or an internal link within Sycope.
- Dashboard - choose the dashboard to which it should navigate.
- Widget - select the widget to which it should navigate.
- In the Show as section:
- Bookmark - more about Bookmark
- Drilldown (in context menu)
This time, we'll focus on selecting Drilldown, which extends the Add bookmark window with Available for field (detailed in the Drilldown Examples section).
Drilldown Examples
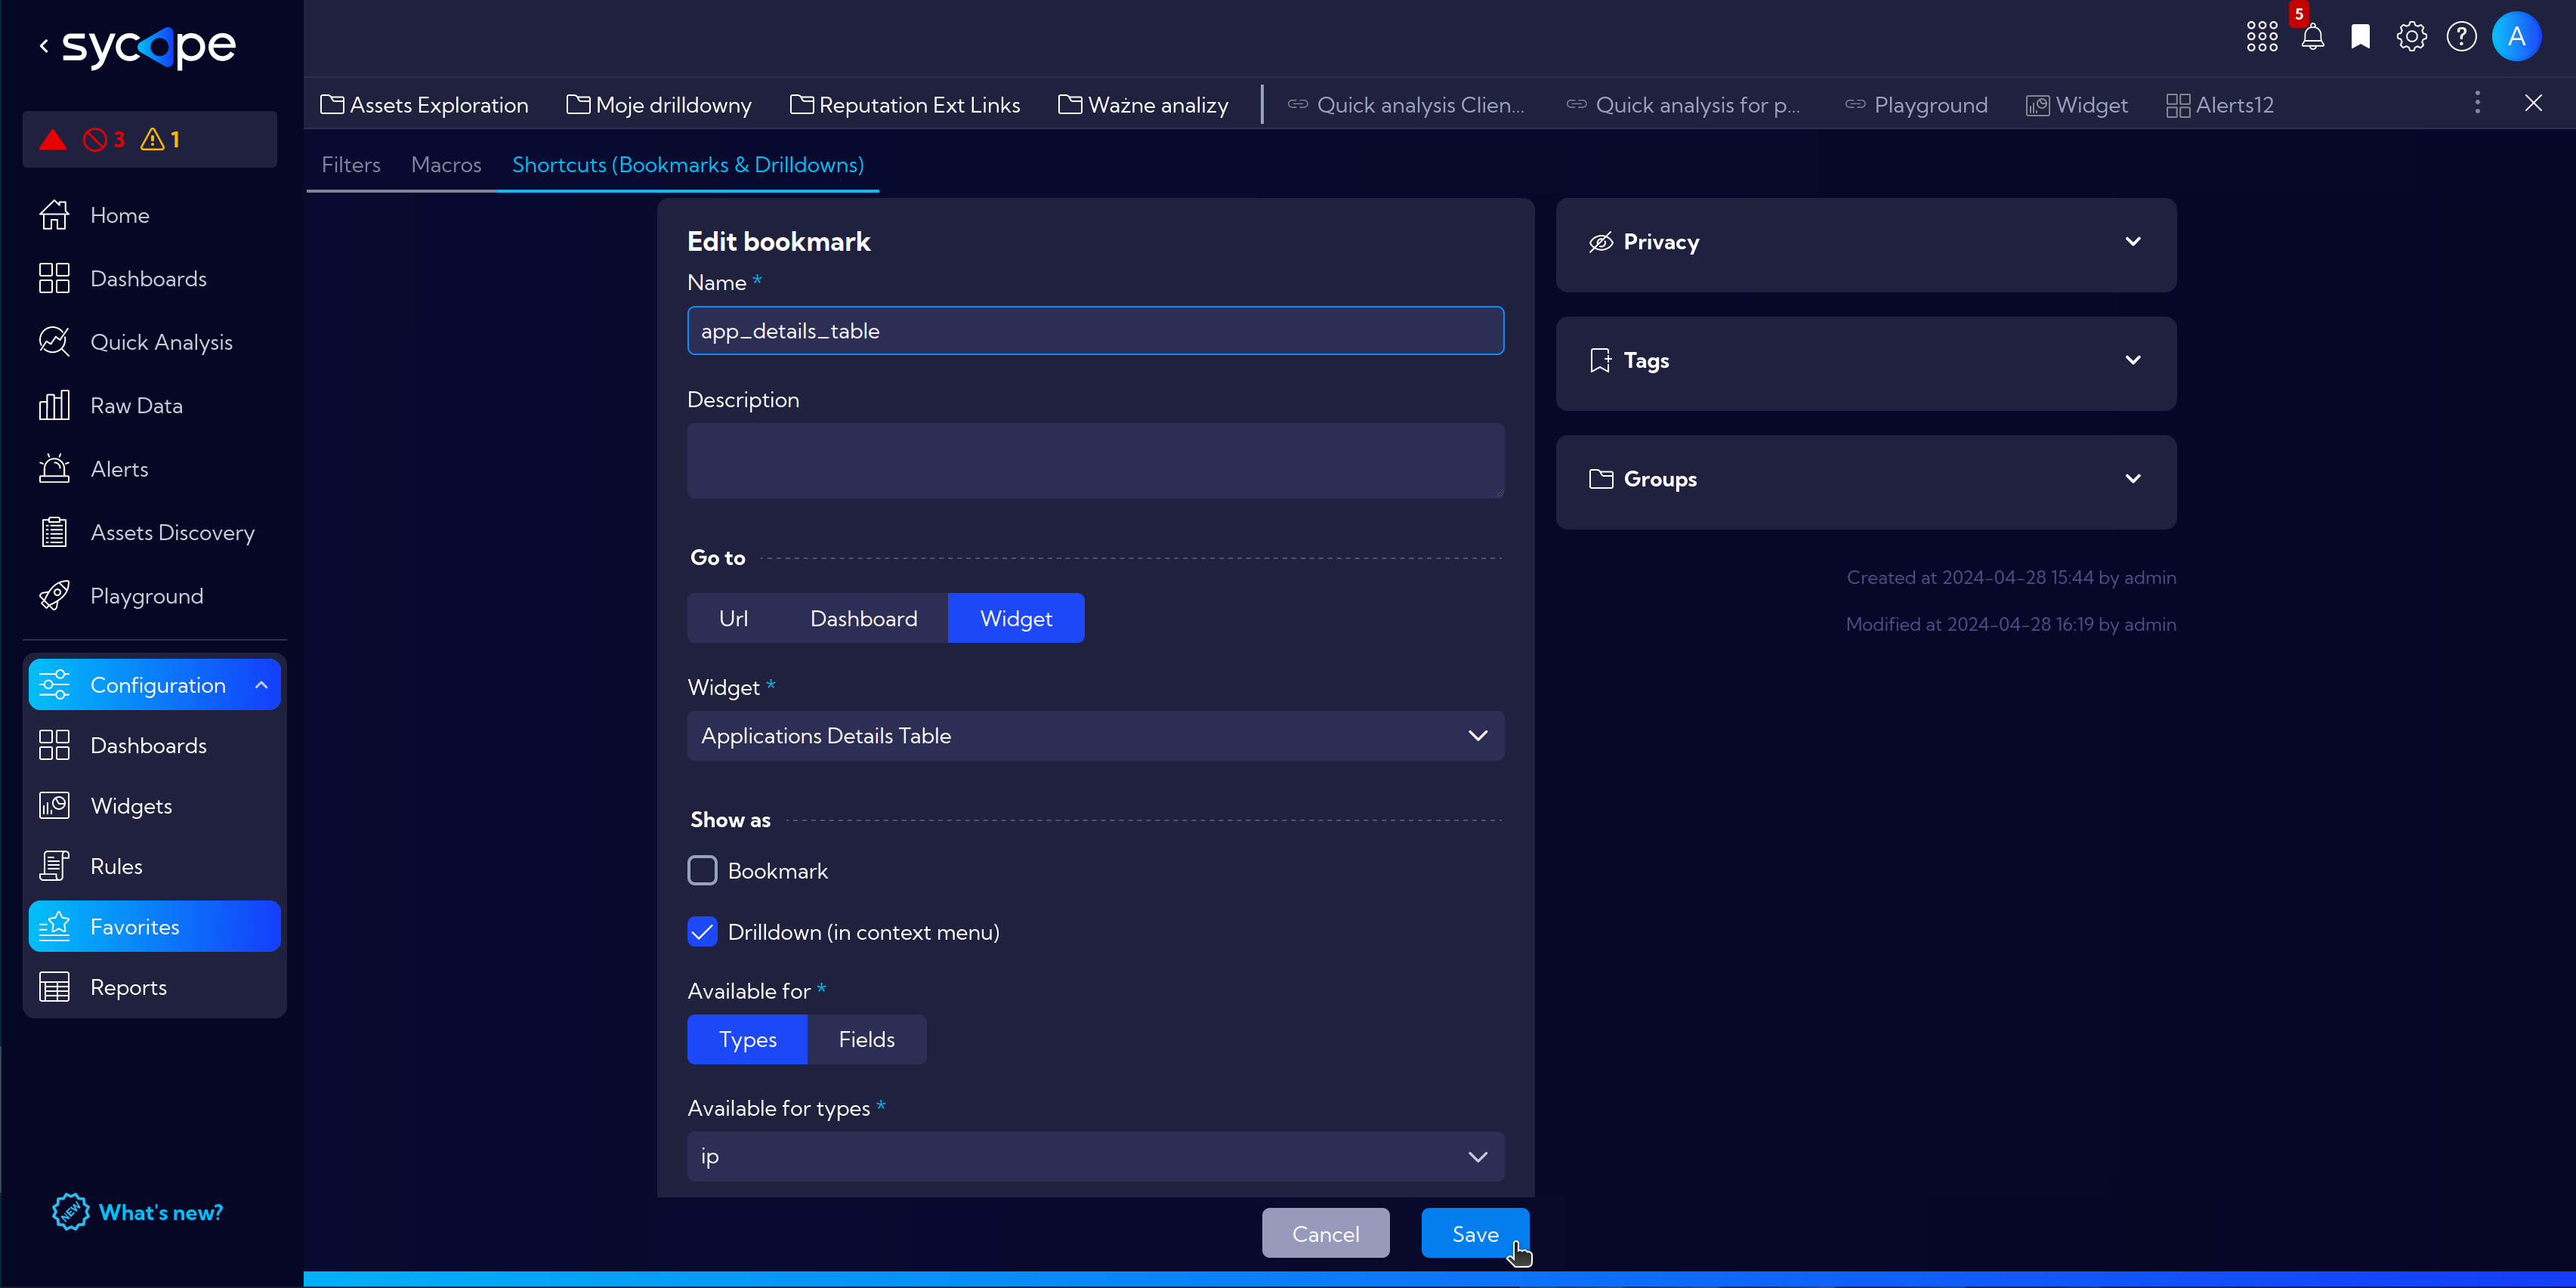
Drilldown: Application Details Table
In this example, we are creating a drilldown that, when clicking on a field with an IP address, displays a widget presenting the table with details for applications running on specified host.
- Begin by adding a new drilldown.
- Navigate to [Configuration > Favorites] and click
Add shortcut. - Fill in the fields.
- Name: app_details_table
- In the Go to section, select the type Widget.
- Select the widget: Applications Details Table.
- In the Show as section mark Drilldown (in context menu).
- In the Available for select Types.
- And in Available for types choose ip.
- Finally click on
Savebutton.
- Navigate to [Configuration > Favorites] and click
Now let's test our new drilldown in action.
- Navigate to
[Menu > Raw Data]. - Right-click on a field with selected Cilent, then Drilldown and app_details_table.
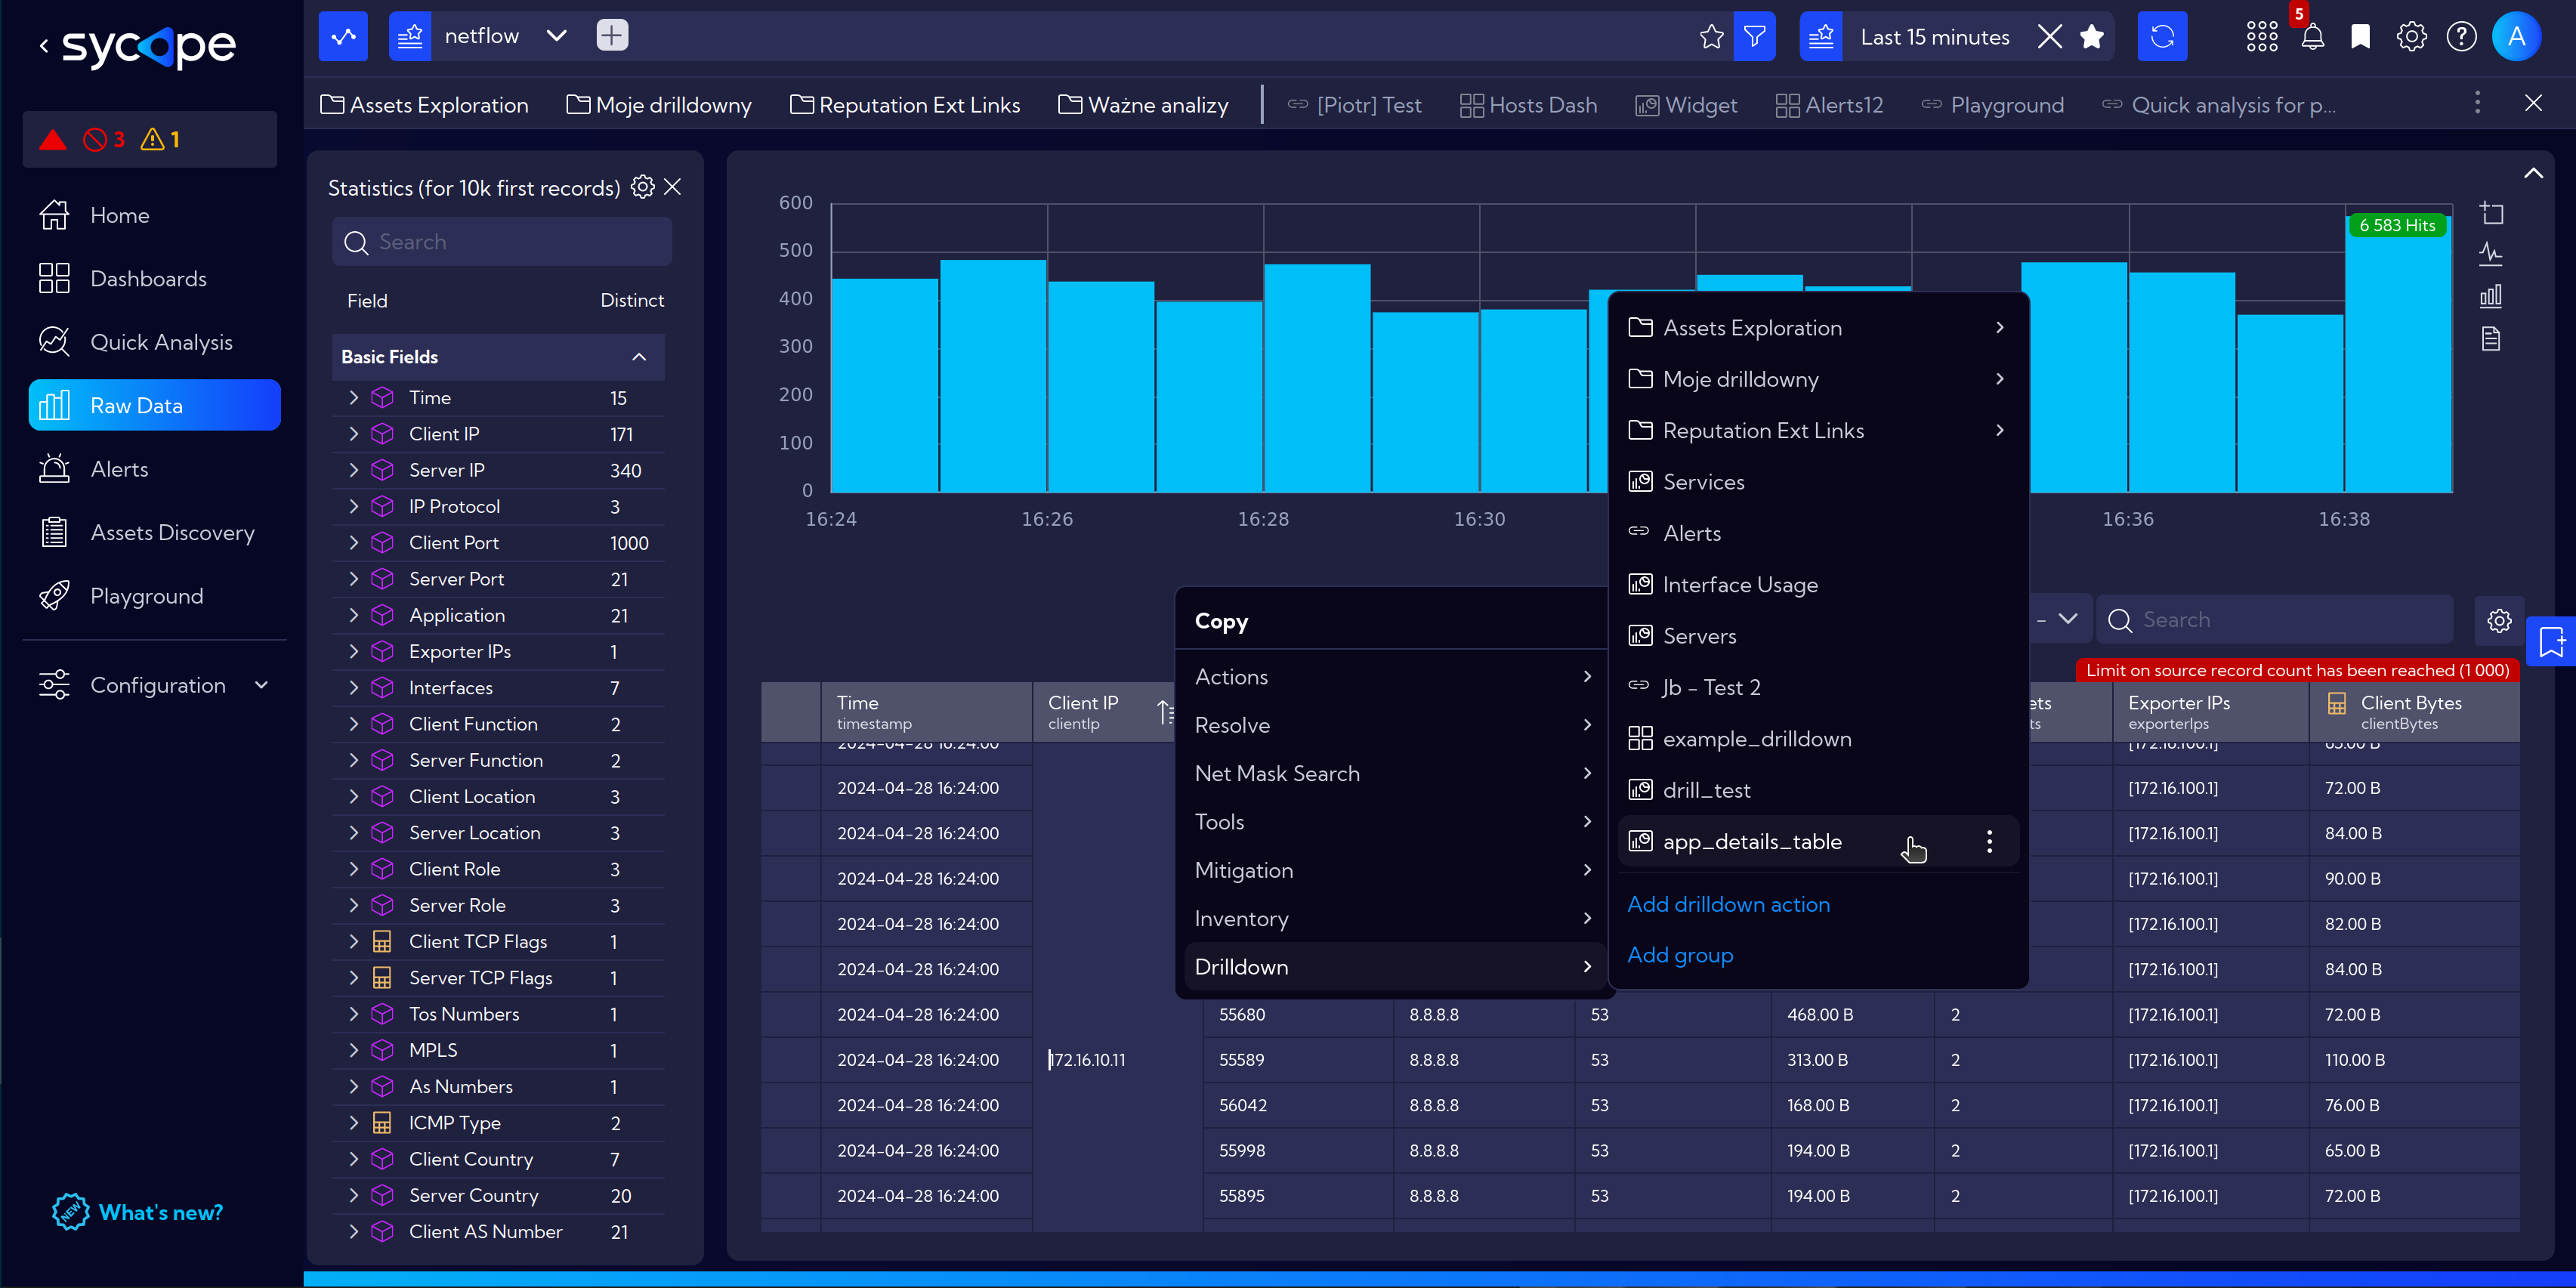
- The pop-up window displays a widget information with the added filter, i.e. the selected IP address.

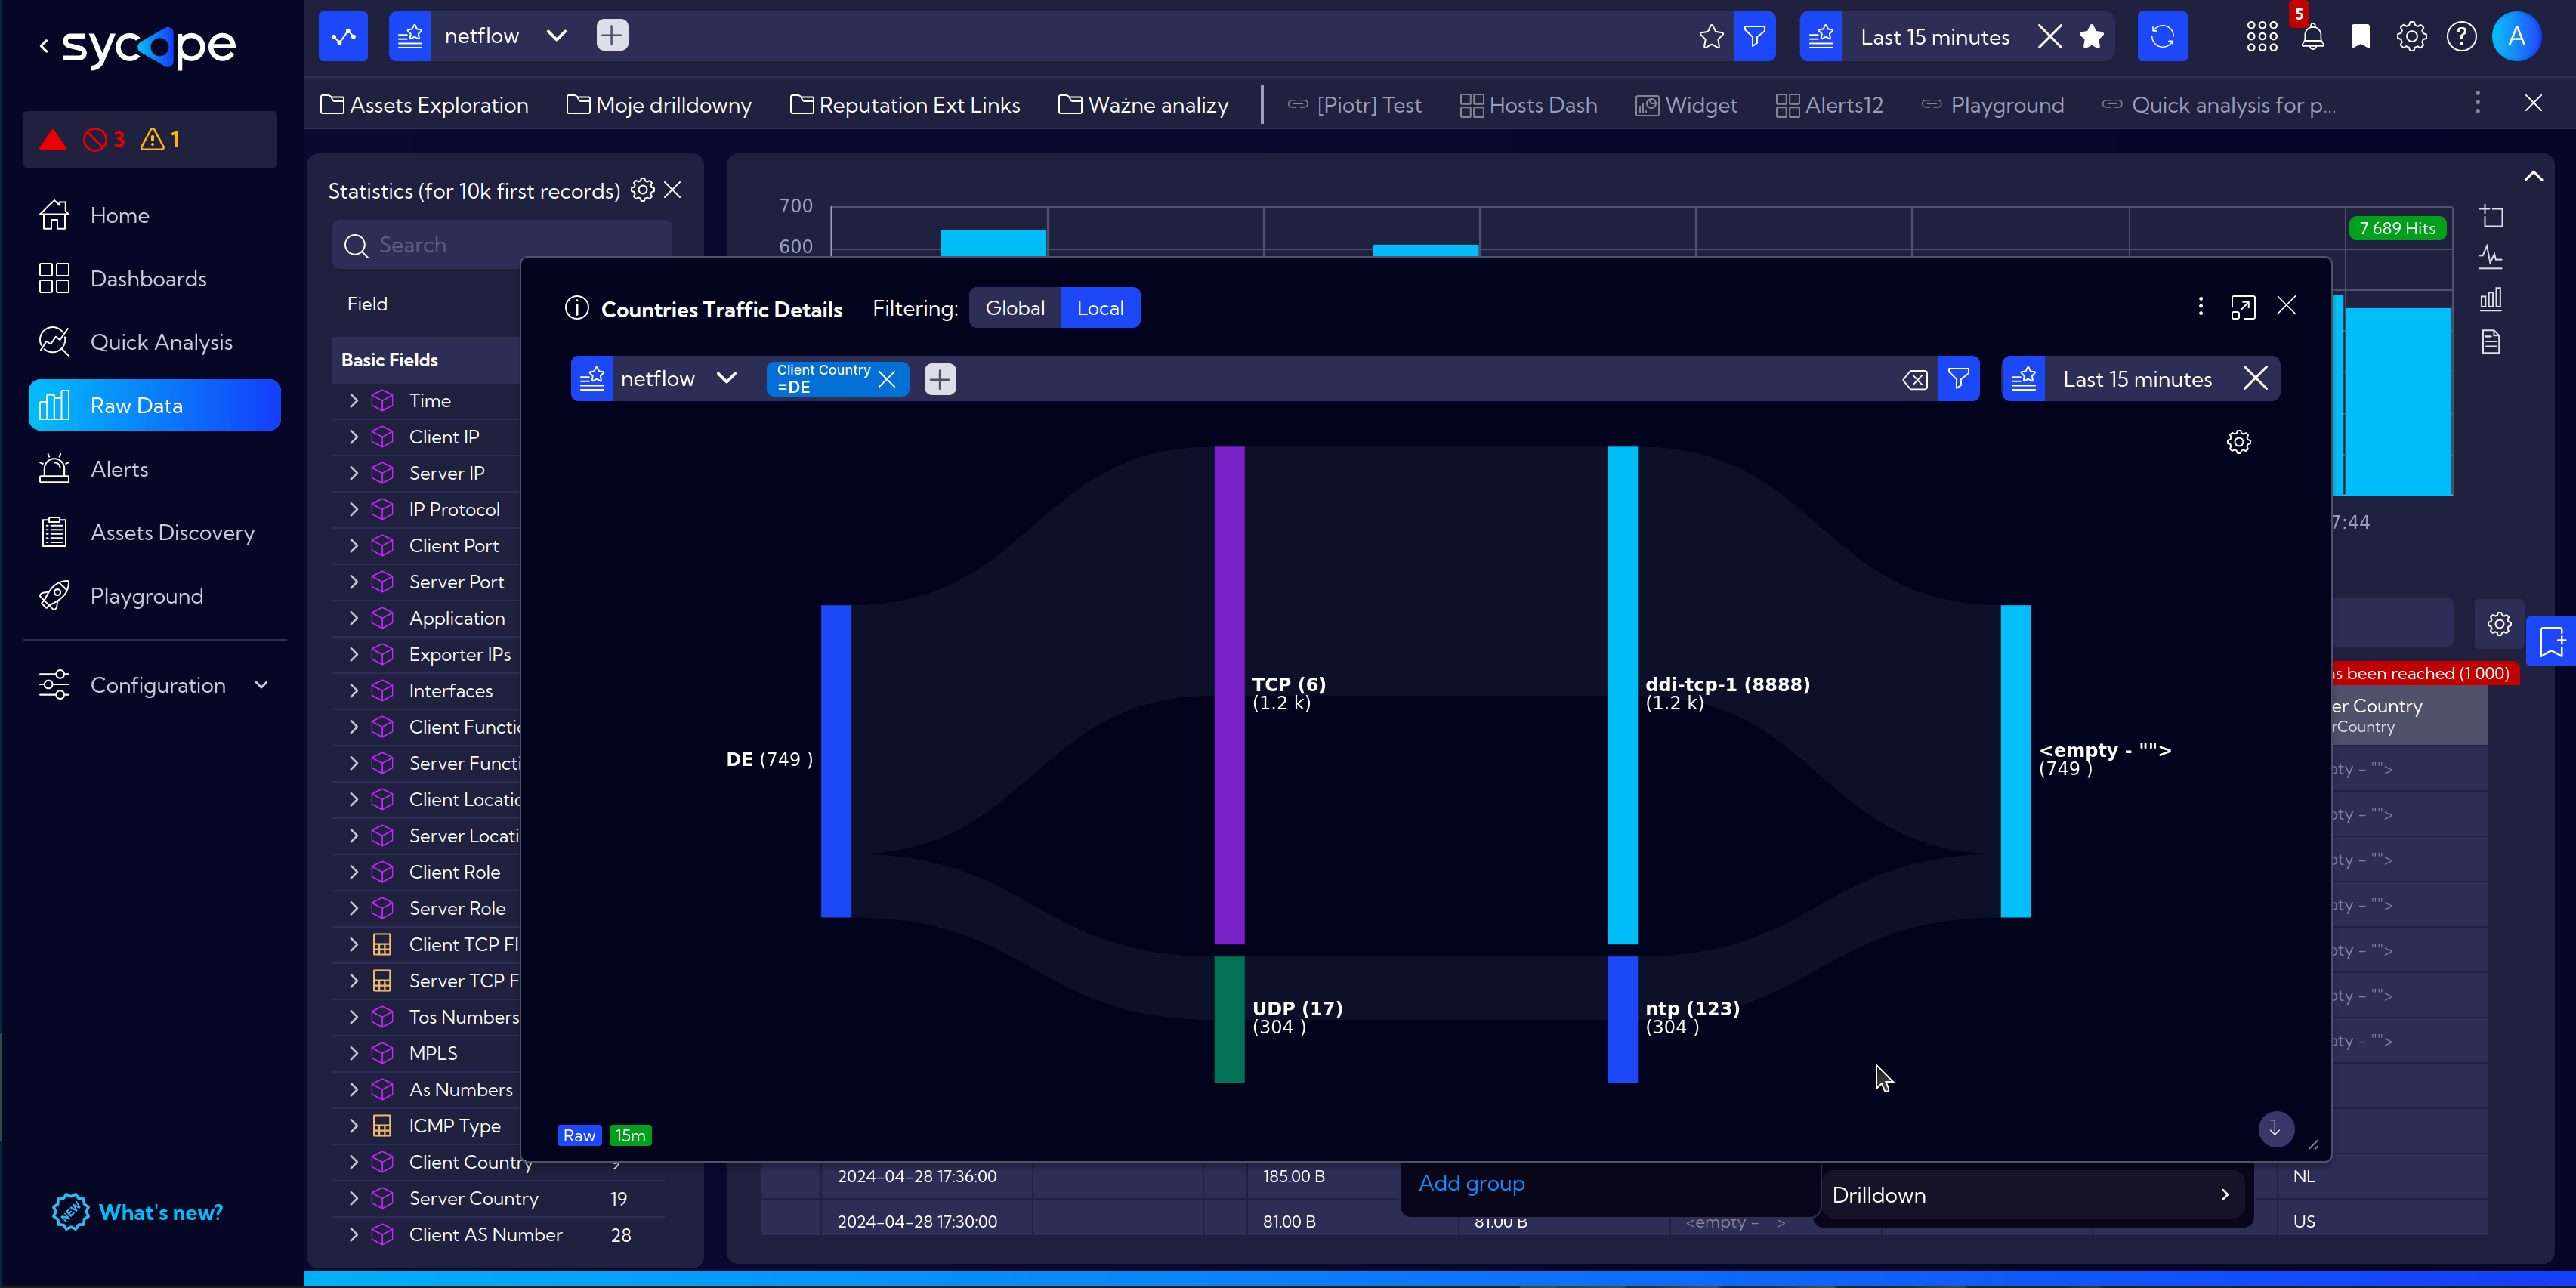
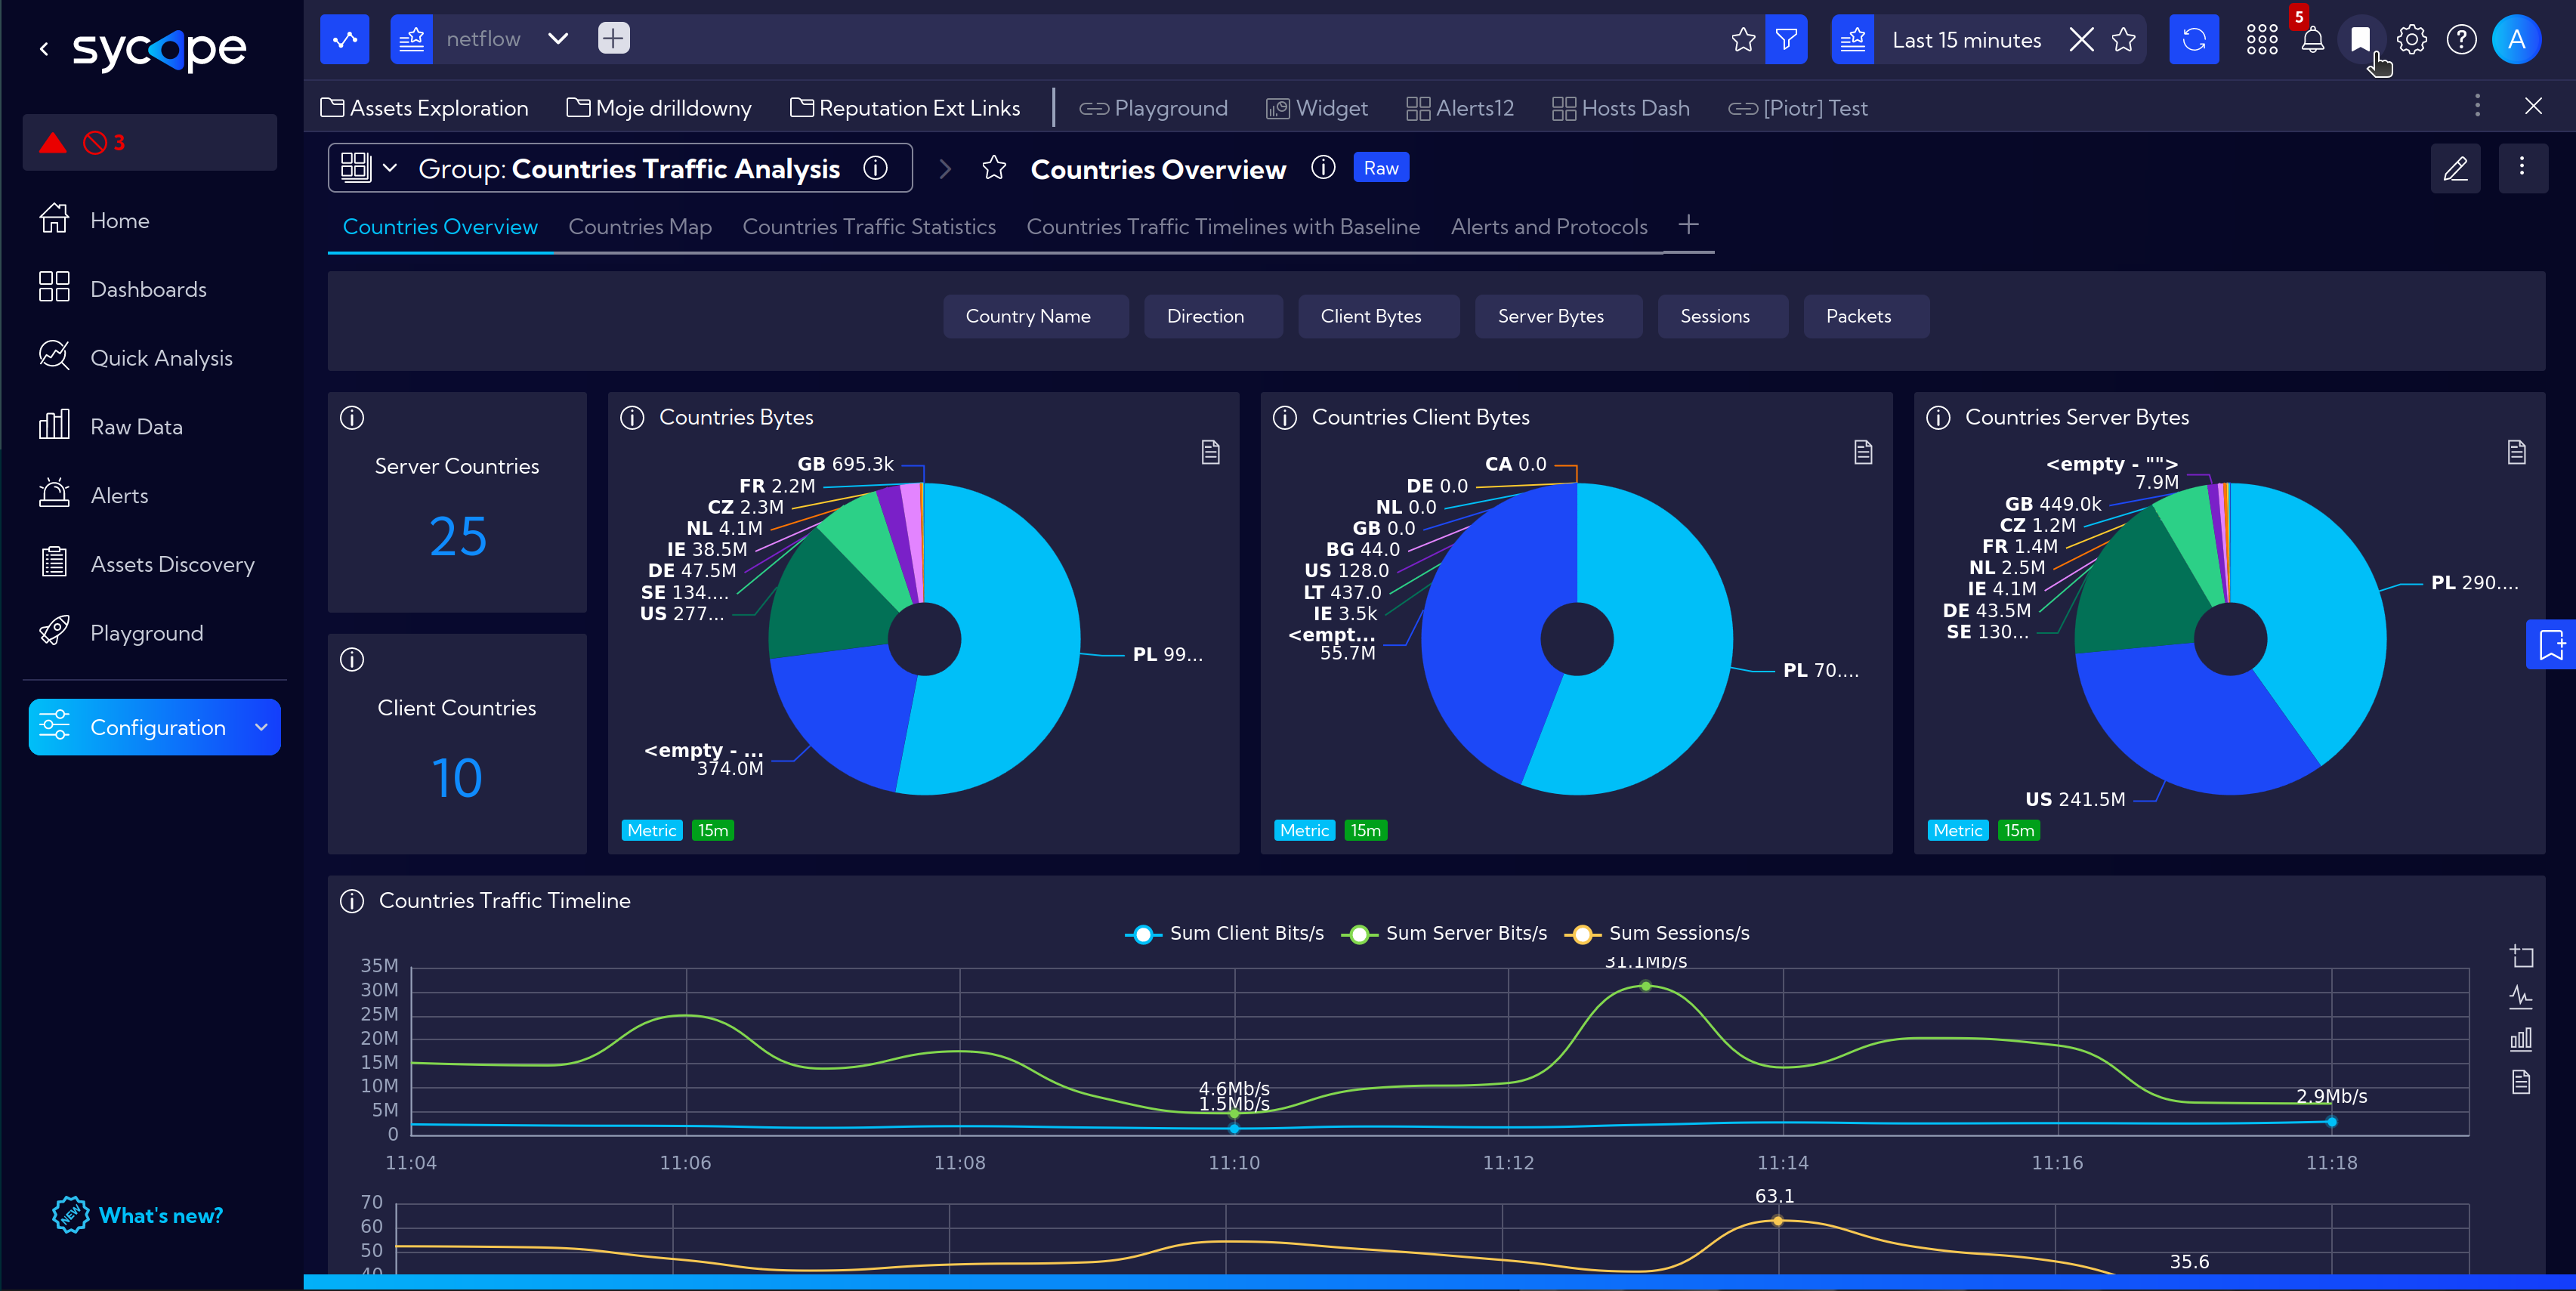
Drilldown: Countries Traffic Details
The next example demonstrates a drilldown for a selected field type with the country name.
Invoking the drilldown will display traffic details for the selected country.
Navigate to [Configuration > Favorites] and click
Add shortcut.Fill in the fields.
Name: country_traffic.
In the Go to section, select the type Widget.
- Select the widget: Countries Traffic Details.
In the Show as section mark Drilldown (in context menu).
In the Available for select Fields.
- And in Available for fields as a Source choose Netflow > netflow.
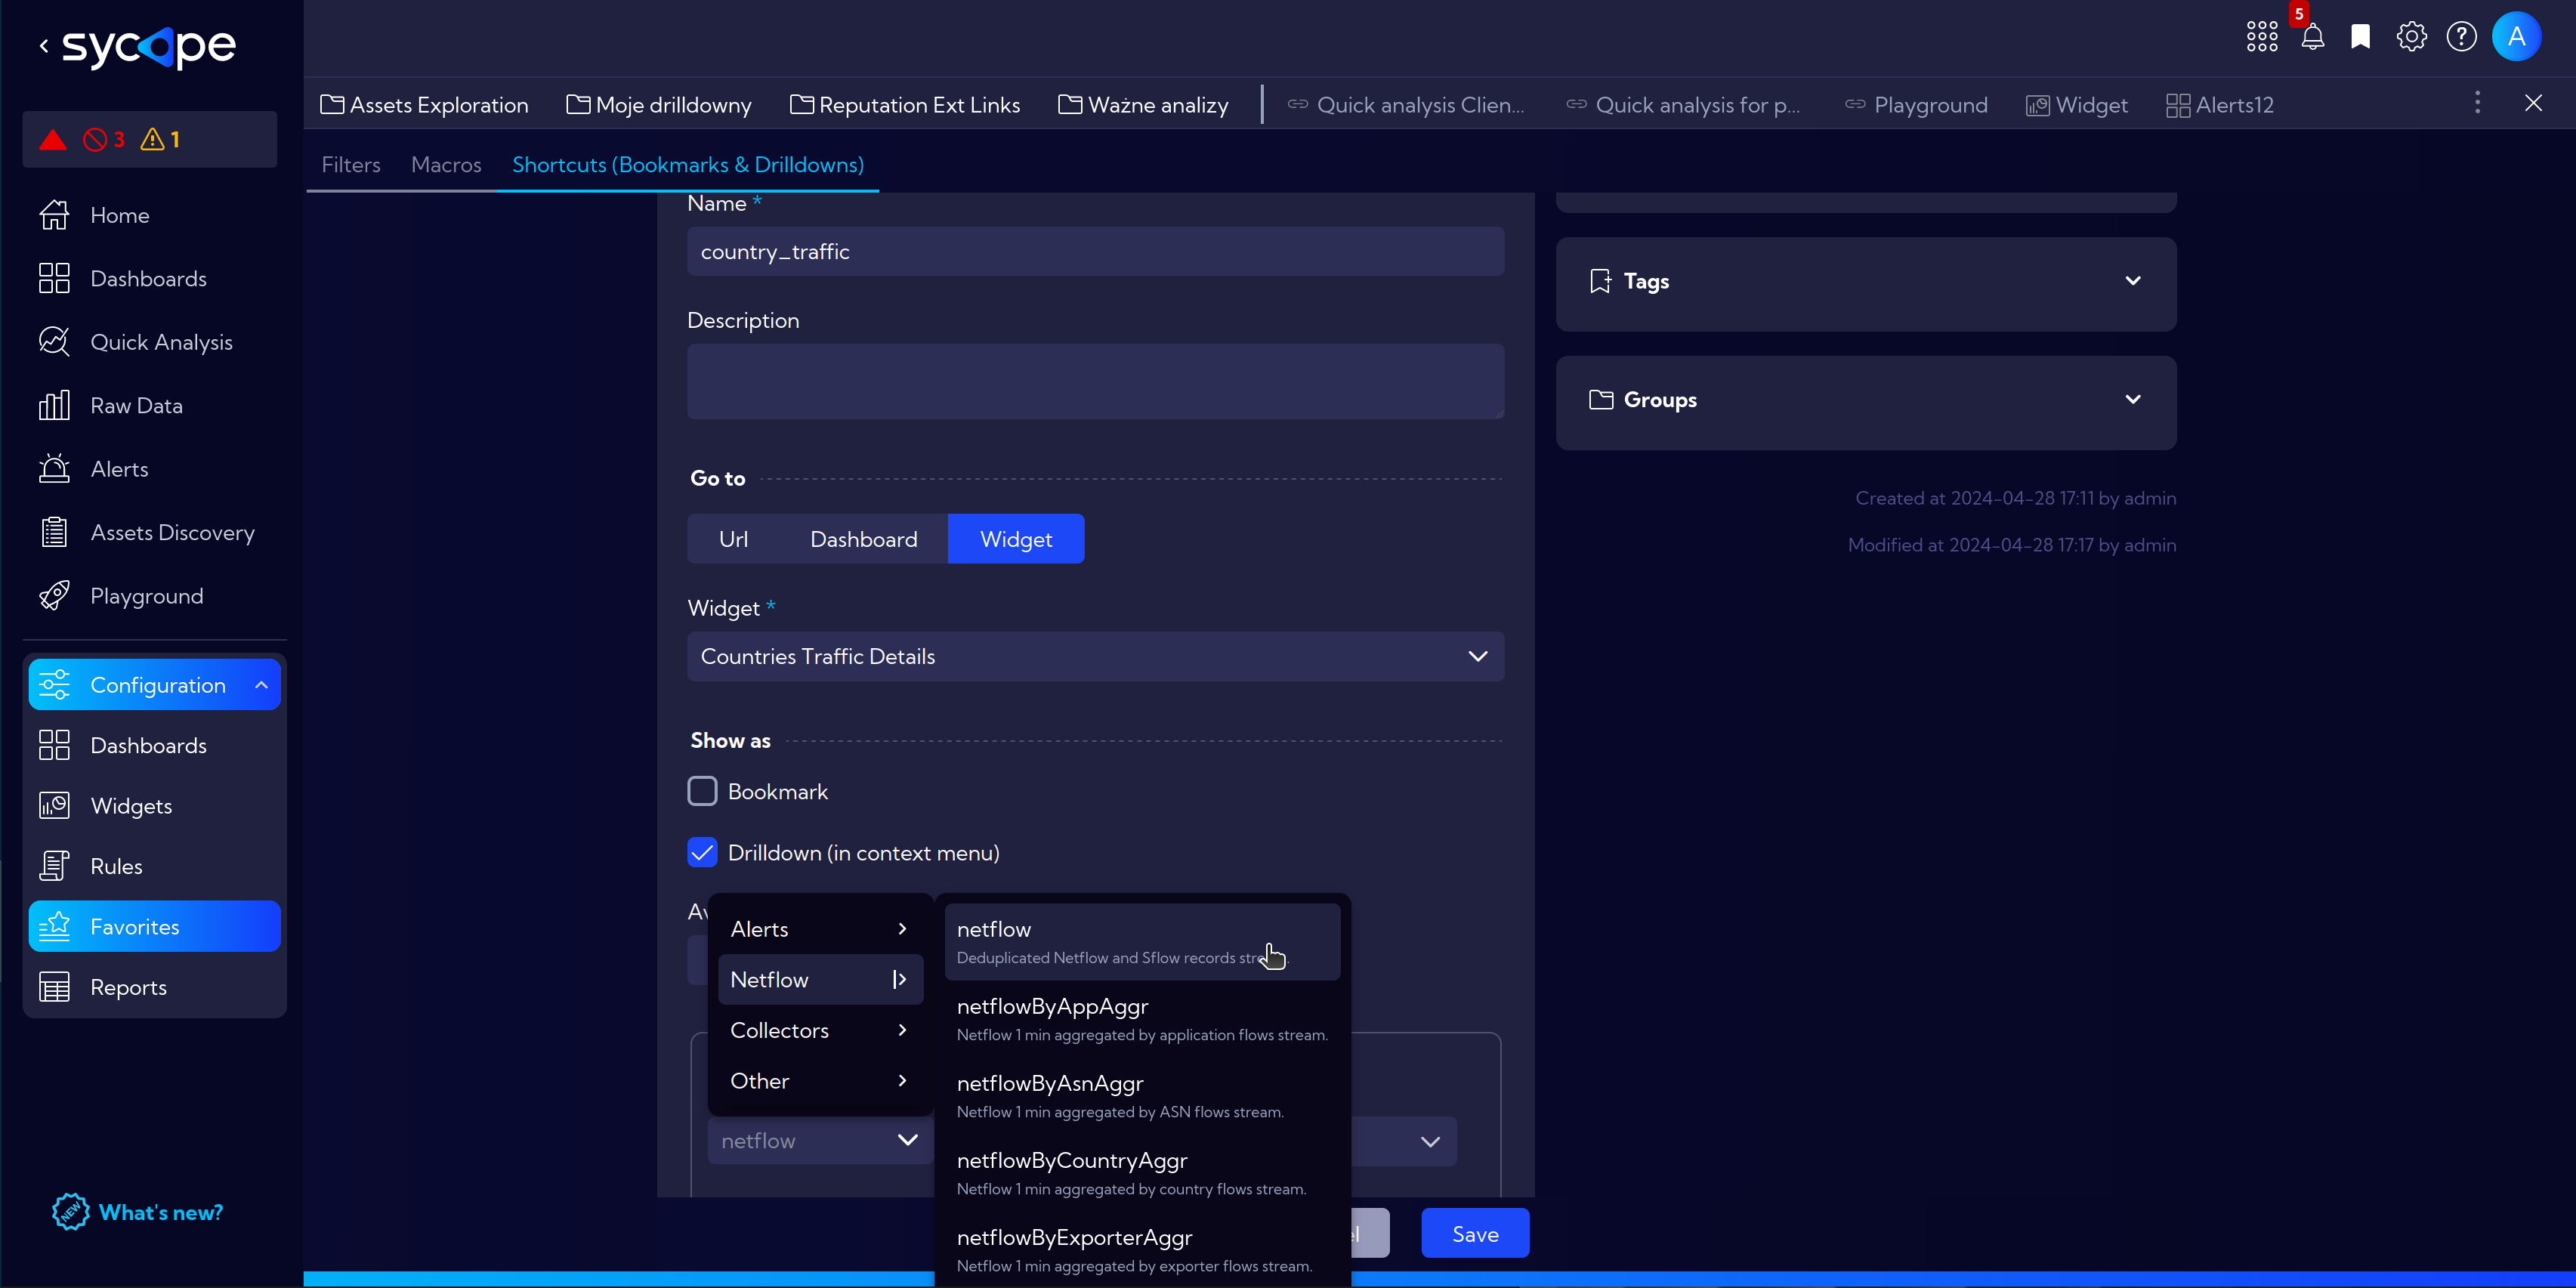
- In the Field name search for country and mark Client Country and Server Country.
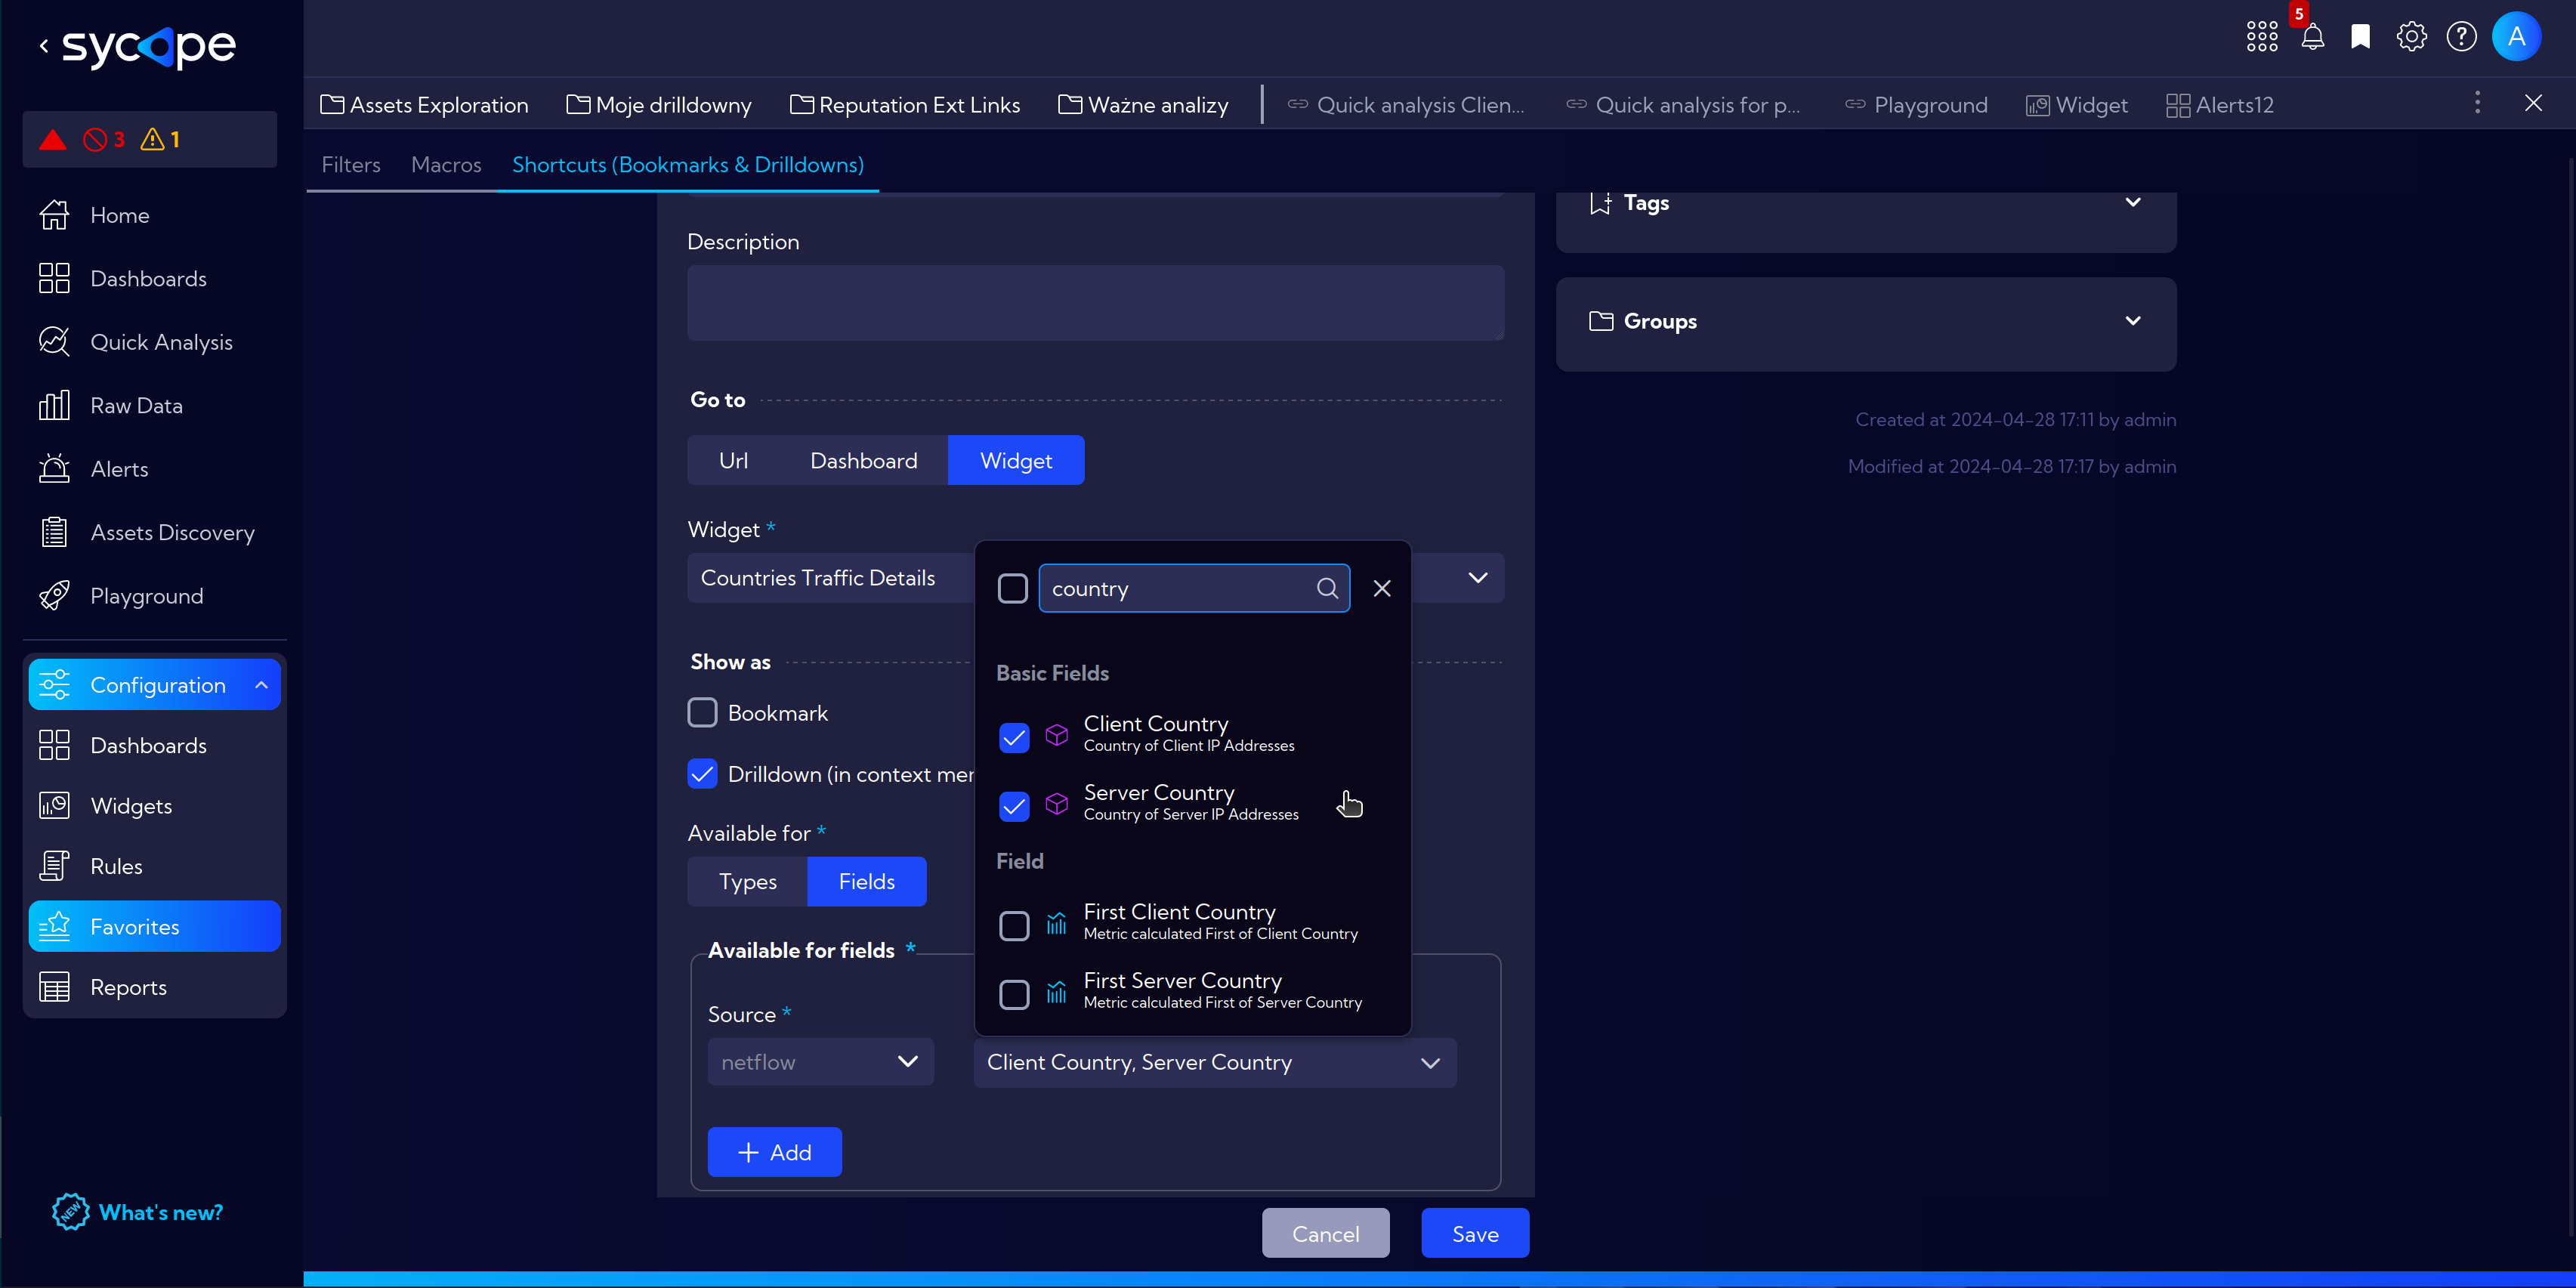
- Finally:
Save.
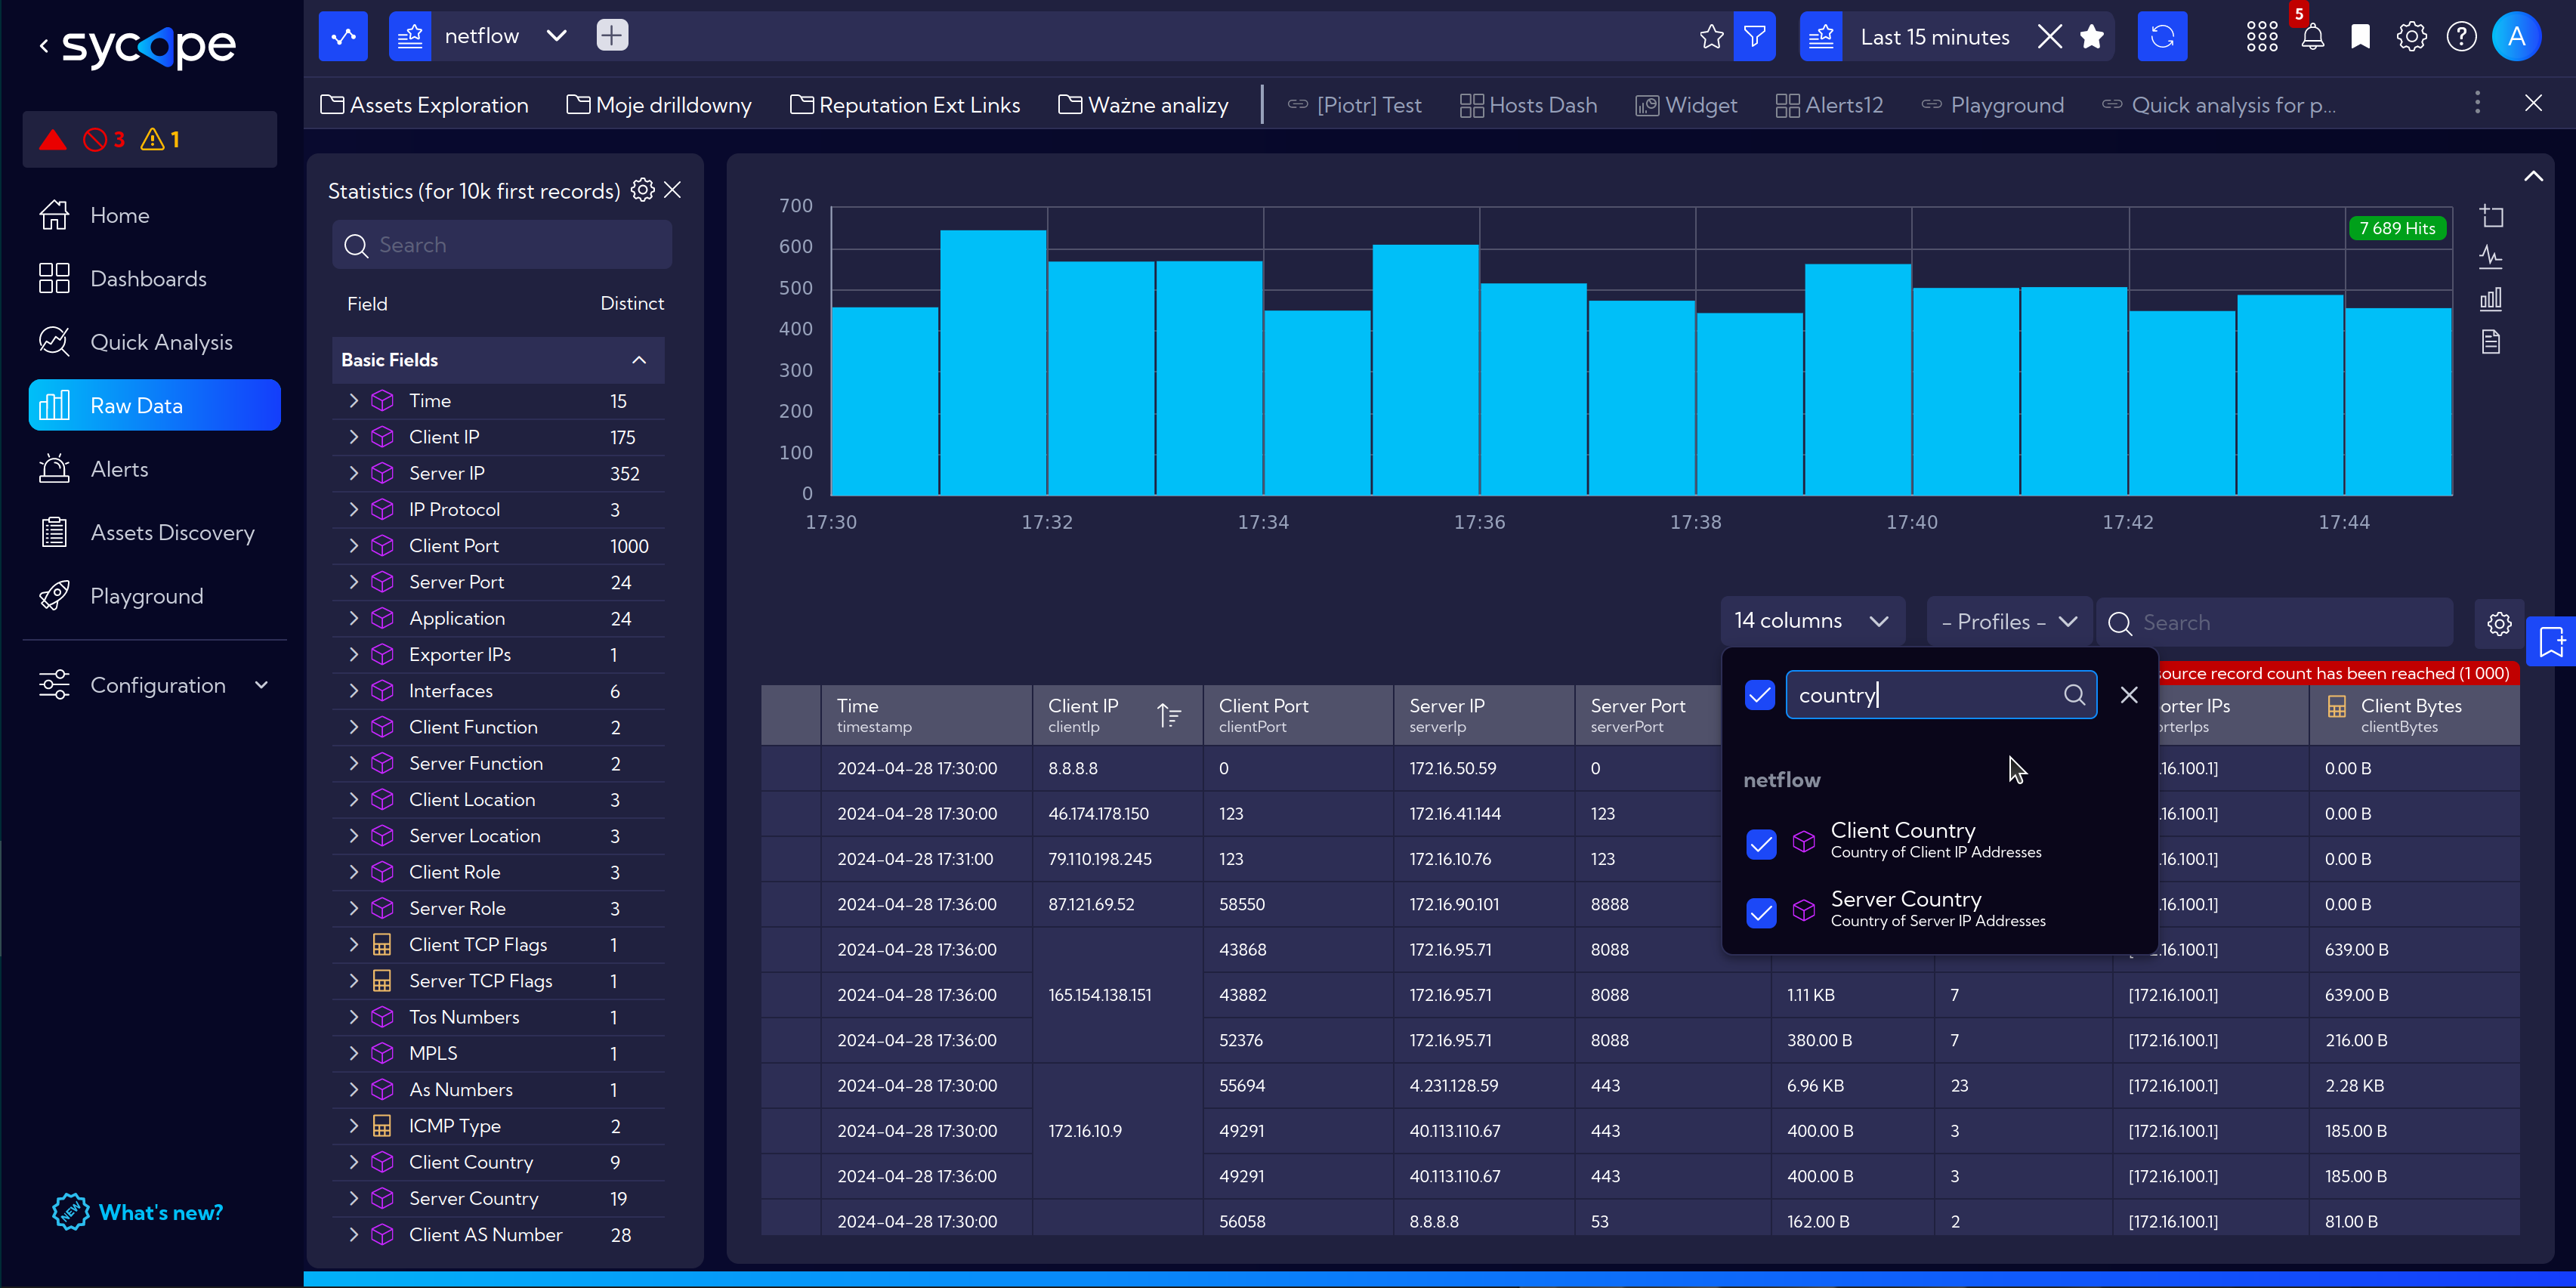
To test this drilldown naviagte to
[Menu > Raw Data]and make sure that the columns Client Country and Server Contry are selected and visible.
- Now right-click on a field with country symbol, select Drilldown and country_traffic
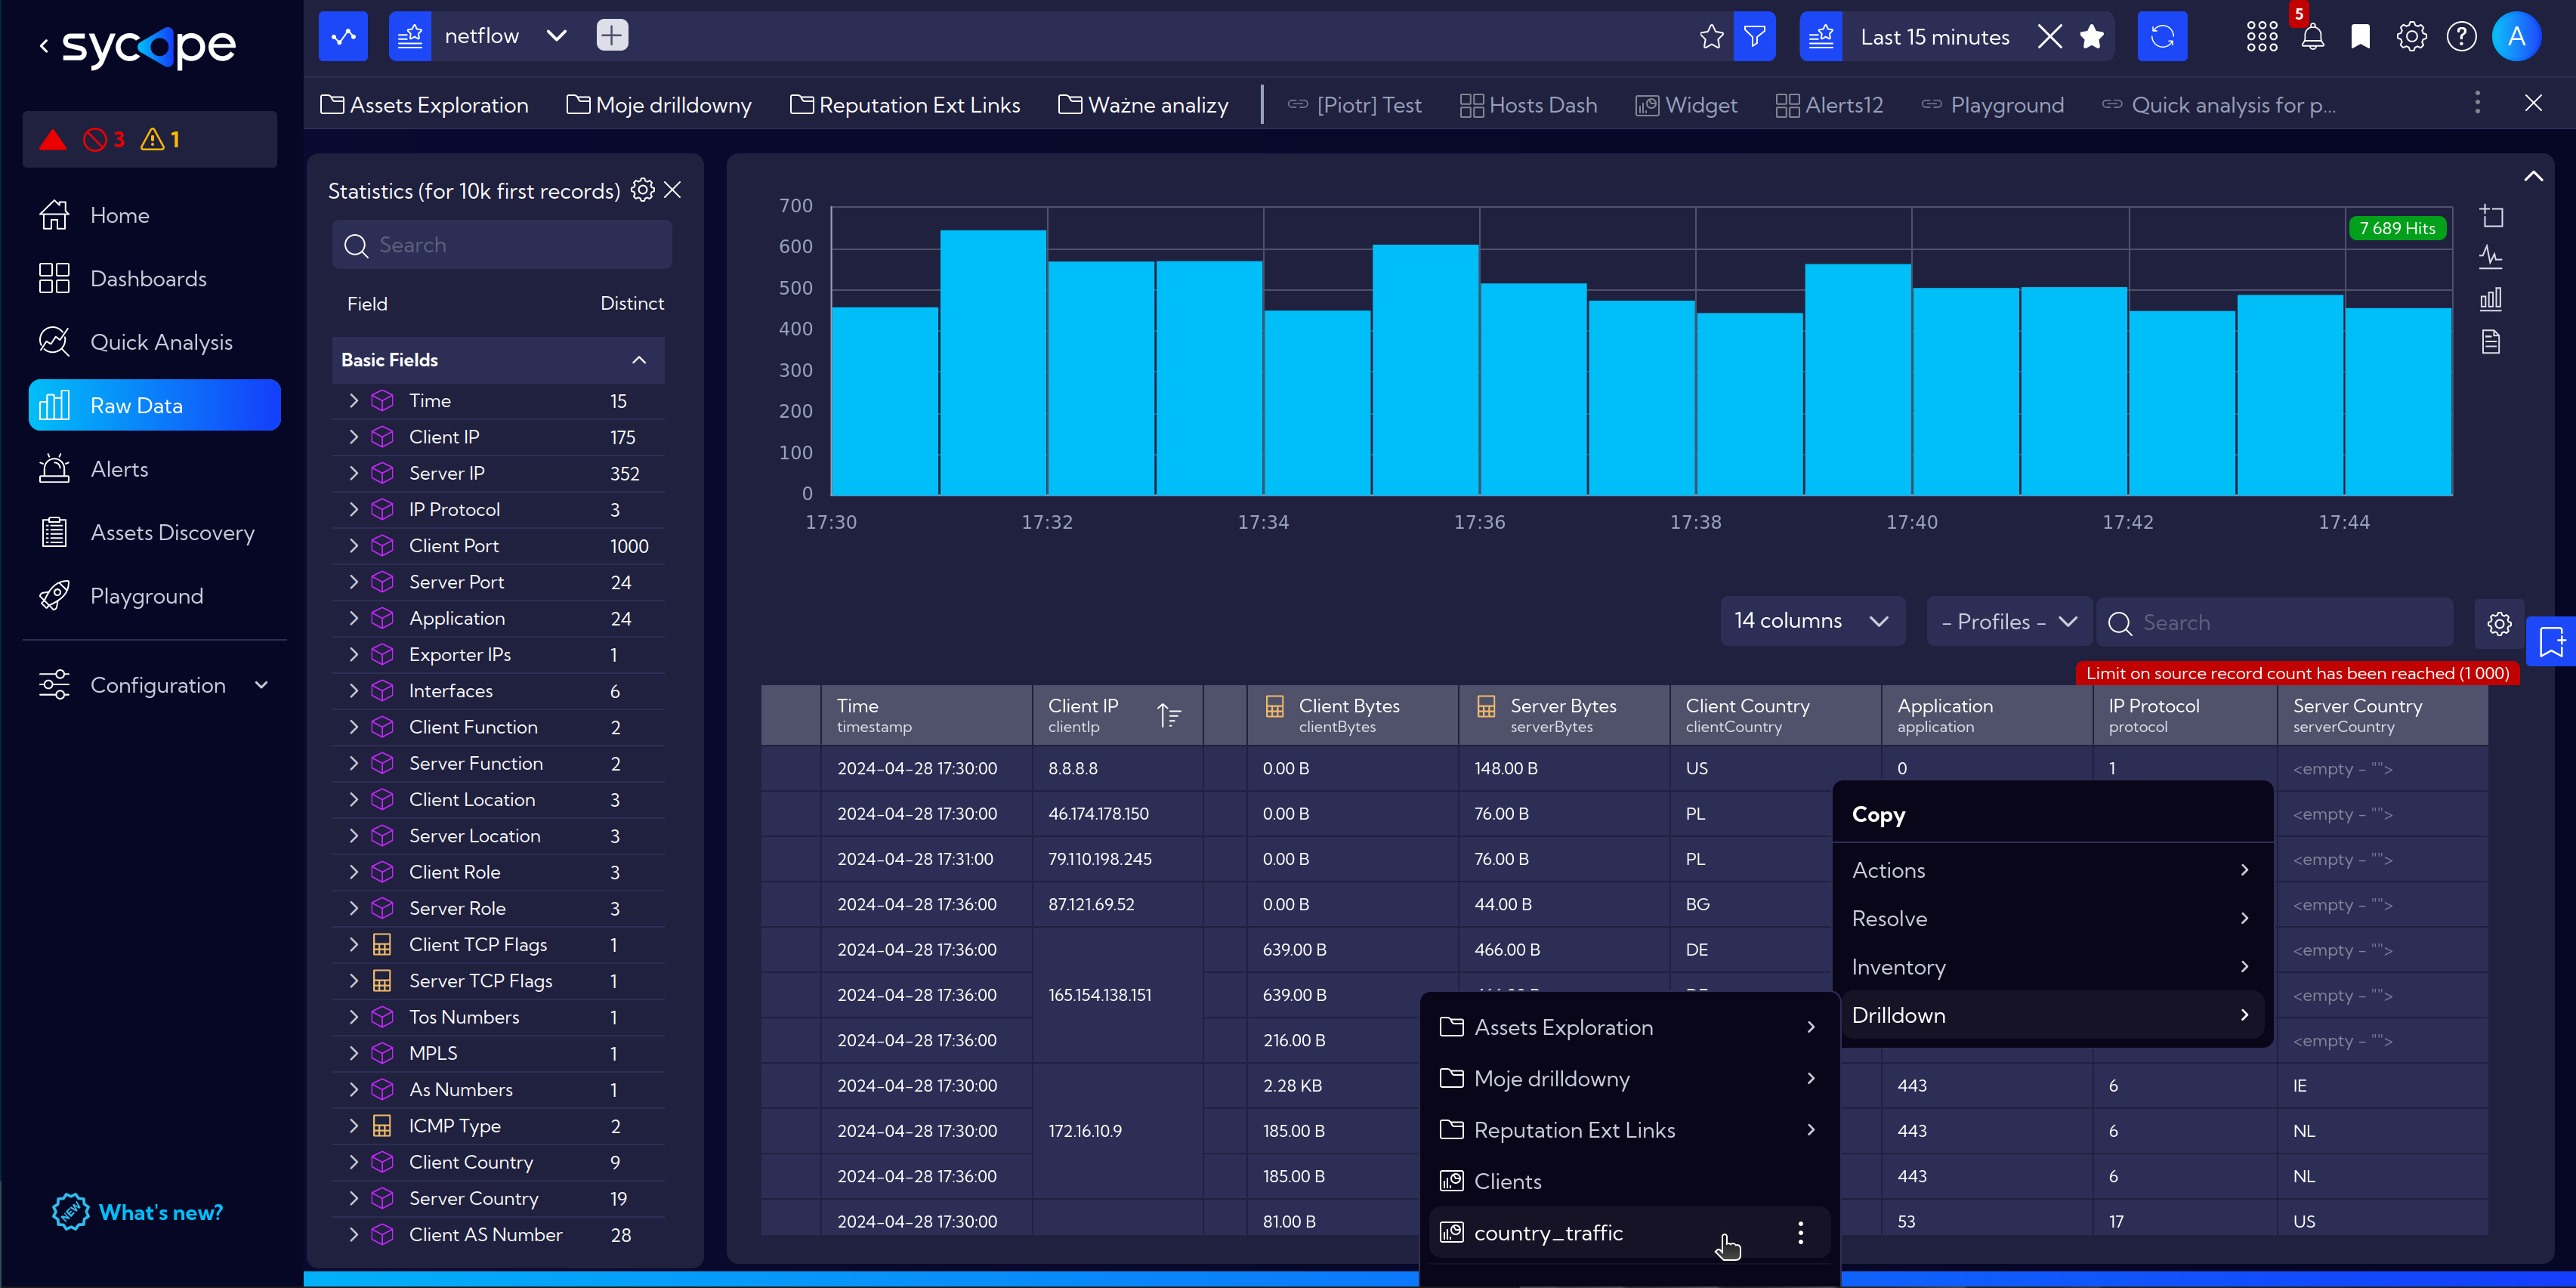
- This drilldown will be visible every time we right-click on the fields Client Country or Server Country in the NetFlow stream. Invoking it will open a window with Countries Traffic Details widget for selected country symbol.