Filters
The [Configuration > Favorites > Filters] menu can be used to edit and store favorite Filters (Queries).
Frequently used filters/queries can be saved in the system and then opened via the Search Bar, with the Favorite Filters pop-up menu. 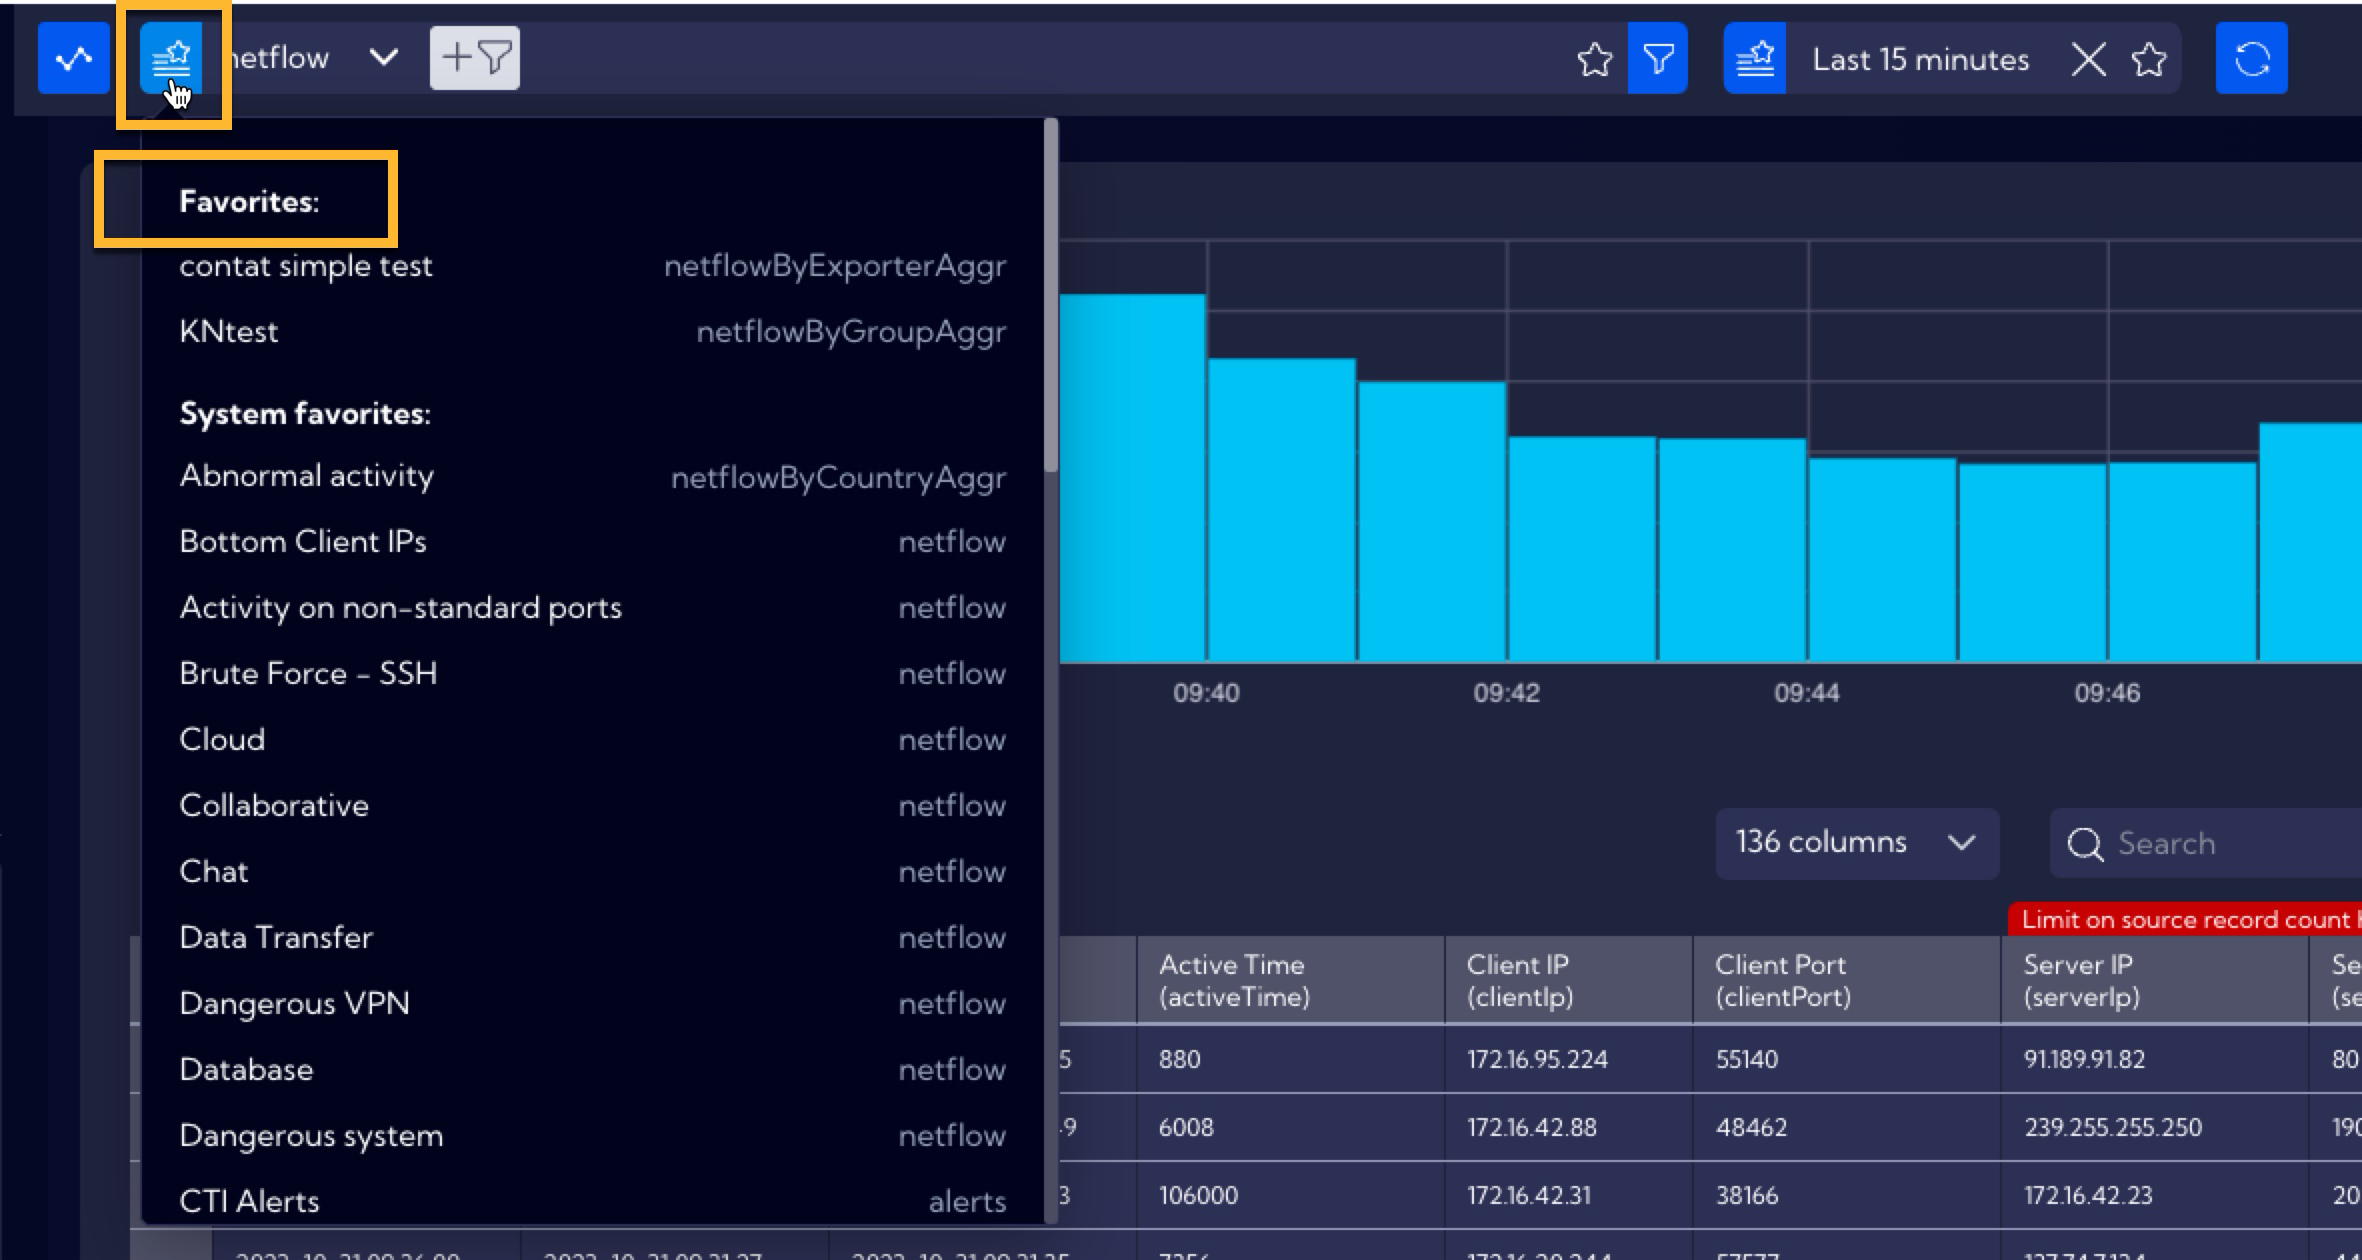
Additionally to the filters created by the user, the System includes ready-made, built-in filters created by the specialists of Sycope. They can be accessed from the System favorites section in the Favorite Filters pop-up menu.
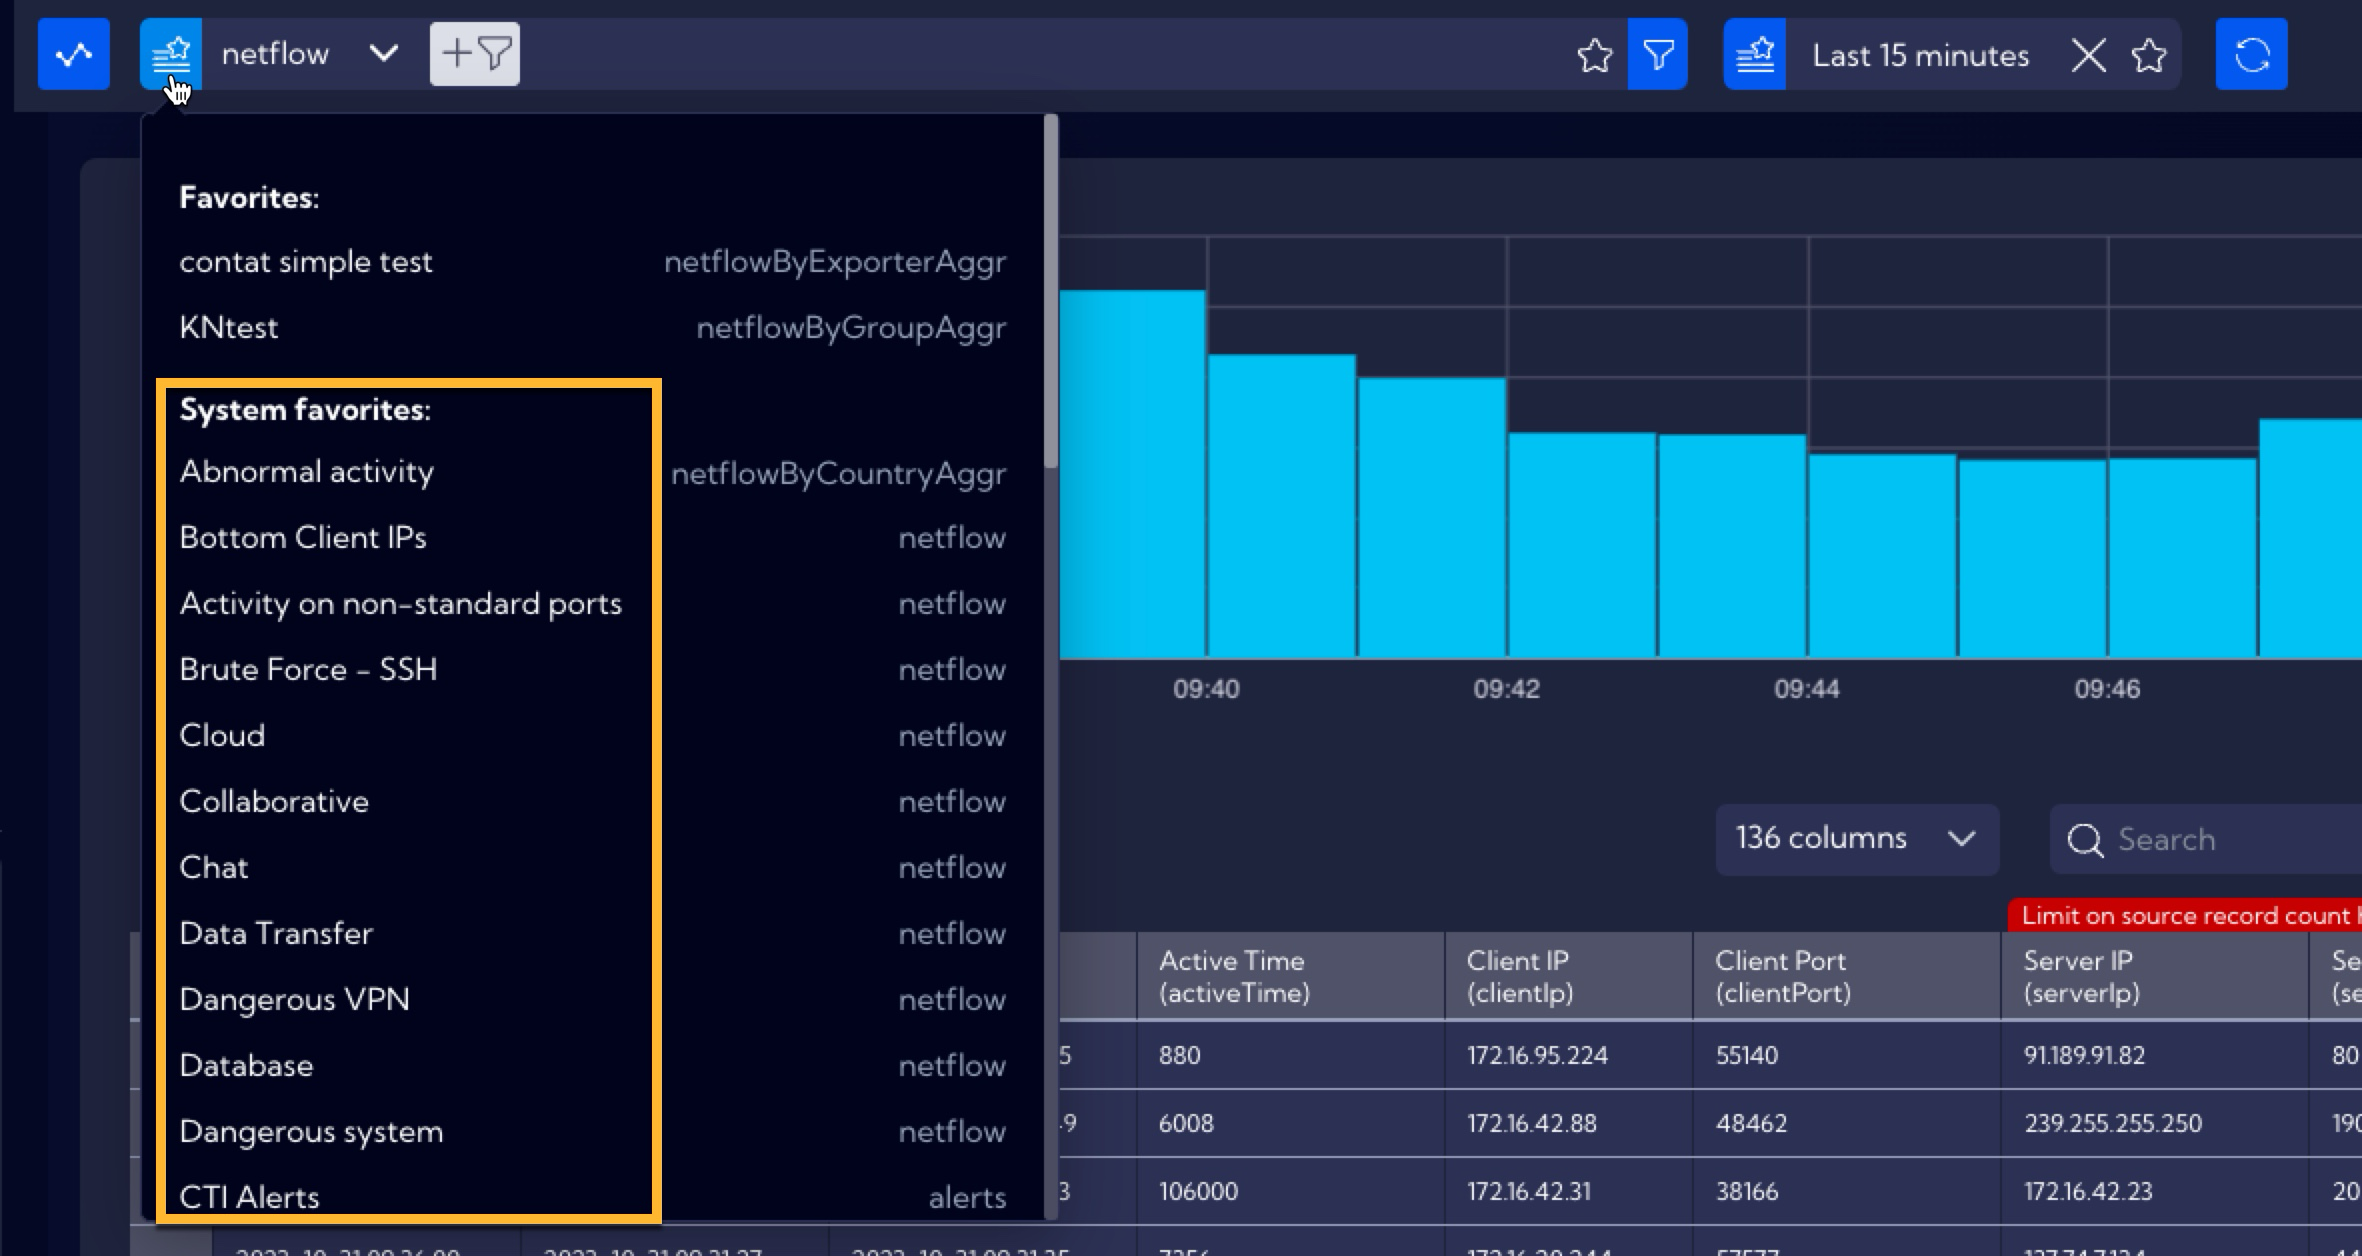
A list of all the built-in filters in the System is located in the Build-in filters table.
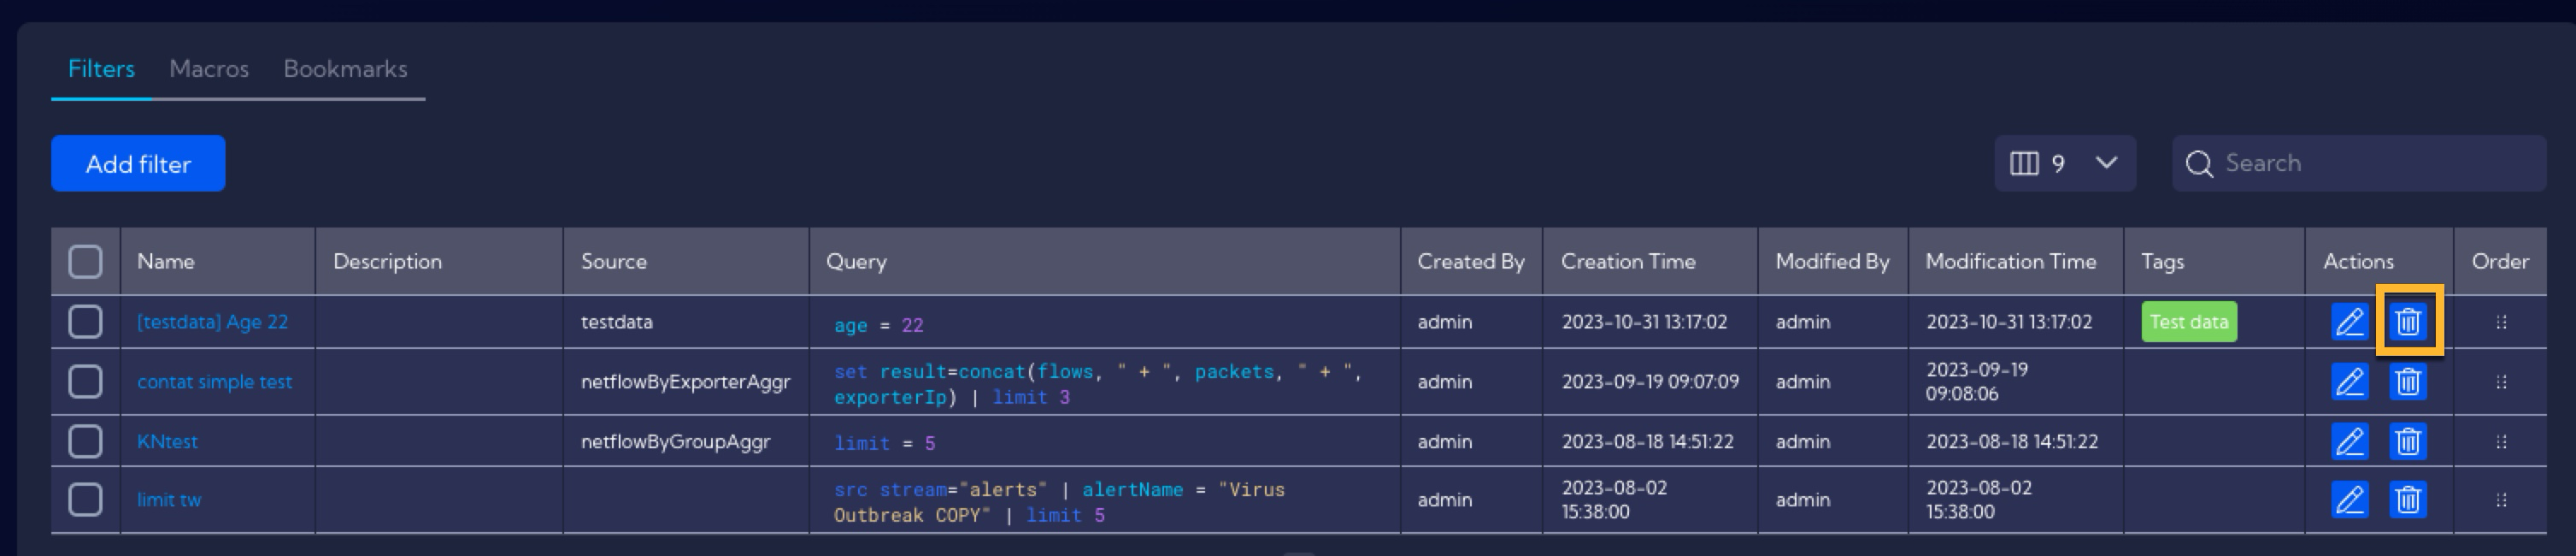
In the [Configuration > Favorites > Filters] menu, you can find a table with a list of user-created filters.
The table includes the following columns:
- Name - name of the filter
- Description - a short description of the filter
- Source - the source of data / data stream used by the filter
- Query - query in the NQL language
- Created By - name of the user who created the filter
- Creation Time - date of the creation of the filter by the user
- Modified By - name of the user who last modified the filter
- Modification Time - date of the last modification
- Tags - assigned tags
- Action - available actions
- Edit - filter editing button
- Delete - filter deletion button
Creating a filter via the [Configuration > Favorites > Filters] menu
In order to create a filter in the [Configuration > Favorites > Filters] menu, you must use the Add filter button.
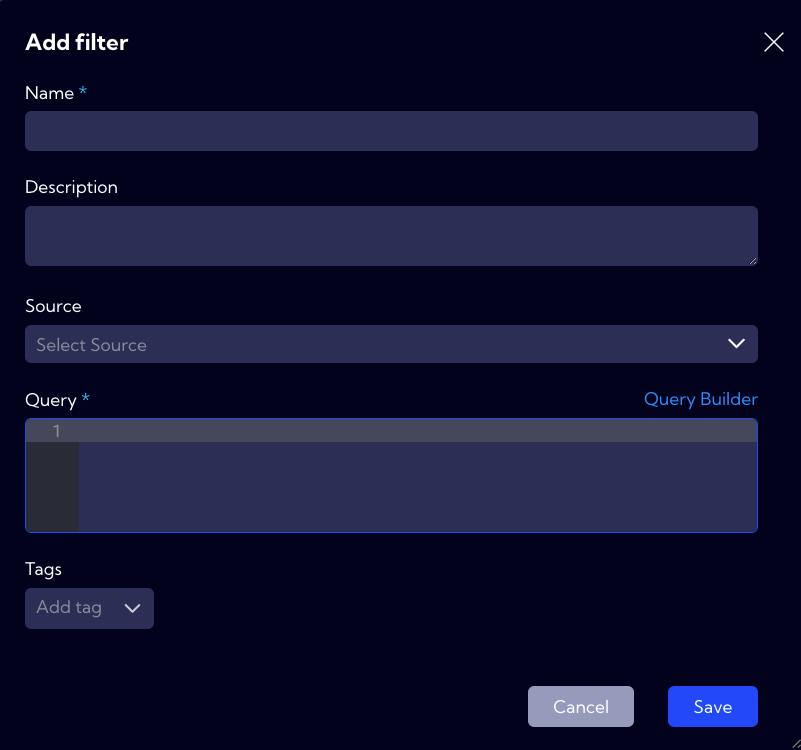
In the filter creation window, the following fields need to be filled out:
- Name - name of the filter
- Description - a short description
- Source - the data stream used by the filter
- Query - query in the NQL language
- Tags - tags assignment
Example
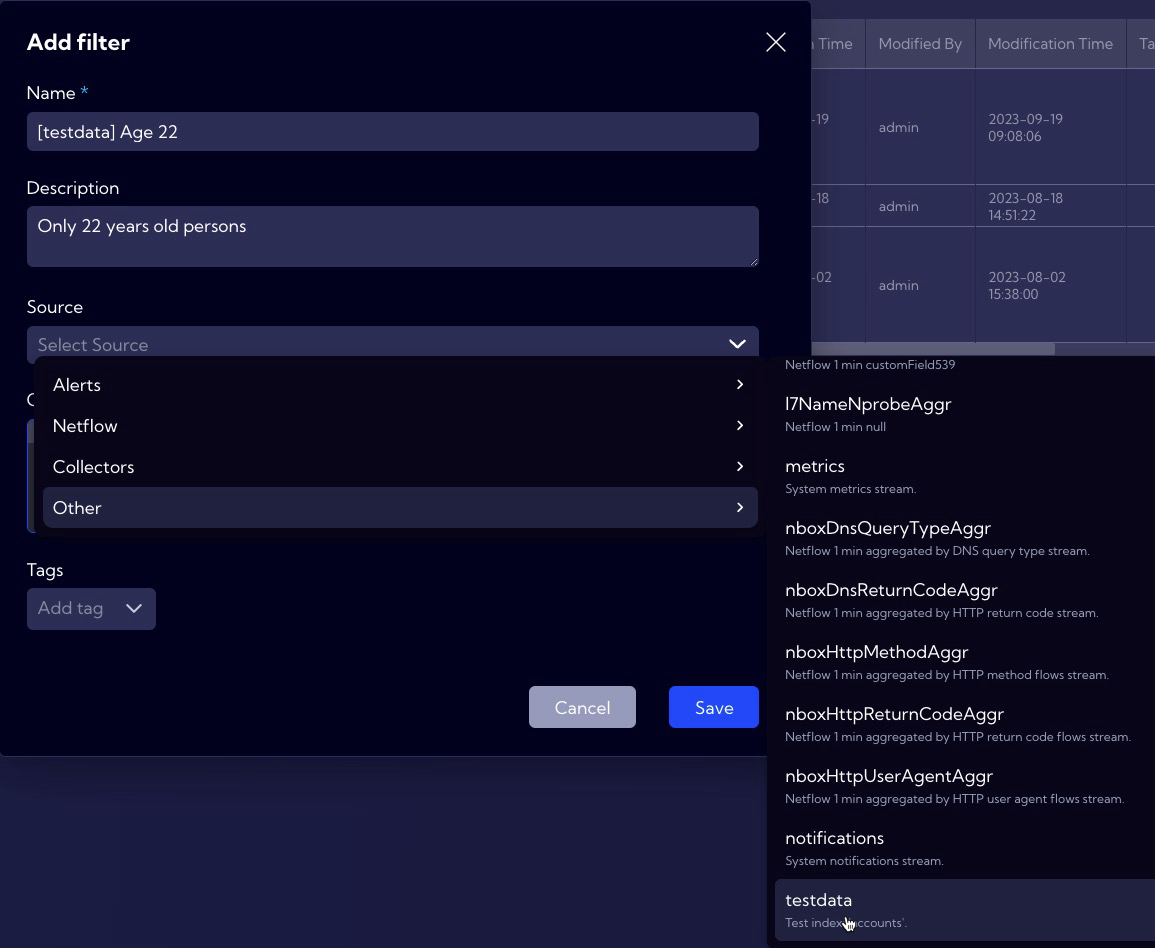
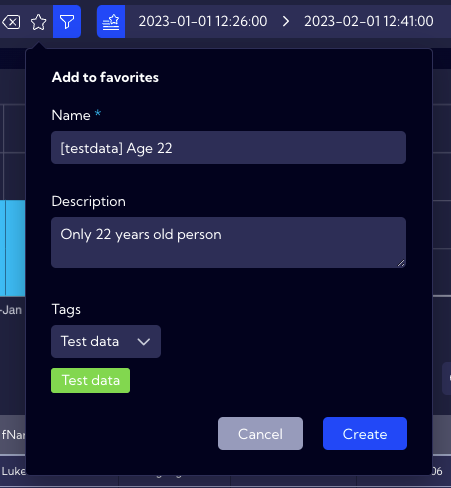
As an example, create a filter that will use the testdata stream to filter people aged 22. Initially, fill out the Name and Description fields.

Now, select the testdata stream.
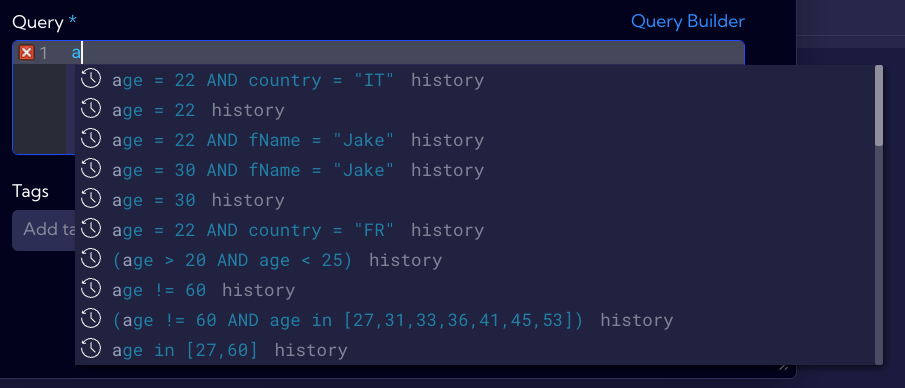
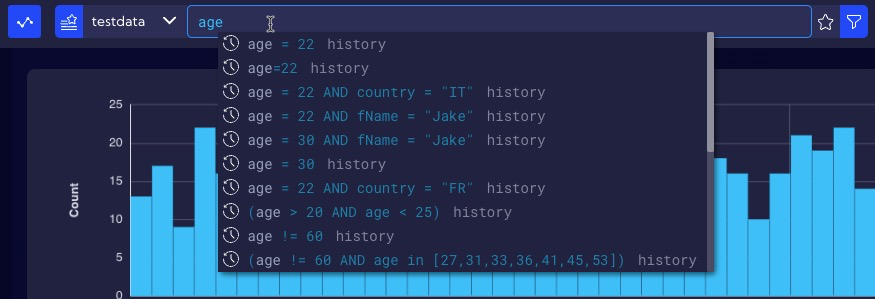
In the Query field, type the age=22 phrase (during the typing, the system will suggest the commands/expressions. You can find more information on the NQL in the NQL User Manual document, as well as the entire NQL section of the documentation).
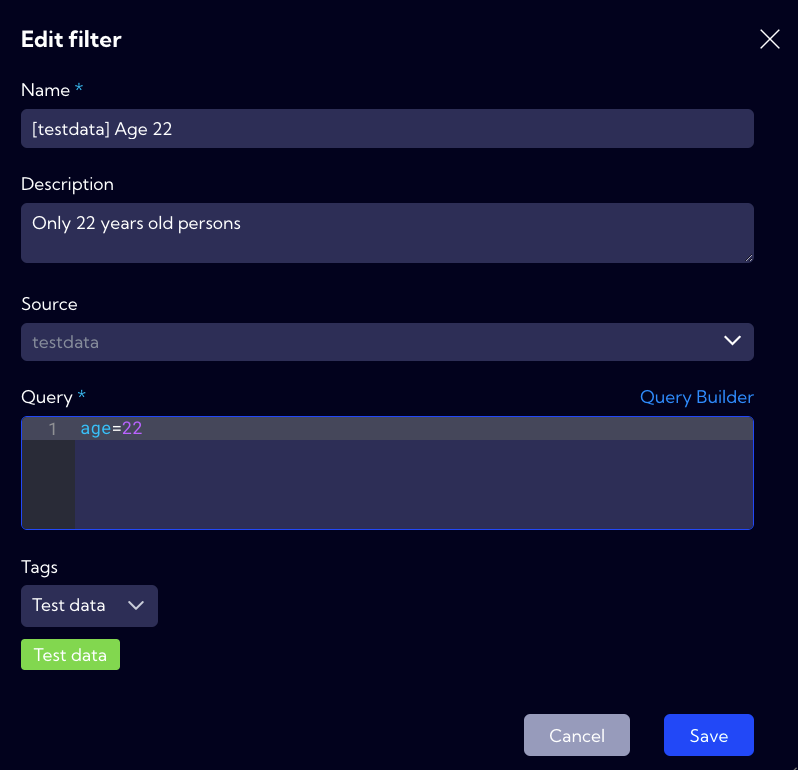
Next, you can (while it is not obligatory) assign a tag to the filter, while in this example, the Test data tag has been assigned. A complete filter looks like this:
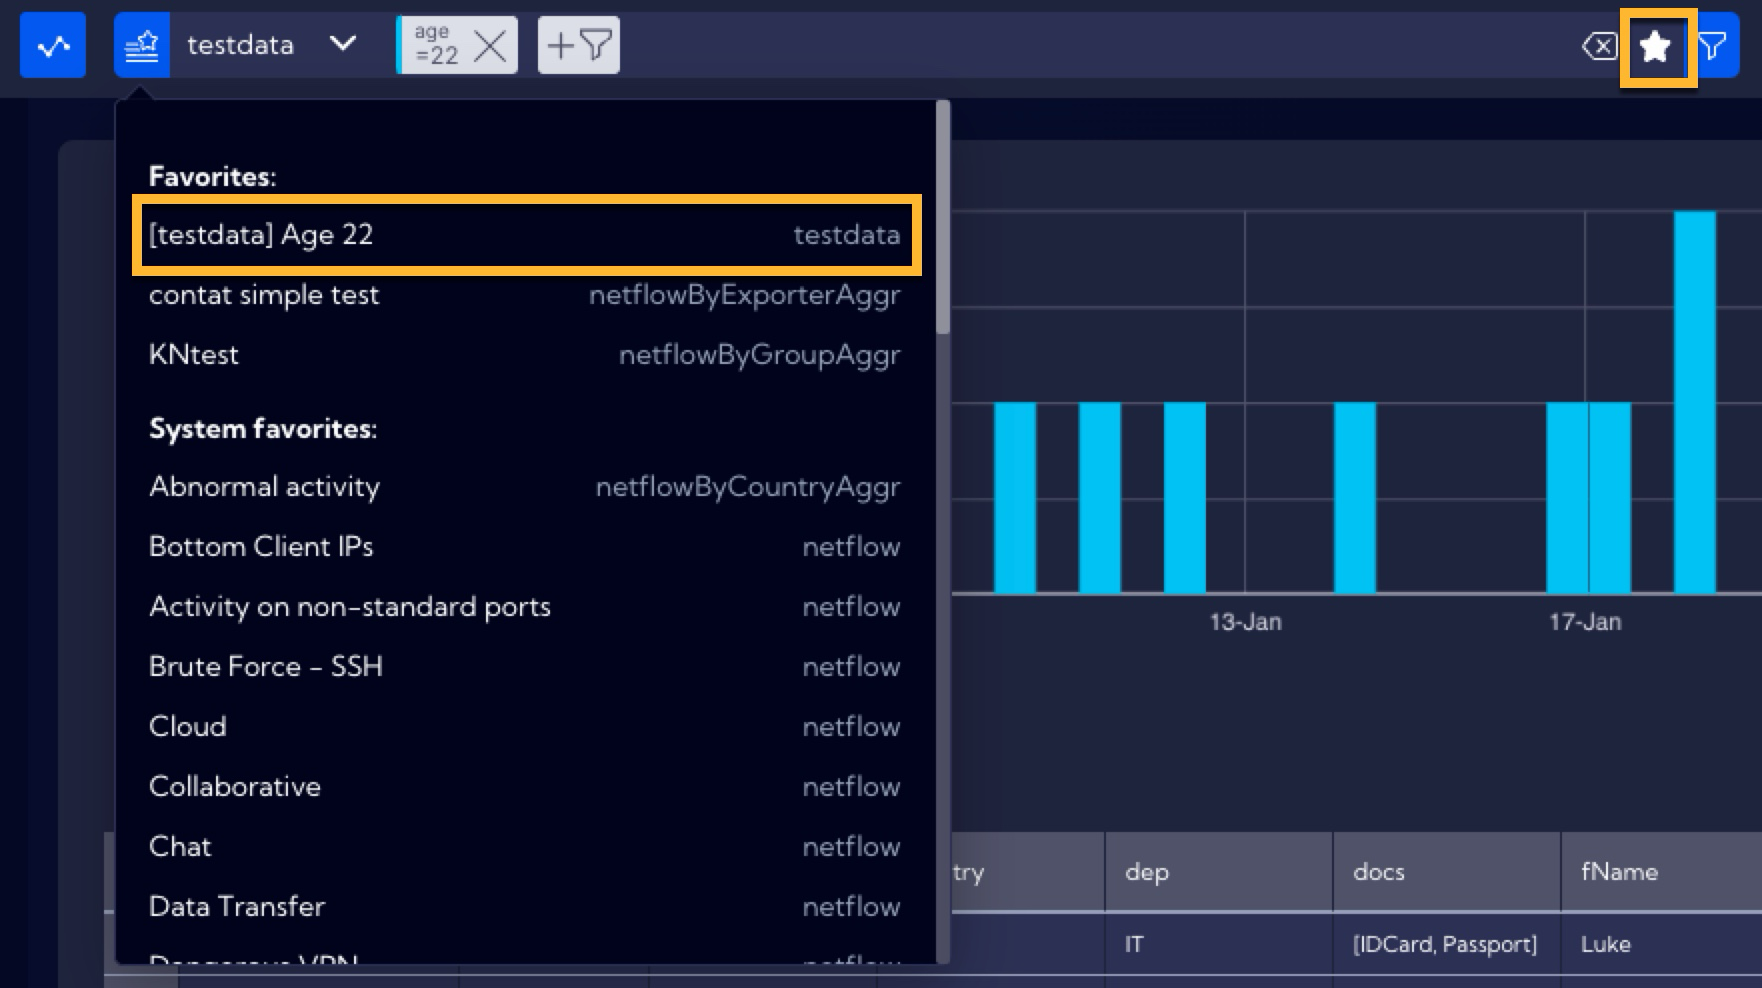
After saving the filter, it will be placed in the filter table, as well as in the pop-up menu in the Search bar in the Favorites section.


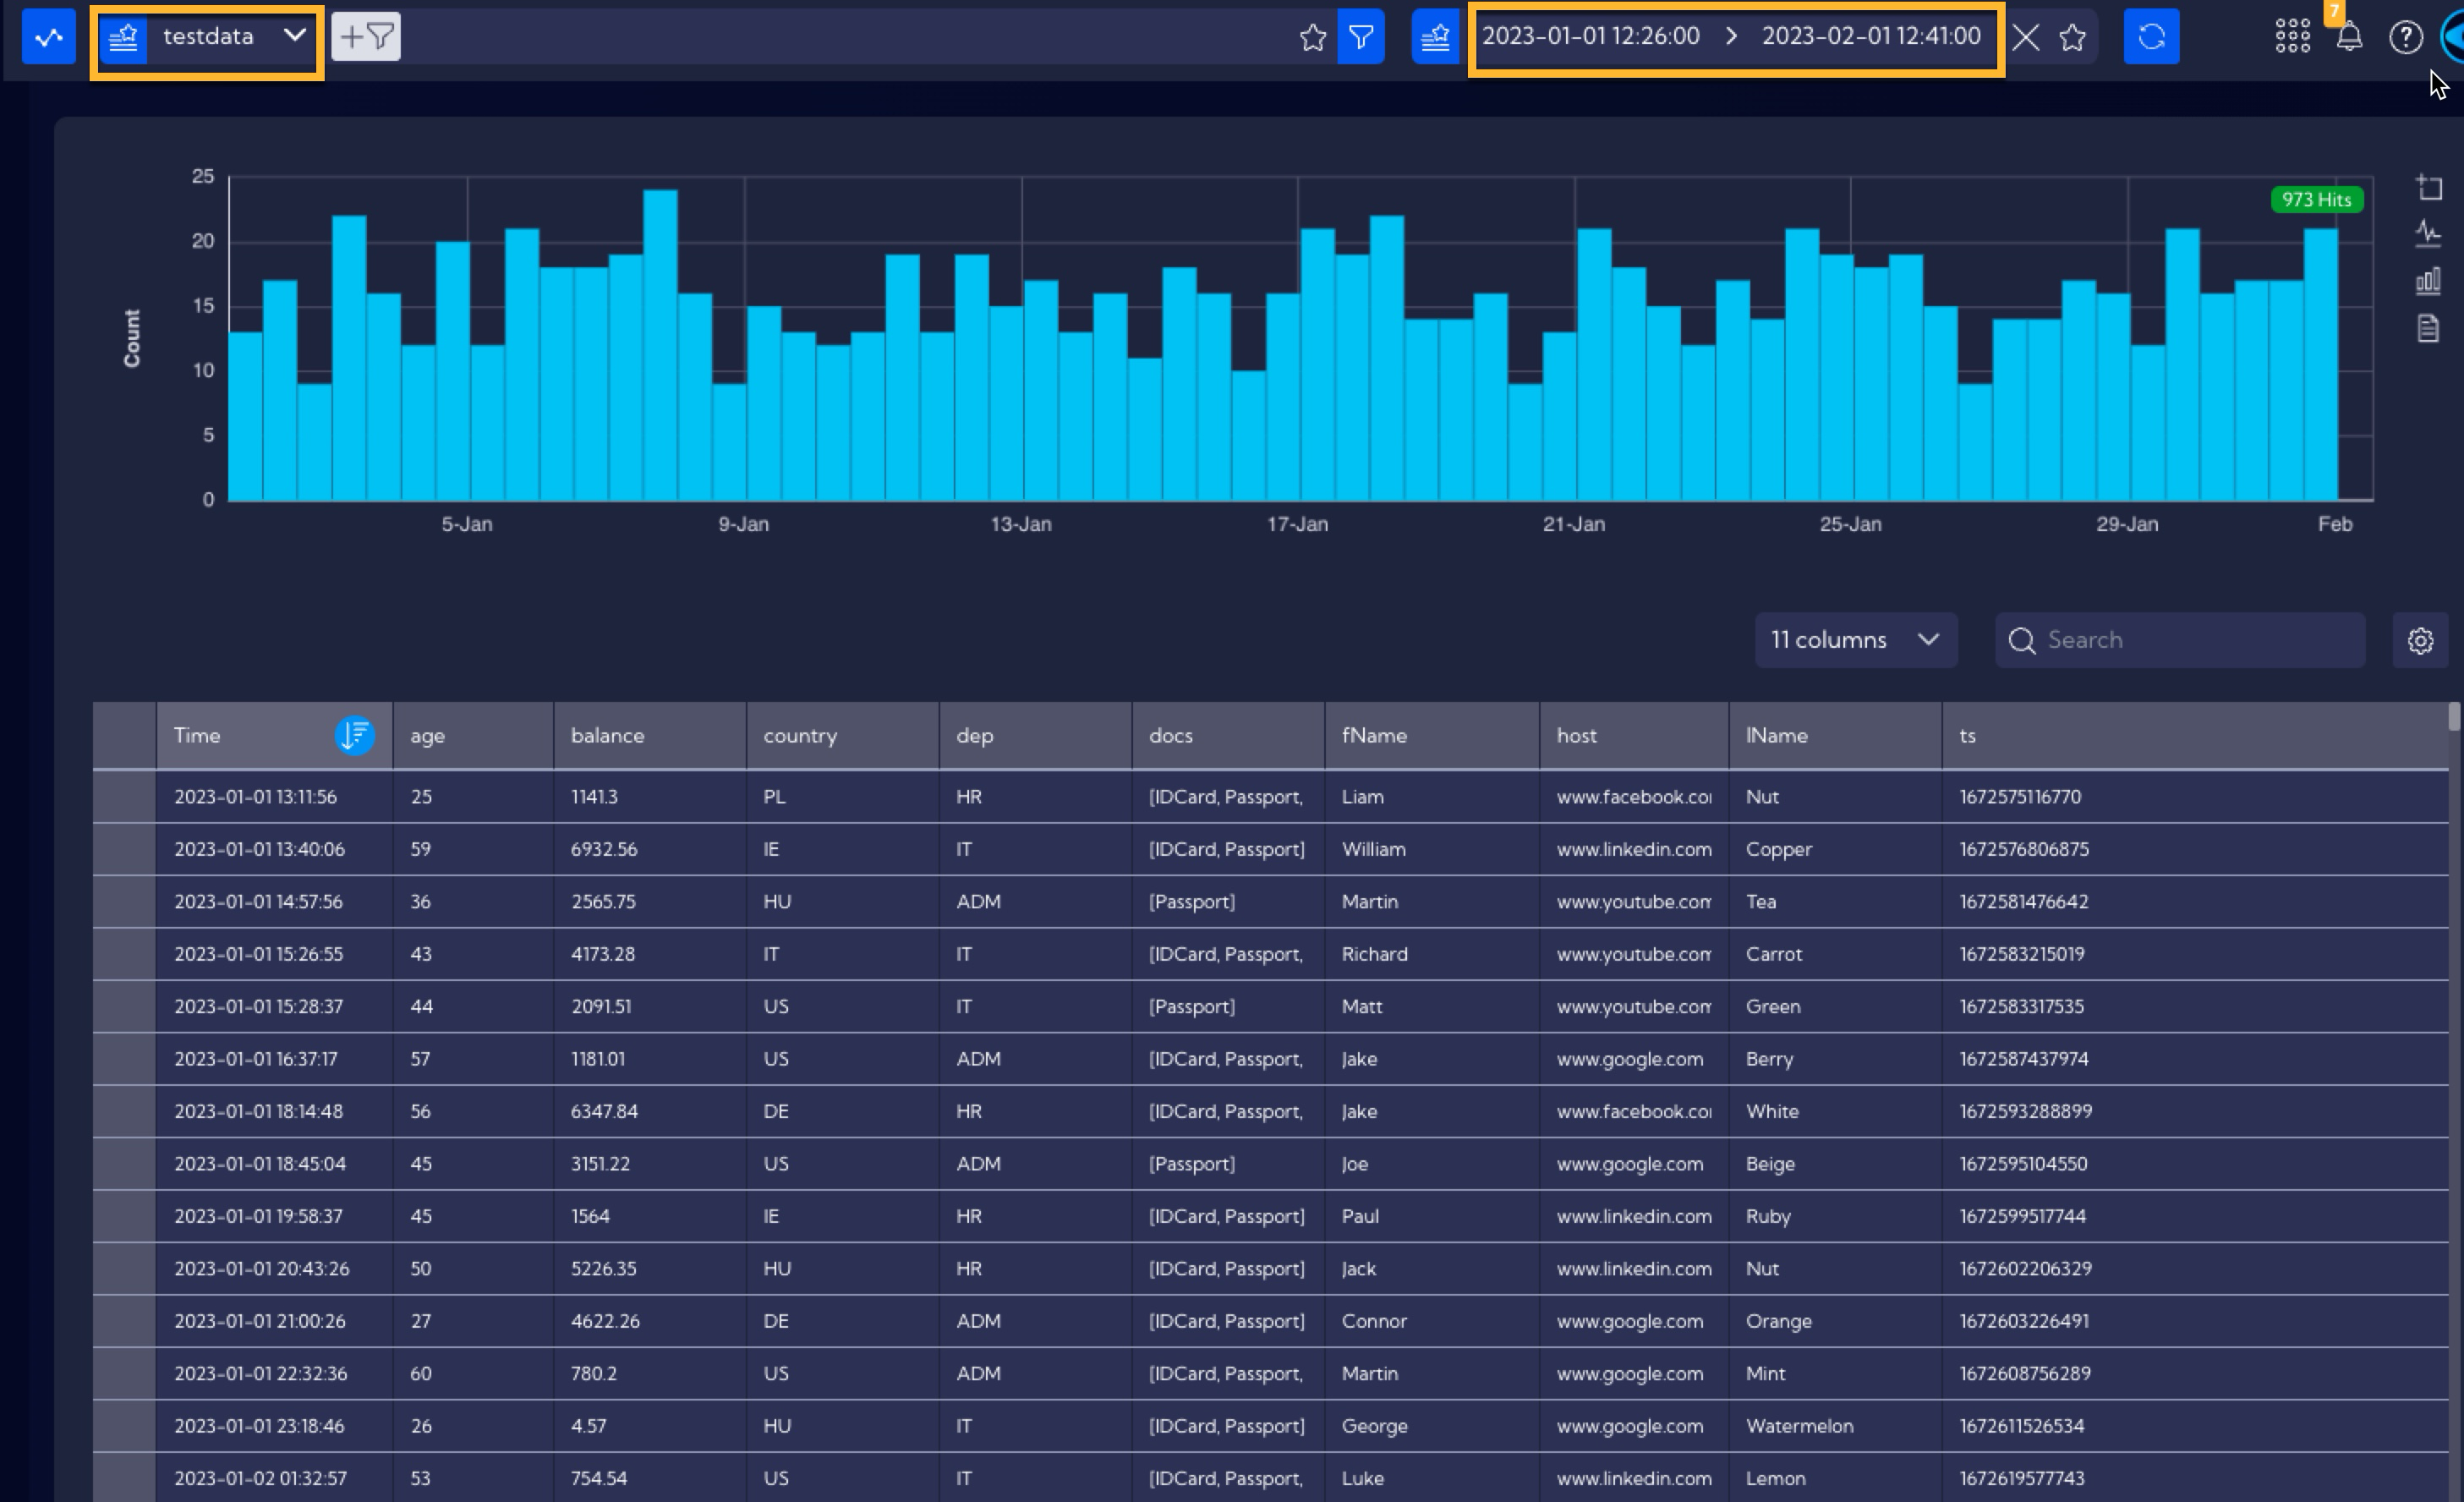
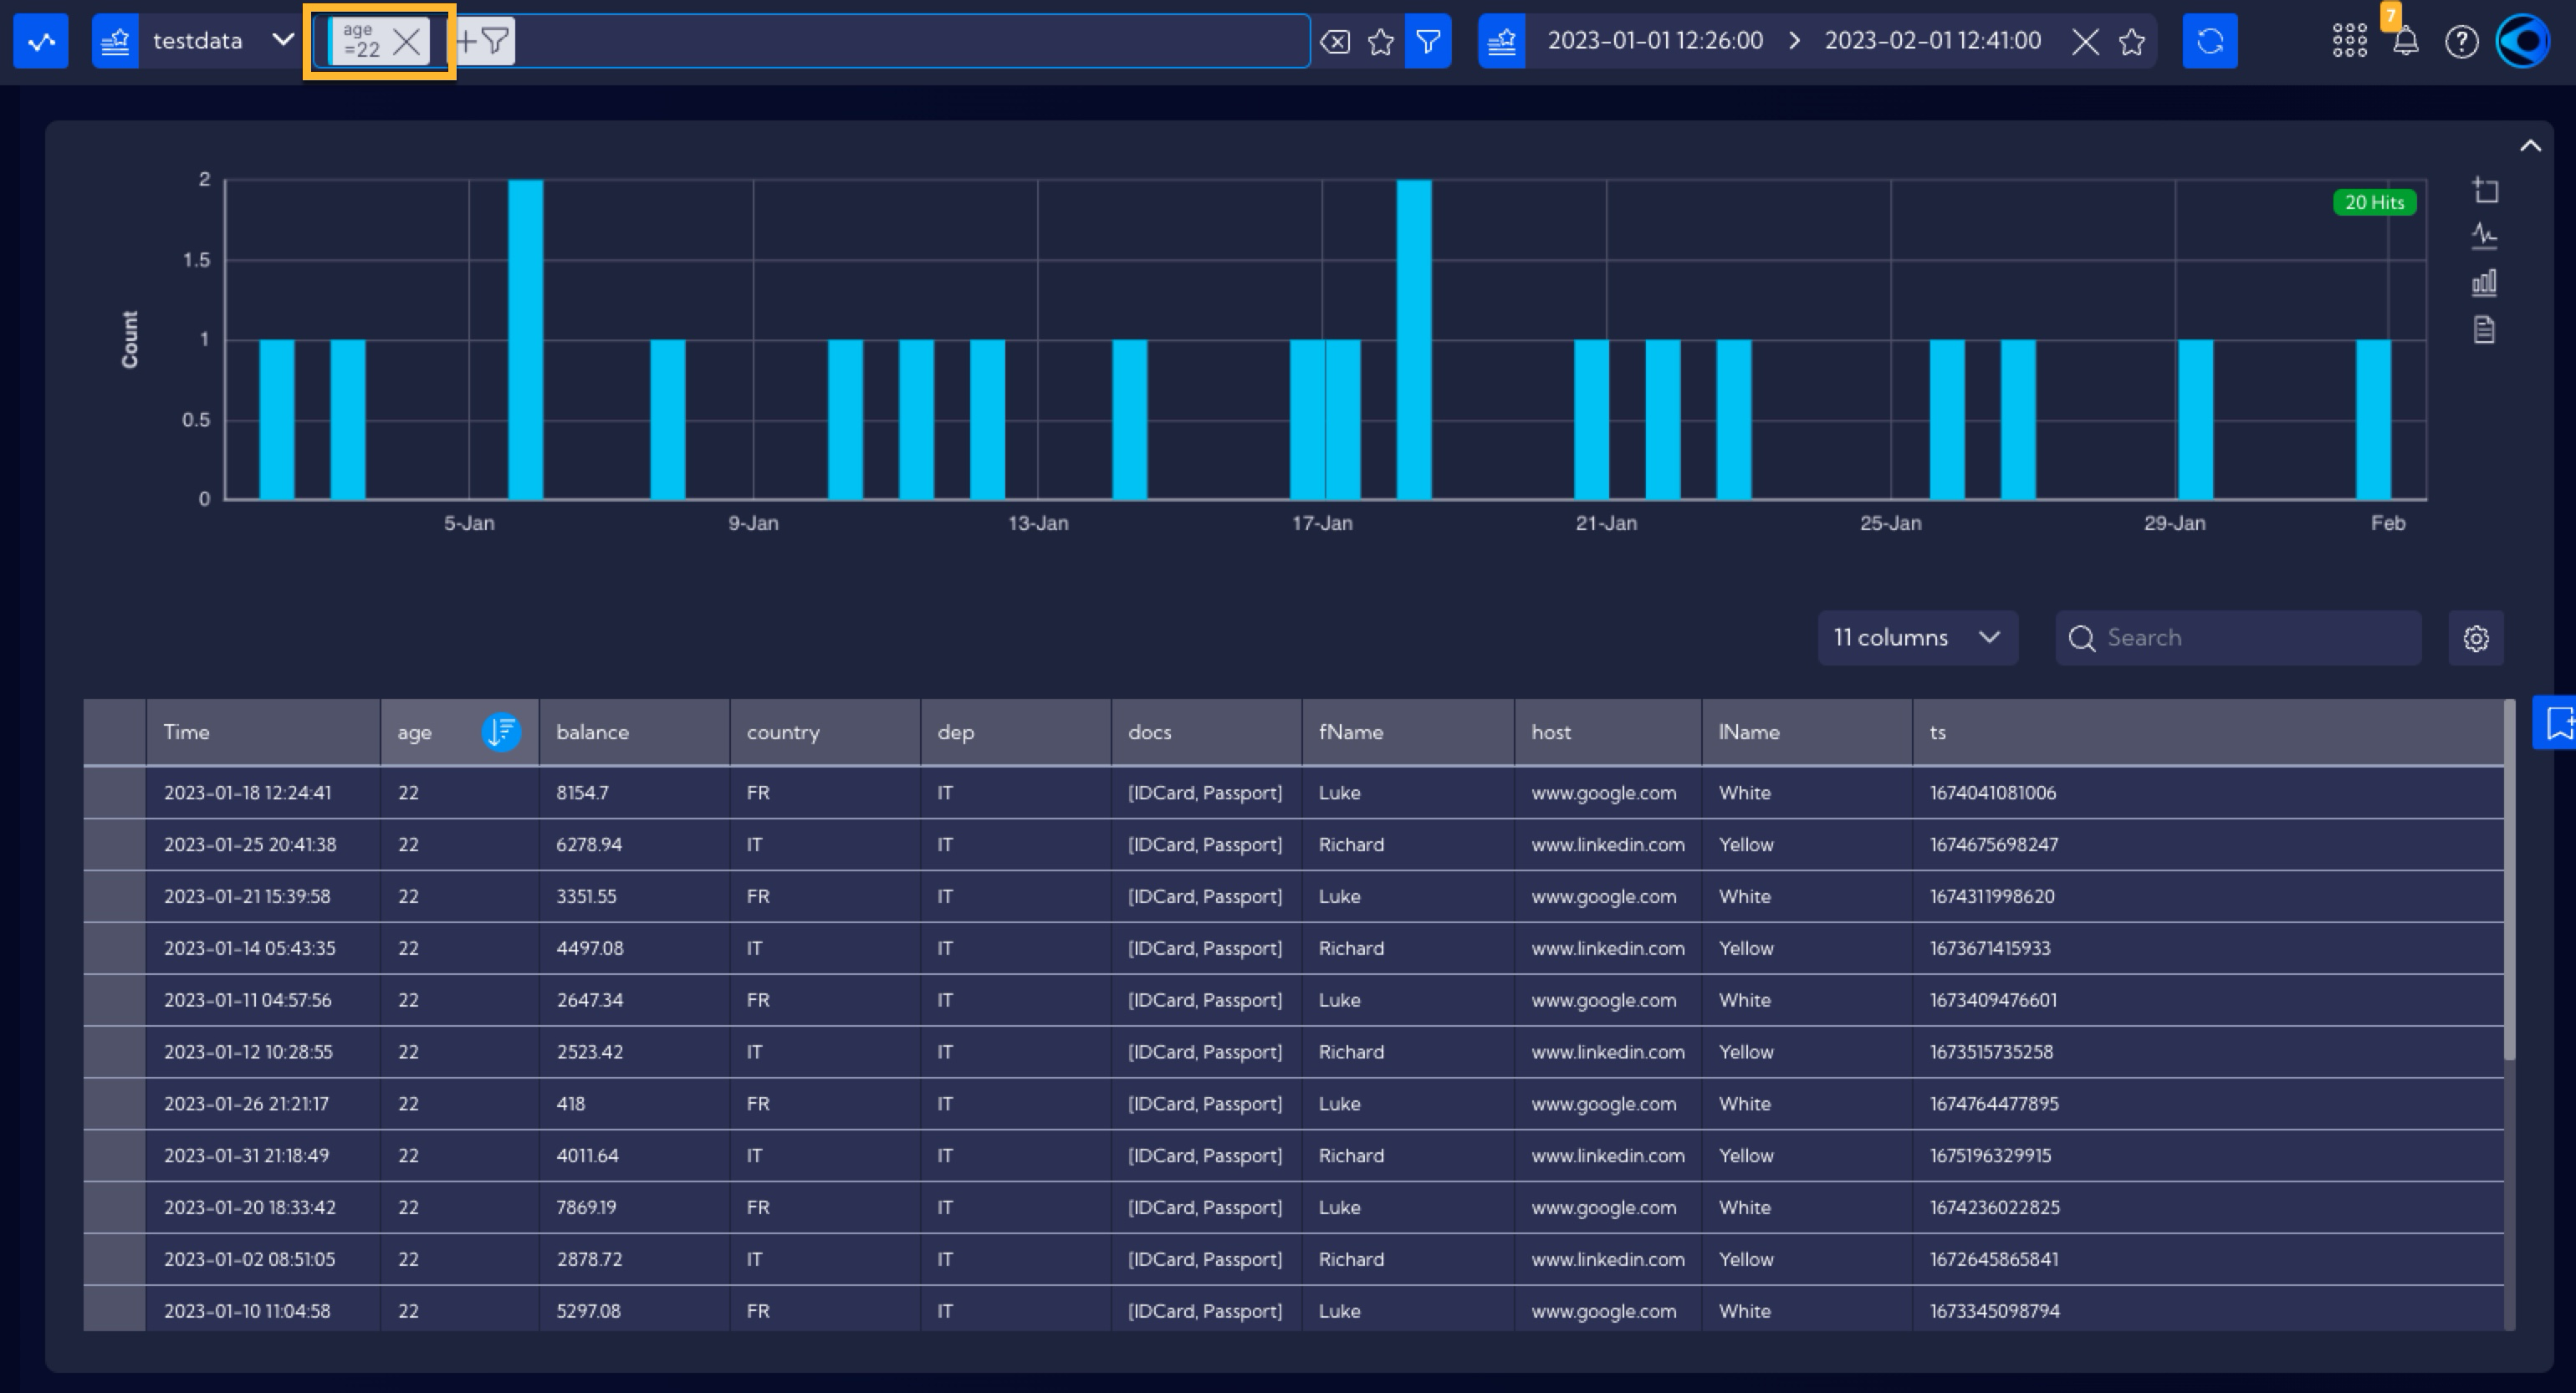
In order to use a filter you can, for example, in the [Raw Data] menu select the stream for which the filter has been created (in this example, it is the testdata stream). Then, select in the menu the time range appropriate for the given stream - in the case of the testdata stream, the data has a timestamp of 01.01.2023 - 01.02.2023.
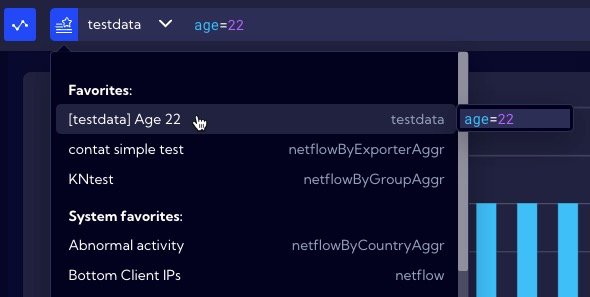
Then, from the Favorite filters menu in the Search Bar, select the created filter.
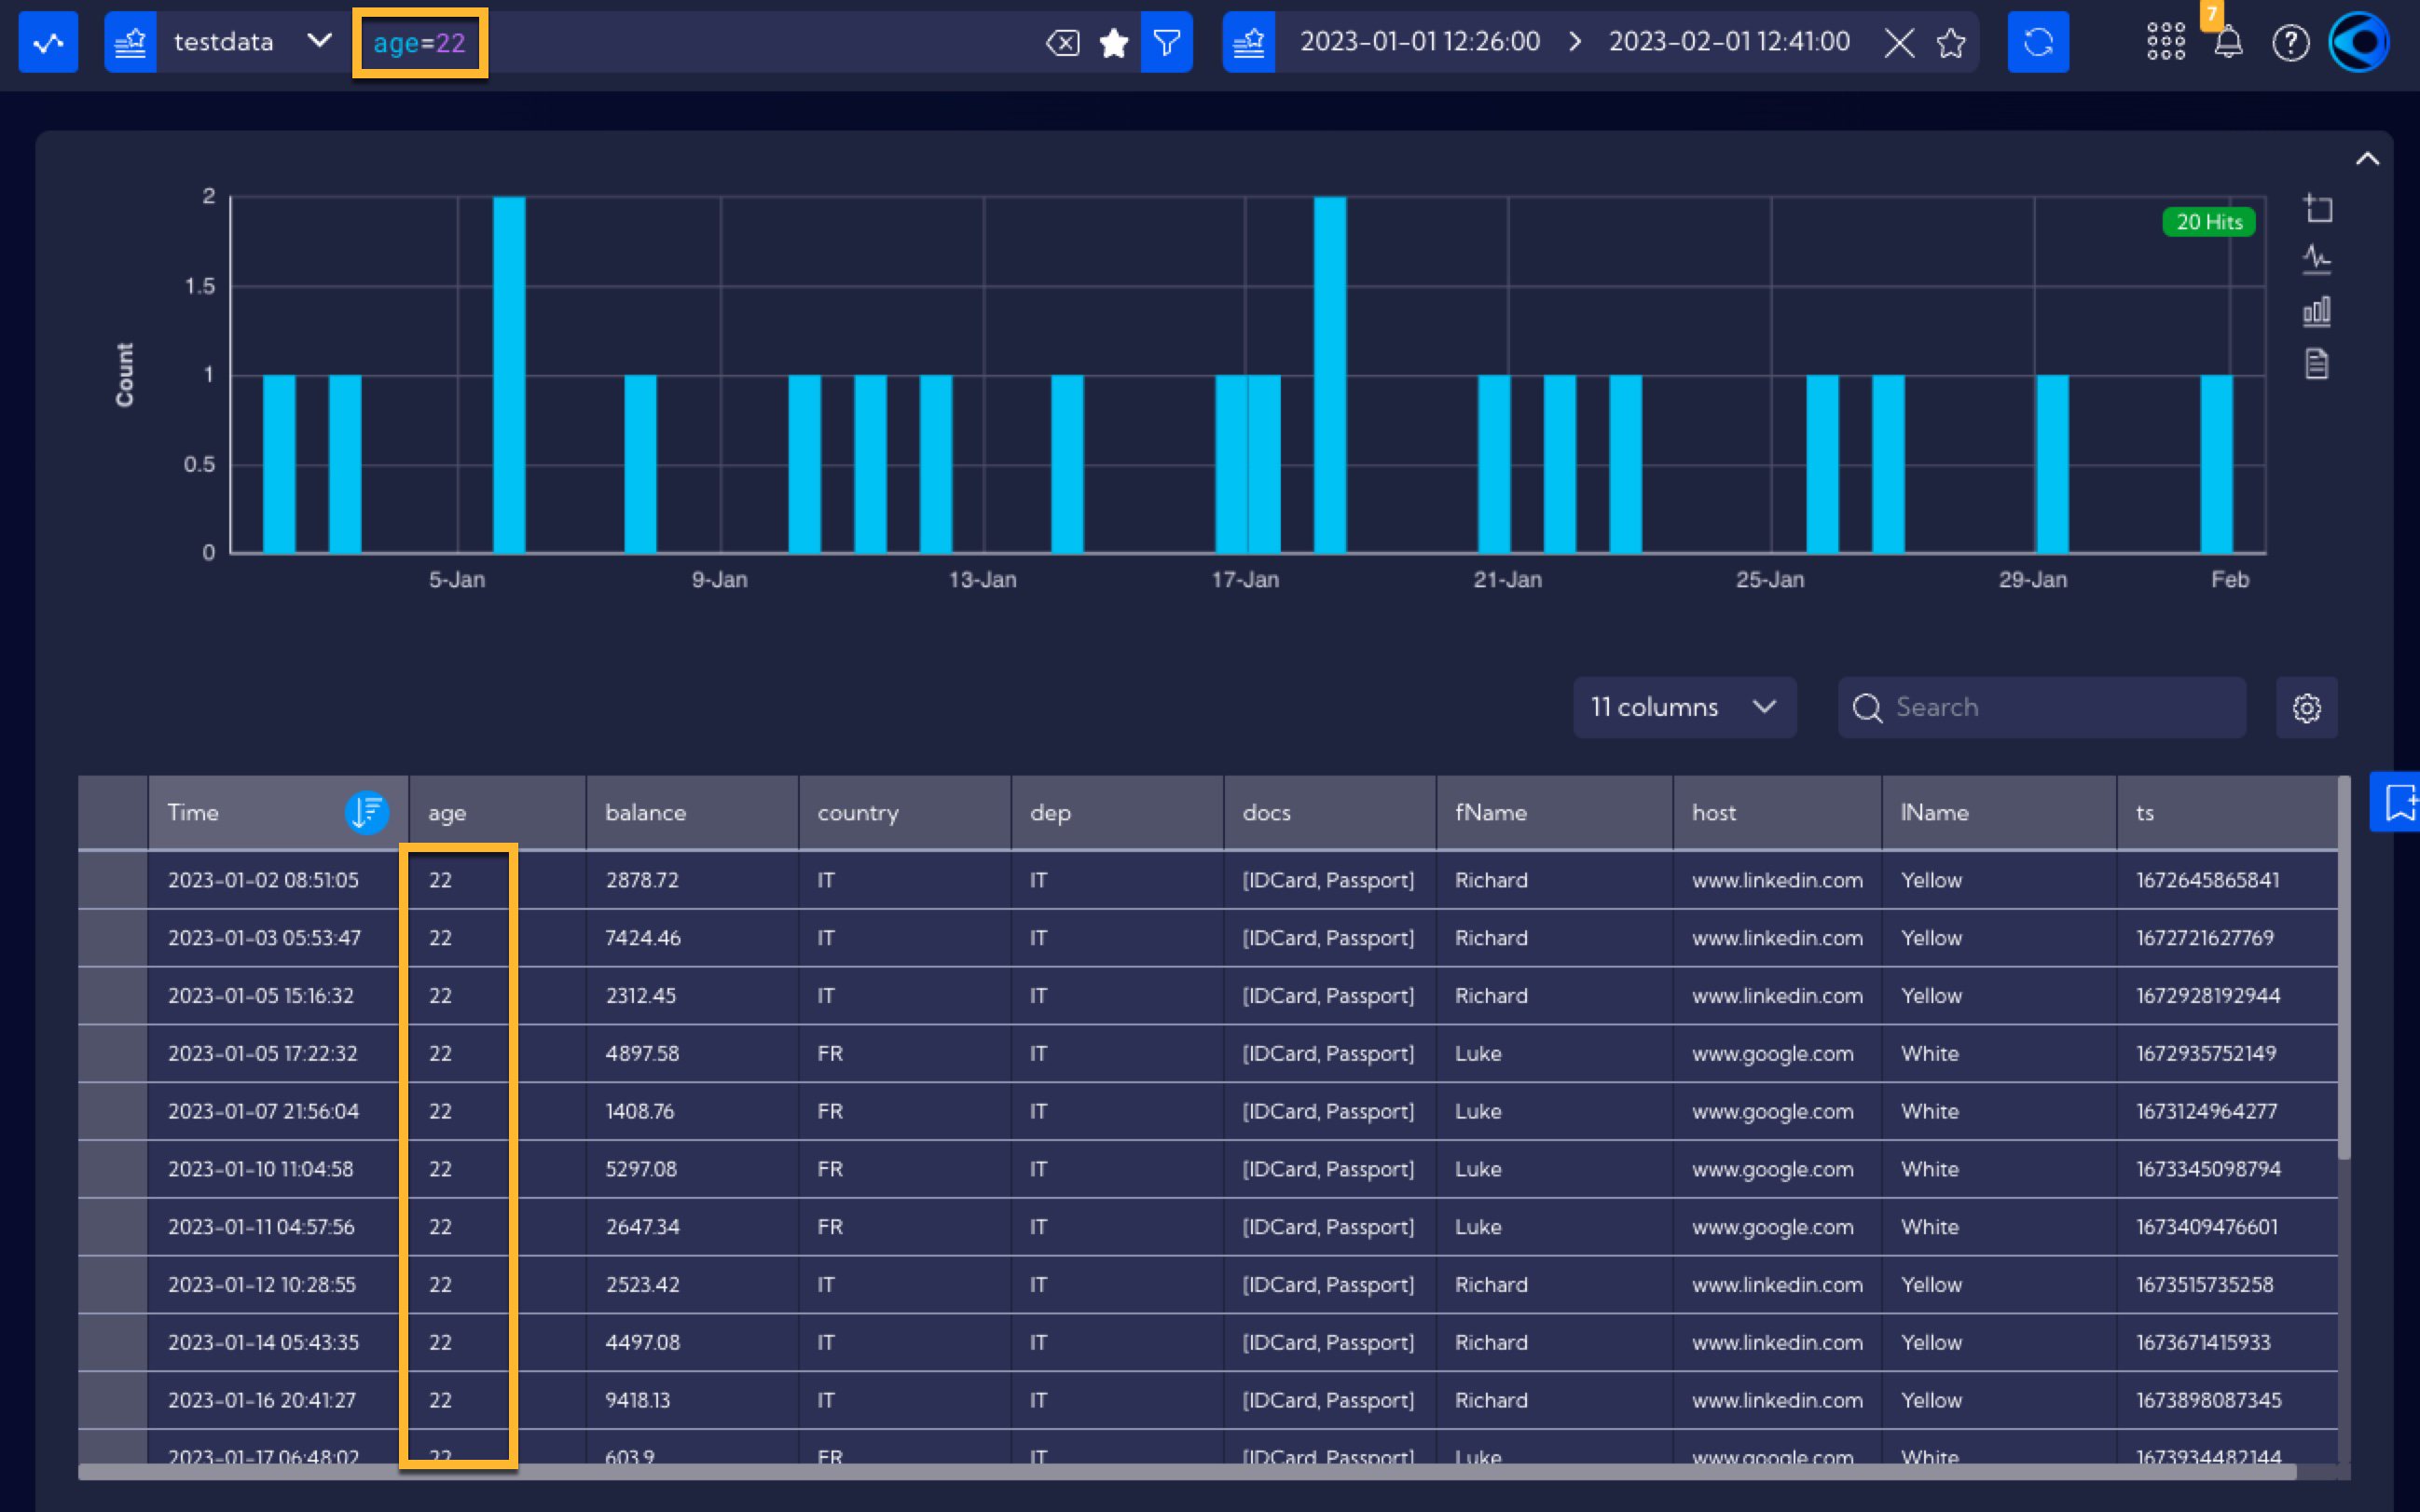
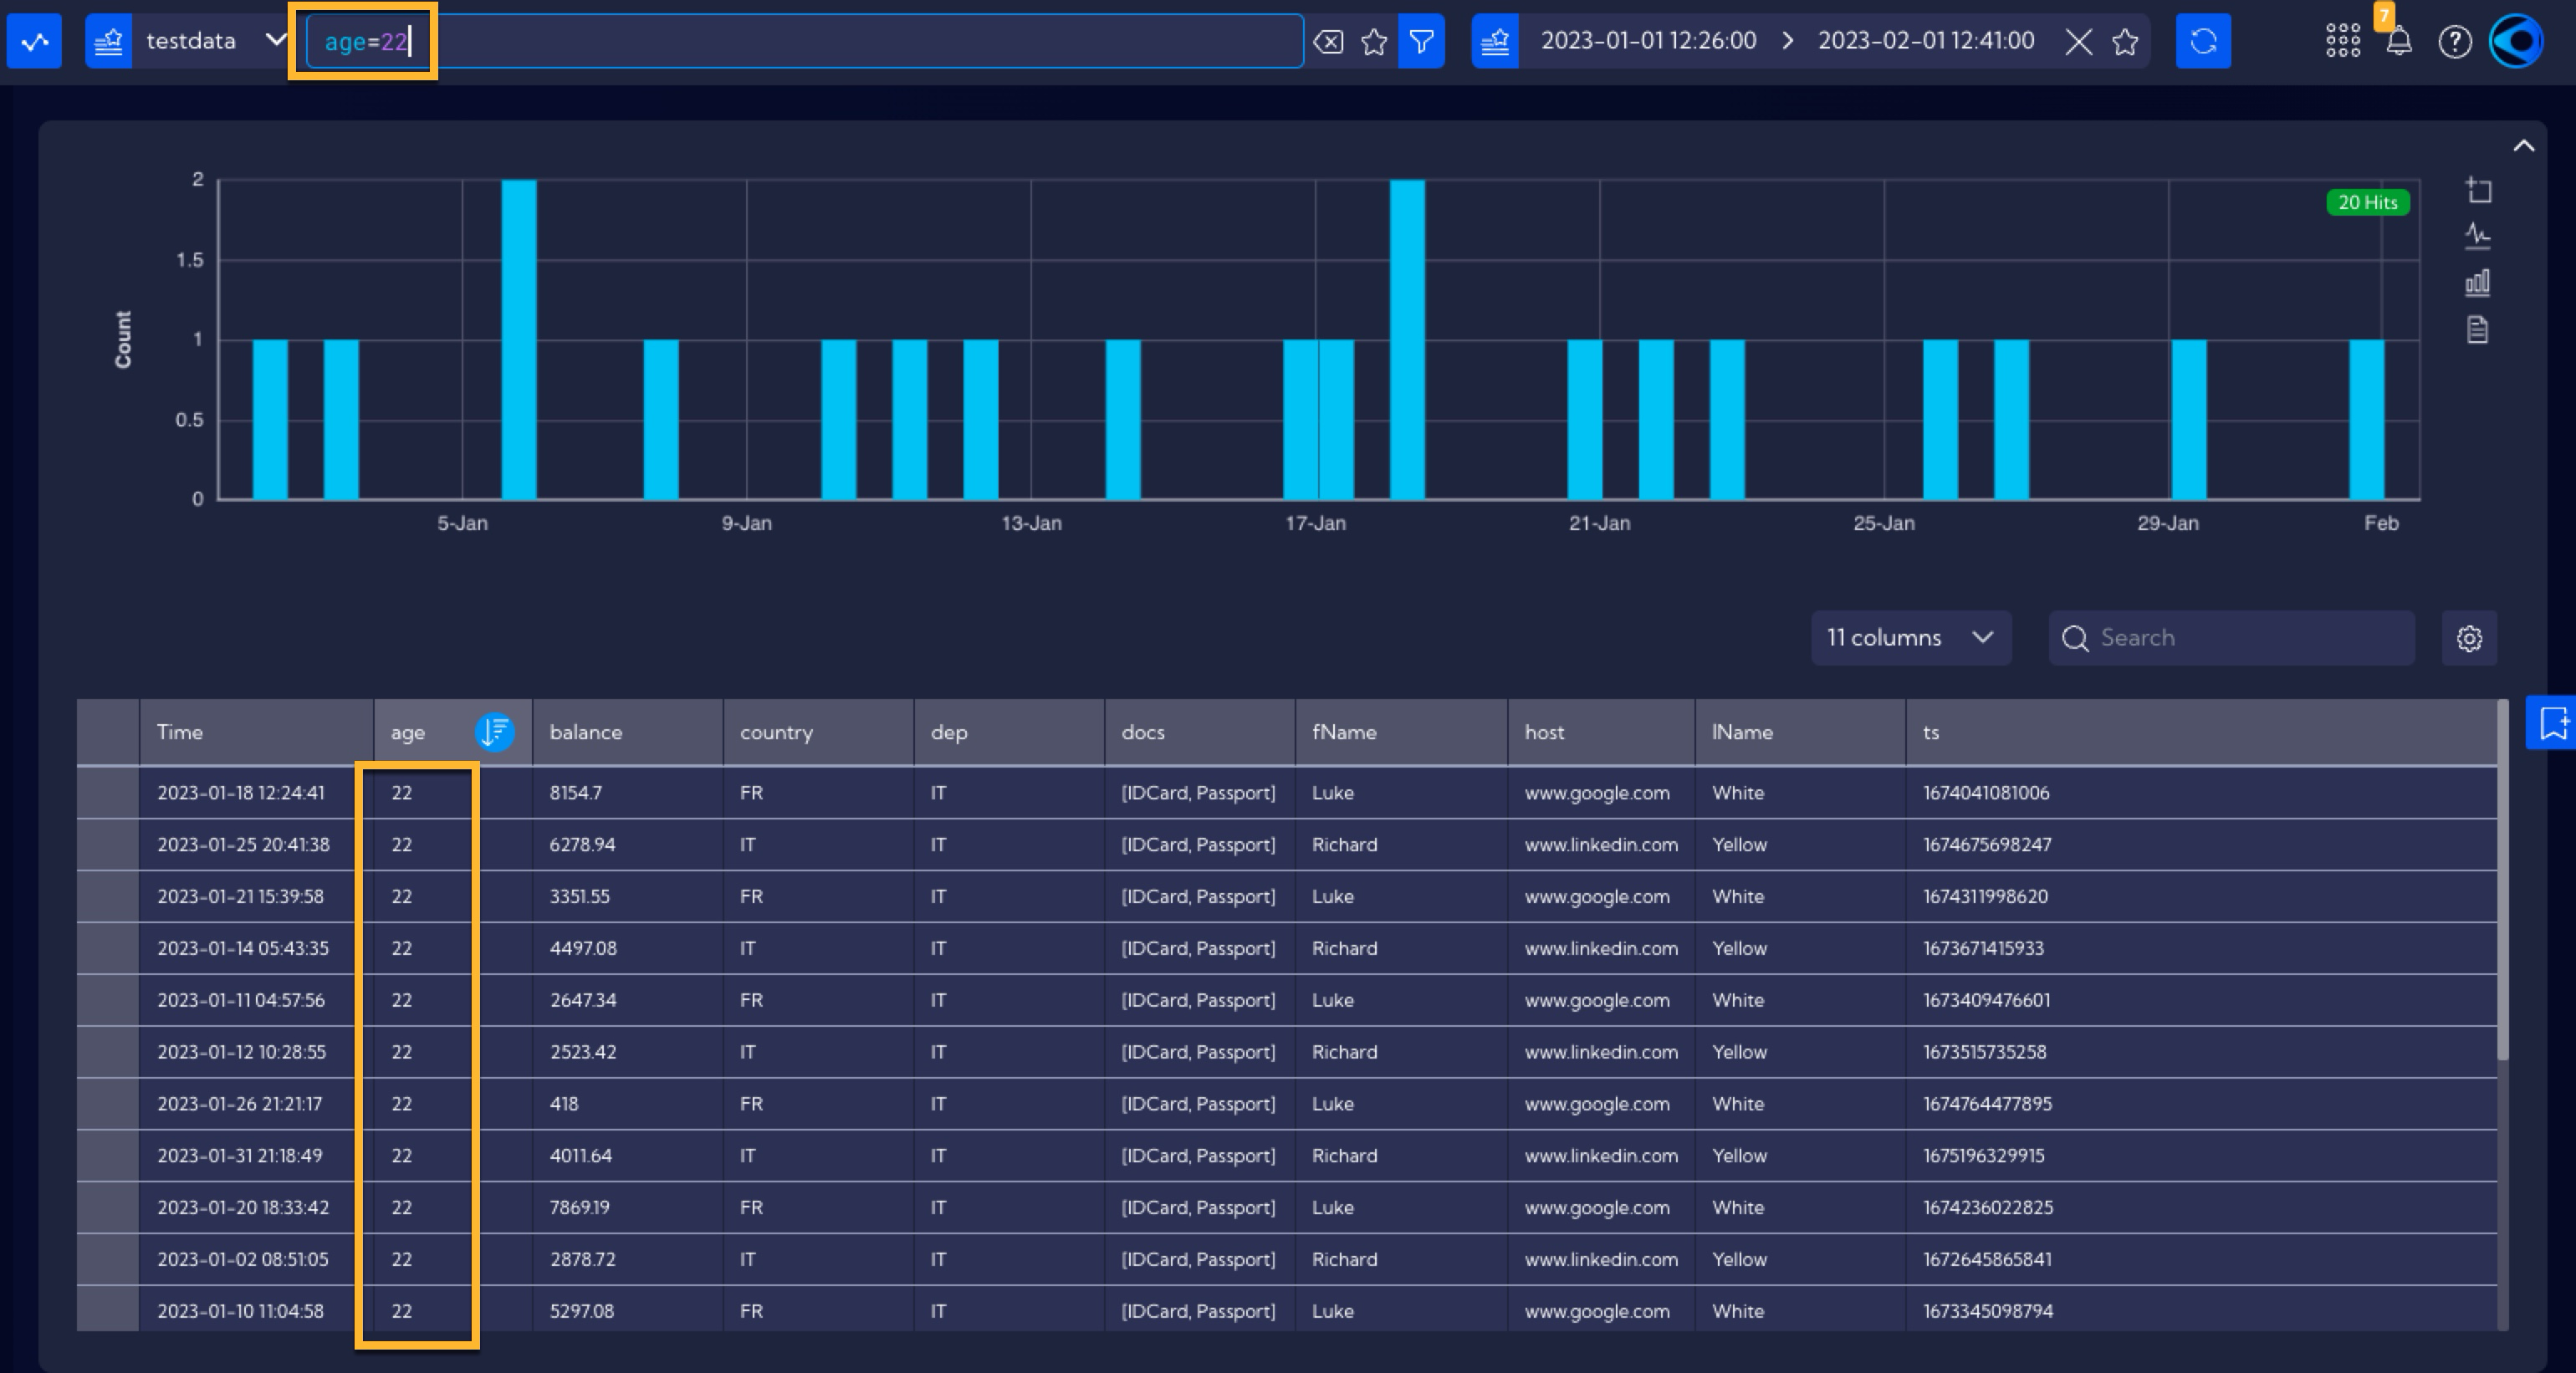
The filter has been saved into the Search Bar, and the table will now display the data only of people aged 22.
Creating a filter from the level of the Search Bar
A favorite filter can be created and deleted also from the level of the Search Bar. Basing on the previous example, create a filter for the testdata stream that will display only people in the age of 22. For this purpose, you can, for example, use the [RAW Data] menu and select the testdata stream, as well as an appropriate time range (see example above).
Next, you must enter the filtering expression in the Search bar. You can do this in two ways:
The first method
In the table, locate the value of
22in theagecolumn and by pointing it with your mouse push the plus button to add it to the filter in the Search Bar.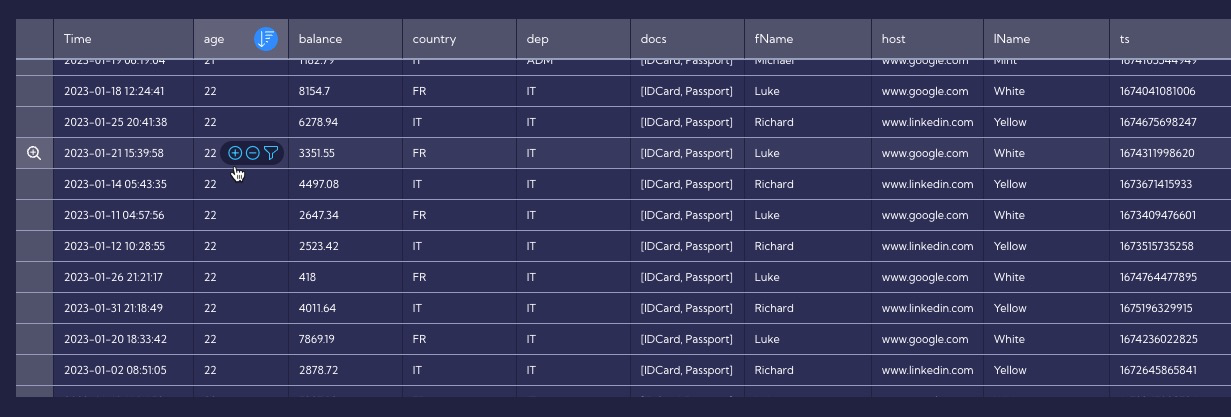
The second method
Go into advanced mode of the Search bar (you can find the documentation of the Search bar here: Search bar documentation)

and then manually type in the value of the expression that constitutes the filter in the Search bar, which in this case is age=22
For a filter created in such a way (regardless of whether it was the first or the second method) to be added to the Favorite Filters, you must use the ![]() icon in the Search bar.
icon in the Search bar.

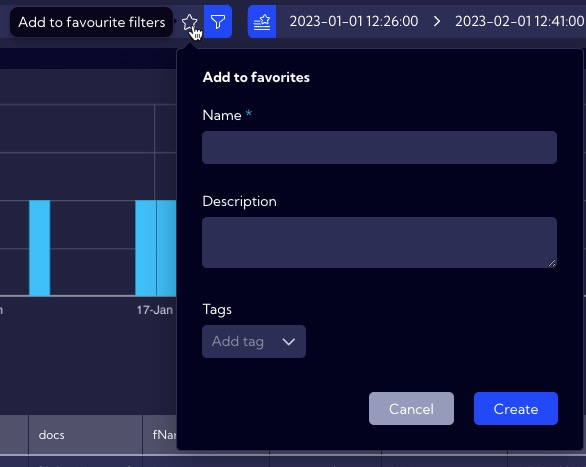
Then, fill out the appropriate fields just as in the method explained earlier for entering the filter from the [Configuration > Favorites > Filters] menu.
After clicking on the Create button, the filter will appear in the Favorite Filters menu, as well as in the list of filters in the table of the [Configuration > Favorites > Filters] menu.
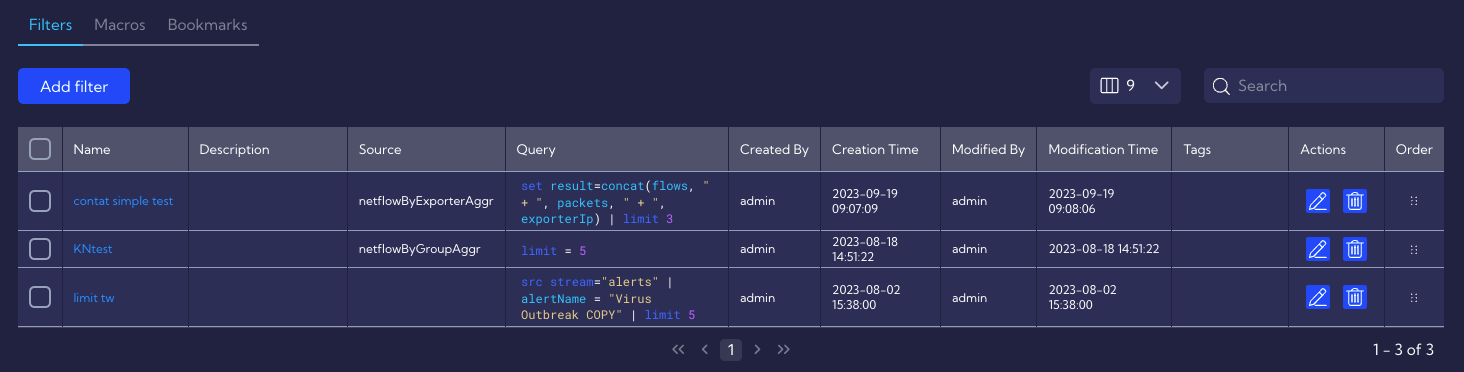
At the same time, the icon in the task bar will change its status and clicking it means to delete/remove the filter.

Therefore, the Favorite Filter can be removed from the level of the Search Bar with the use of this icon, as well as in the [Configuration > Favorites > Filters] menu by using the Delete button located in the table, in the Action column.