API Documentation
Introduction
This part of the Sycope system documentation presents an example of how to interact with the system's API.
Interacting with the API from Python
This is a minimal example of interacting with the API using a Python script. When working with code in a development or production environment, it’s important to ensure secure storage of credentials, such as passwords and other sensitive variables.
The code shown below is also available in a notebook.
Imports and Setup
At the beginning of our script, we import the necessary libraries.
In the case of requests, it must first be installed using pip install requests.
Because we are using a self-signed certificate, for code clarity, it's possible to disable warnings.
import requests
from urllib3.exceptions import InsecureRequestWarning

# Disable SSL warnings (self-signed certificate)
requests.packages.urllib3.disable_warnings(category=InsecureRequestWarning)
Initiate a Connection
The code shown below initiates a connection to the Sycope API.
Remember to replace the variables with your own values.
- HOST - The IP address of the host, or the domain if one is used, e.g.
"https://10.0.0.100","https://sycope.example.com" - USERNAME and PASSWORD are the same as for the web interface, i.e., the ones set during the initial setup of Sycope in Let's Start (the default values are shown below).
# Variables
HOST = "https://10.0.0.100"
USERNAME = "admin"
PASSWORD = "qwerty"

# Start a Session
session = requests.Session()

# Send a POST Request to Log in
payload = {"username": USERNAME, "password": PASSWORD}
request = session.post(HOST + "/npm/api/v1/login", json=payload, verify=False)
Next, we check the response. Status 200 and code OK indicate that the session has started correctly.
# Check the Request
request.json()

# Output
{'status': 200, 'code': 'OK'}
Once the session is open, we can start interacting with the API.
Interaction with Custom Indexes
In this section, we will show how to create a new custom index, make modifications to it, send data to the index, and also how to delete a selected index.
Create an Index
To add a new index, it is necessary to specify its name and define the fields (columns) it should contain.
Variables:
- CUSTOM_INDEX_NAME - The name of the new index.
- FIELDS - Fields in the index.
Fields is a list of dictionaries containing the following keys:
- name - The column name.
- type - The data type.
- Available types: string, boolean, byte, short, int, long, float, double, ip, ip4, ip6, subnet, ifc, mac, set
- sortable - Boolean value indicating whether it is possible to sort by this column. Can be set only for numeric types: byte, short, int, long, float, double.
- description - The column description.
- displayName - The display name.
Fields can be defined according to your needs, however, the only mandatory one is Timestamp, which accepts values in milliseconds. e.g. 1738677059000.
Timestamp:
{
    "name": "timestamp",
    "type": "long",
    "sortable": True,
    "description": "Timestamp",
    "displayName": "Time Field",
}
Below is the code to create a sample custom index:
CUSTOM_INDEX_NAME = "Custom_Test_Index"
FIELDS = [
    {
        "name": "timestamp",
        "type": "long",
        "sortable": True,
        "description": "Timestamp",
        "displayName": "Time Field",
    },
    {
        "name": "test_ip4",
        "type": "ip4",
        "description": "Test ipv4 field",
        "displayName": "IP4 test",
    },
    {
        "name": "test_ip6",
        "type": "ip6",
        "description": "Test ipv6 field",
        "displayName": "IP6 test",
    },
    {
        "name": "test_string",
        "type": "string",
        "description": "Test string field",
        "displayName": "string test",
    },
    {
        "name": "test_boolean",
        "type": "boolean",
        "description": "Test boolean field",
        "displayName": "boolean test",
    },
    {
        "name": "test_float",
        "type": "float",
        "description": "Test float field",
        "displayName": "float test",
    },
    {
        "name": "test_double",
        "type": "double",
        "description": "Test double field",
        "displayName": "double test",
    },
]


payload = {
    "category": "userIndex.index",
    "config": {
        "name": CUSTOM_INDEX_NAME,
        "active": True,
        "rotation": "daily",
        "storeRaw": True,
        "fields": FIELDS,
    },
}
request = session.post(
    HOST + "/npm/api/v1/config-element-index/user-index", json=payload, verify=False
)
# Check the Request
request.json()

# Output
{'status': 200, 'code': 'OK', 'id': '65ac6a43-8173bfdf-d1815c2c'}
The output also includes the ID of the newly created index.
The ID will be needed later for modifying or deleting the index.
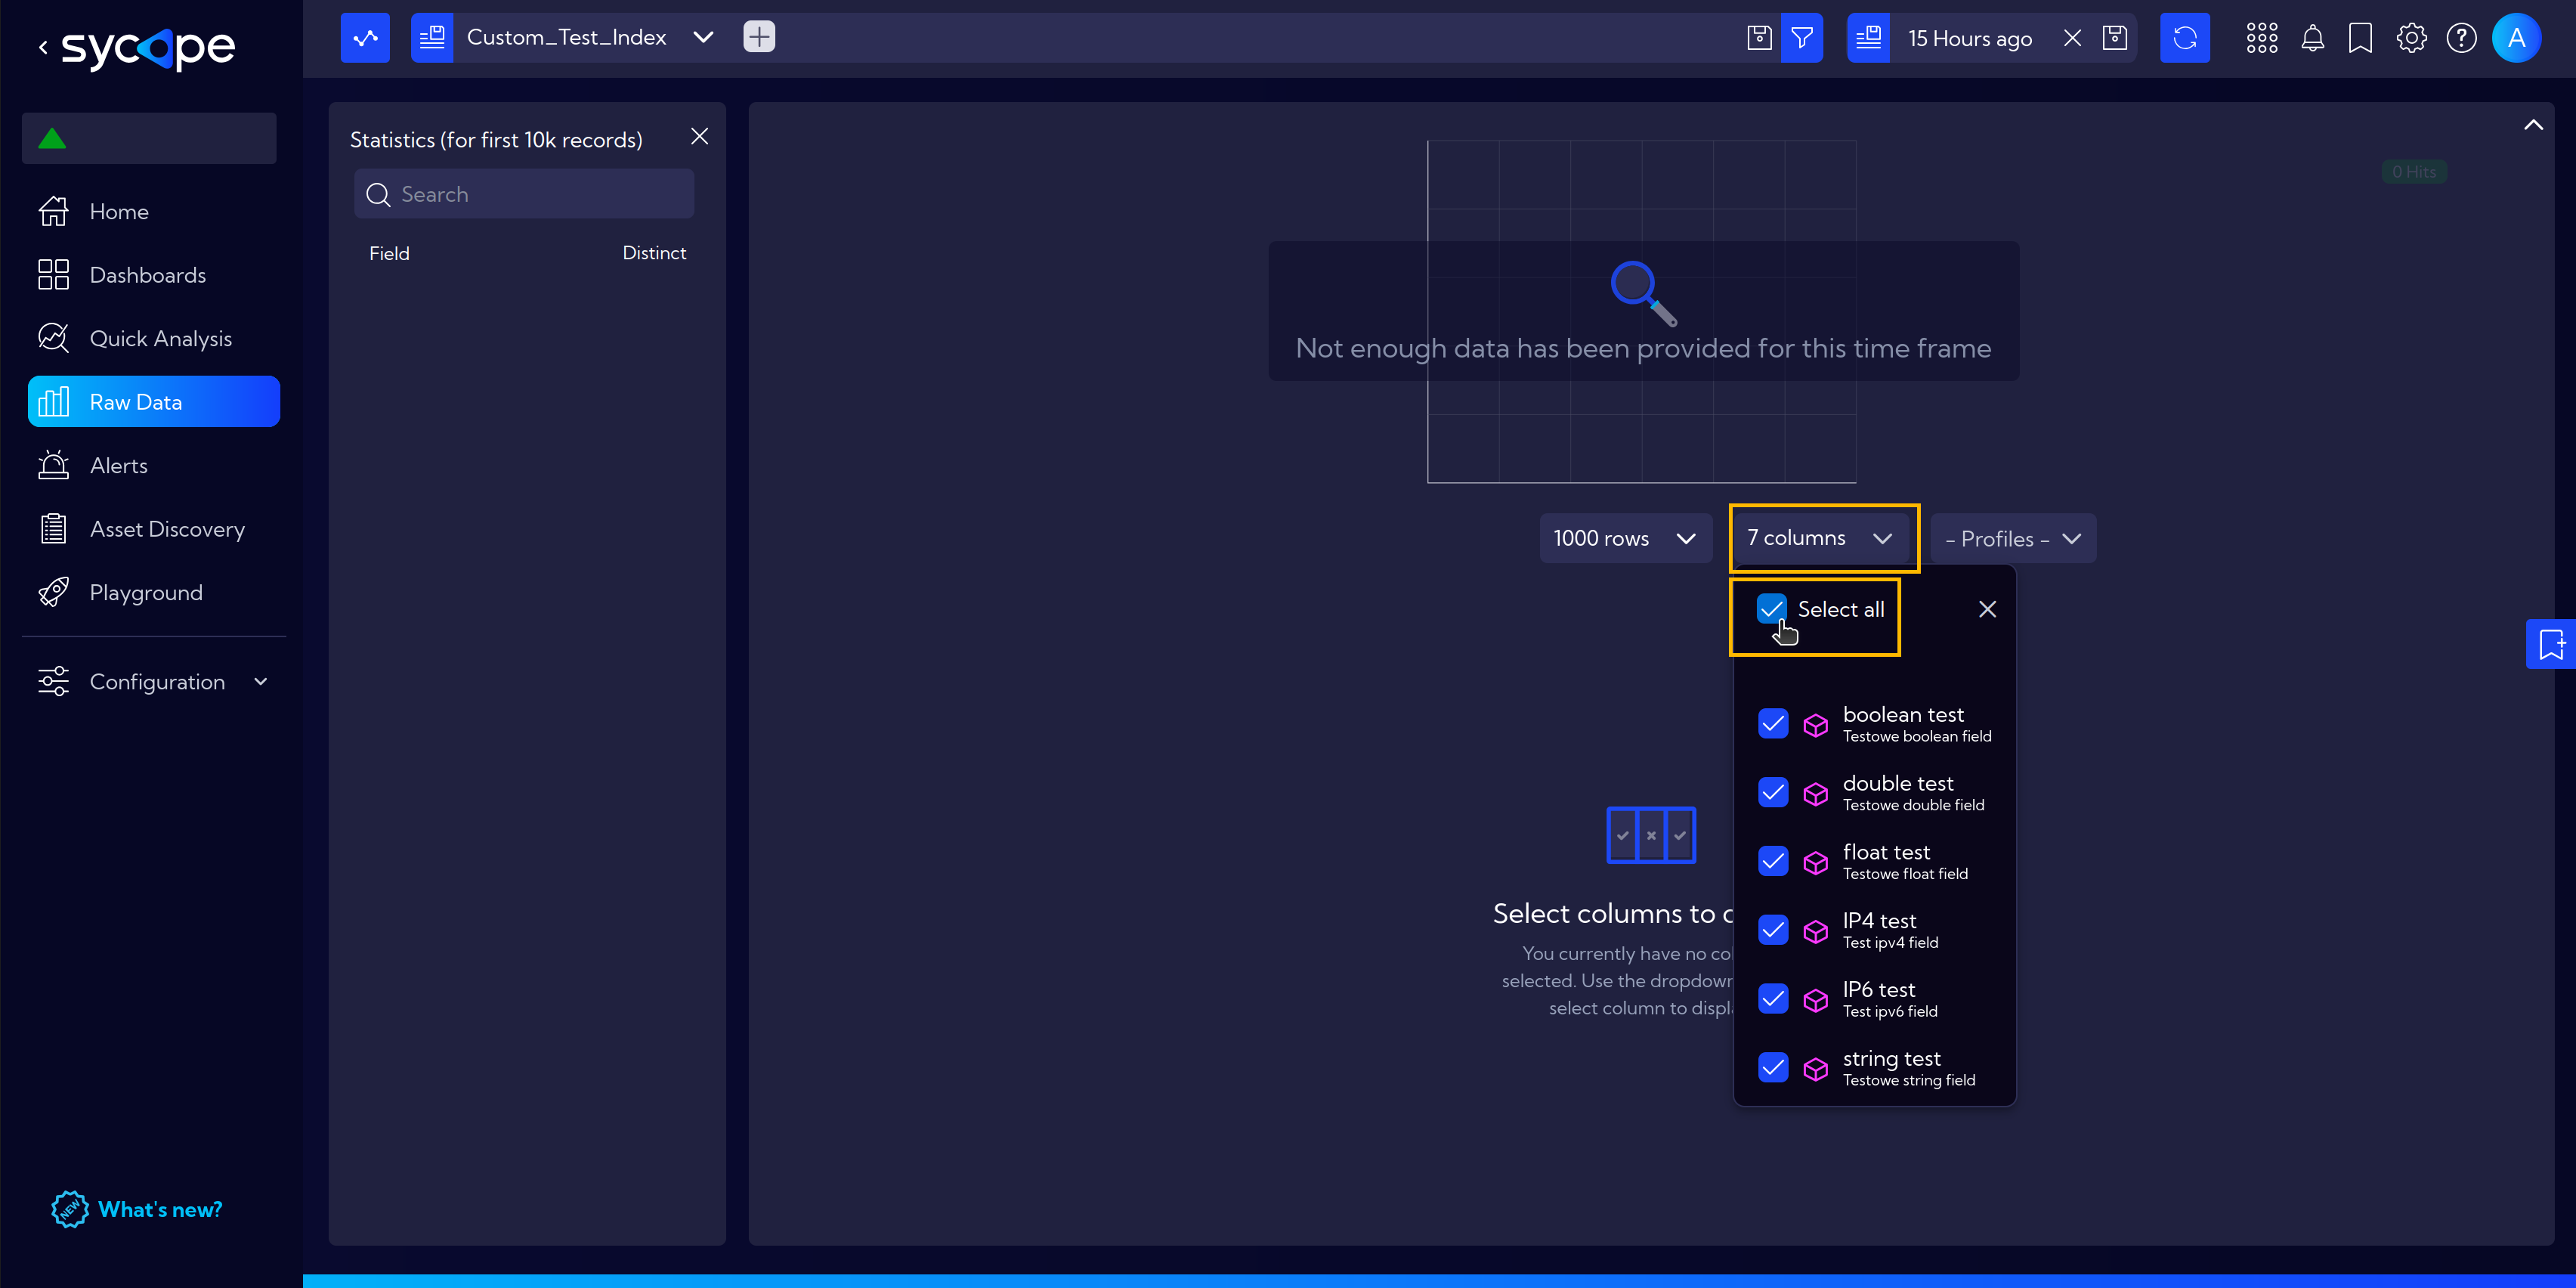
This is how it looks in Sycope under [Menu > Raw Data].
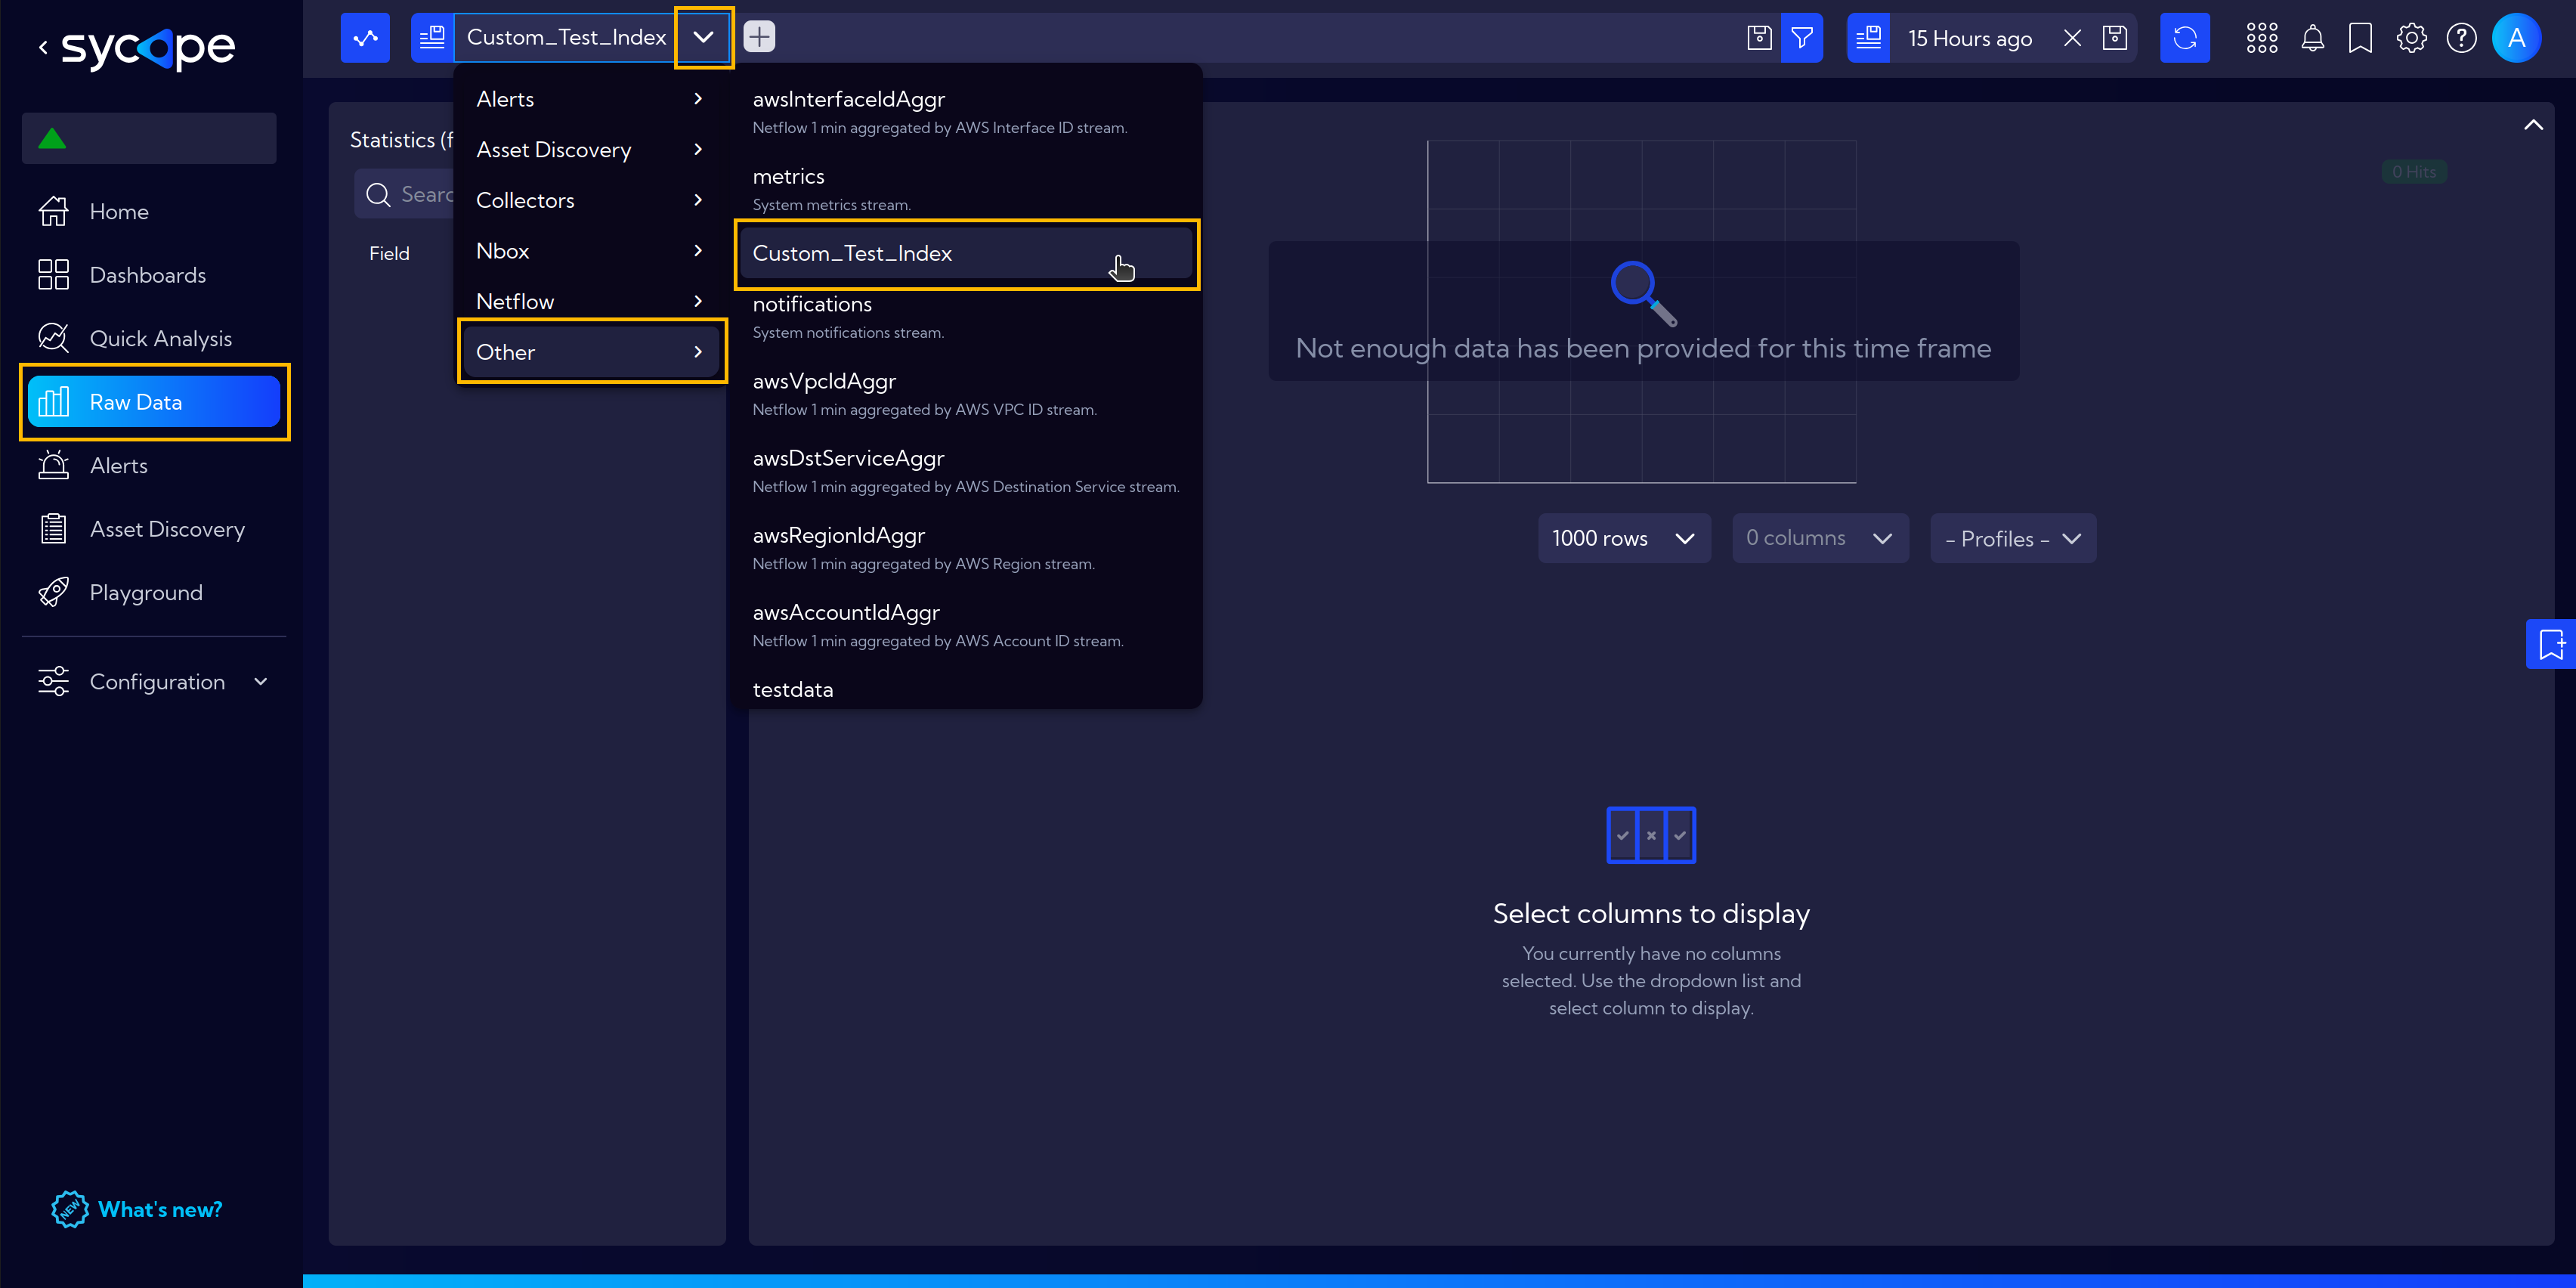
By clicking on Columns, you can select which ones will be visible.
List Indexes
Run the code below to list the existing custom indexes in your Sycope system.
request = session.get(
    HOST + '/npm/api/v1/config-elements?filter=category="userIndex.index"', verify=False
)
This is what the response looks like. In our case, there is only one custom index.
request.json()["total"]

# Output
1
We can access the ID directly.
request.json()["data"][0]["id"]

# Output
'65adb33f-cb50dadf-8bf808d8'
And here is the full response with detailed data.
request.json()["data"]

# Output
[{'id': '65adb33f-cb50dadf-8bf808d8',
  'category': 'userIndex.index',
  'module': None,
  'created': 1746823609965,
  'createdBy': 'admin',
  'modified': 1746823609965,
  'modifiedBy': 'admin',
  'annotations': None,
  'miscData': None,
  'attributes': None,
  'singleConfigurationInstance': None,
  'tags': None,
  'config': {'name': 'Custom_Test_Index',
   'active': True,
   'rotation': 'daily',
   'storeRaw': True,
   'fields': [{'name': 'timestamp',
     'type': 'long',
     'sortable': True,
     'description': 'Timestamp',
     'displayName': 'Time Field'},
    {'name': 'test_ip4',
     'type': 'ip4',
     'description': 'Test ipv4 field',
     'displayName': 'IP4 test'},
    {'name': 'test_ip6',
     'type': 'ip6',
     'description': 'Test ipv6 field',
     'displayName': 'IP6 test'},
    {'name': 'test_string',
     'type': 'string',
     'description': 'Testowe string field',
     'displayName': 'string test'},
    {'name': 'test_boolean',
     'type': 'boolean',
     'description': 'Testowe boolean field',
     'displayName': 'boolean test'},
    {'name': 'test_float',
     'type': 'float',
     'description': 'Testowe float field',
     'displayName': 'float test'},
    {'name': 'test_double',
     'type': 'double',
     'description': 'Testowe double field',
     'displayName': 'double test'}]}}]
Modify an Index
You can modify an index by adding new fields or updating existing ones.
However, updates are limited to the description and displayName properties - the name, sortable, and type of a field cannot be changed.
Additionally, it's not possible to remove fields that already exist in the index.
In the example below, we add a new field named test_additional_column.
Keep in mind that modifying an index requires its ID. You can find it using the List Indexes function.
INDEX_ID = "65adb33f-cb50dadf-8bf808d8"

CUSTOM_INDEX_NAME = "Custom_Test_Index"
FIELDS = [
    {
        "name": "timestamp",
        "type": "long",
        "sortable": True,
        "description": "Timestamp",
        "displayName": "Time Field",
    },
    {
        "name": "test_ip4",
        "type": "ip4",
        "description": "Test ipv4 field",
        "displayName": "IP4 test",
    },
    {
        "name": "test_ip6",
        "type": "ip6",
        "description": "Test ipv6 field",
        "displayName": "IP6 test",
    },
    {
        "name": "test_string",
        "type": "string",
        "description": "Test string field",
        "displayName": "string test",
    },
    {
        "name": "test_boolean",
        "type": "boolean",
        "description": "Test boolean field",
        "displayName": "boolean test",
    },
    {
        "name": "test_float",
        "type": "float",
        "description": "Test float field",
        "displayName": "float test",
    },
    {
        "name": "test_double",
        "type": "double",
        "description": "Test double field",
        "displayName": "double test",
    },
    {
        "name": "test_additional_column",
        "type": "string",
        "description": "Test adding a column",
        "displayName": "add col test",
    },
]


payload = {
    "category": "userIndex.index",
    "config": {
        "name": CUSTOM_INDEX_NAME,
        "active": True,
        "rotation": "daily",
        "storeRaw": True,
        "fields": FIELDS,
    },
}
request = session.put(
    HOST + f"/npm/api/v1/config-element-index/user-index/{INDEX_ID}", json=payload, verify=False
)
request.json()
# Output
{'status': 200, 'code': 'OK'}
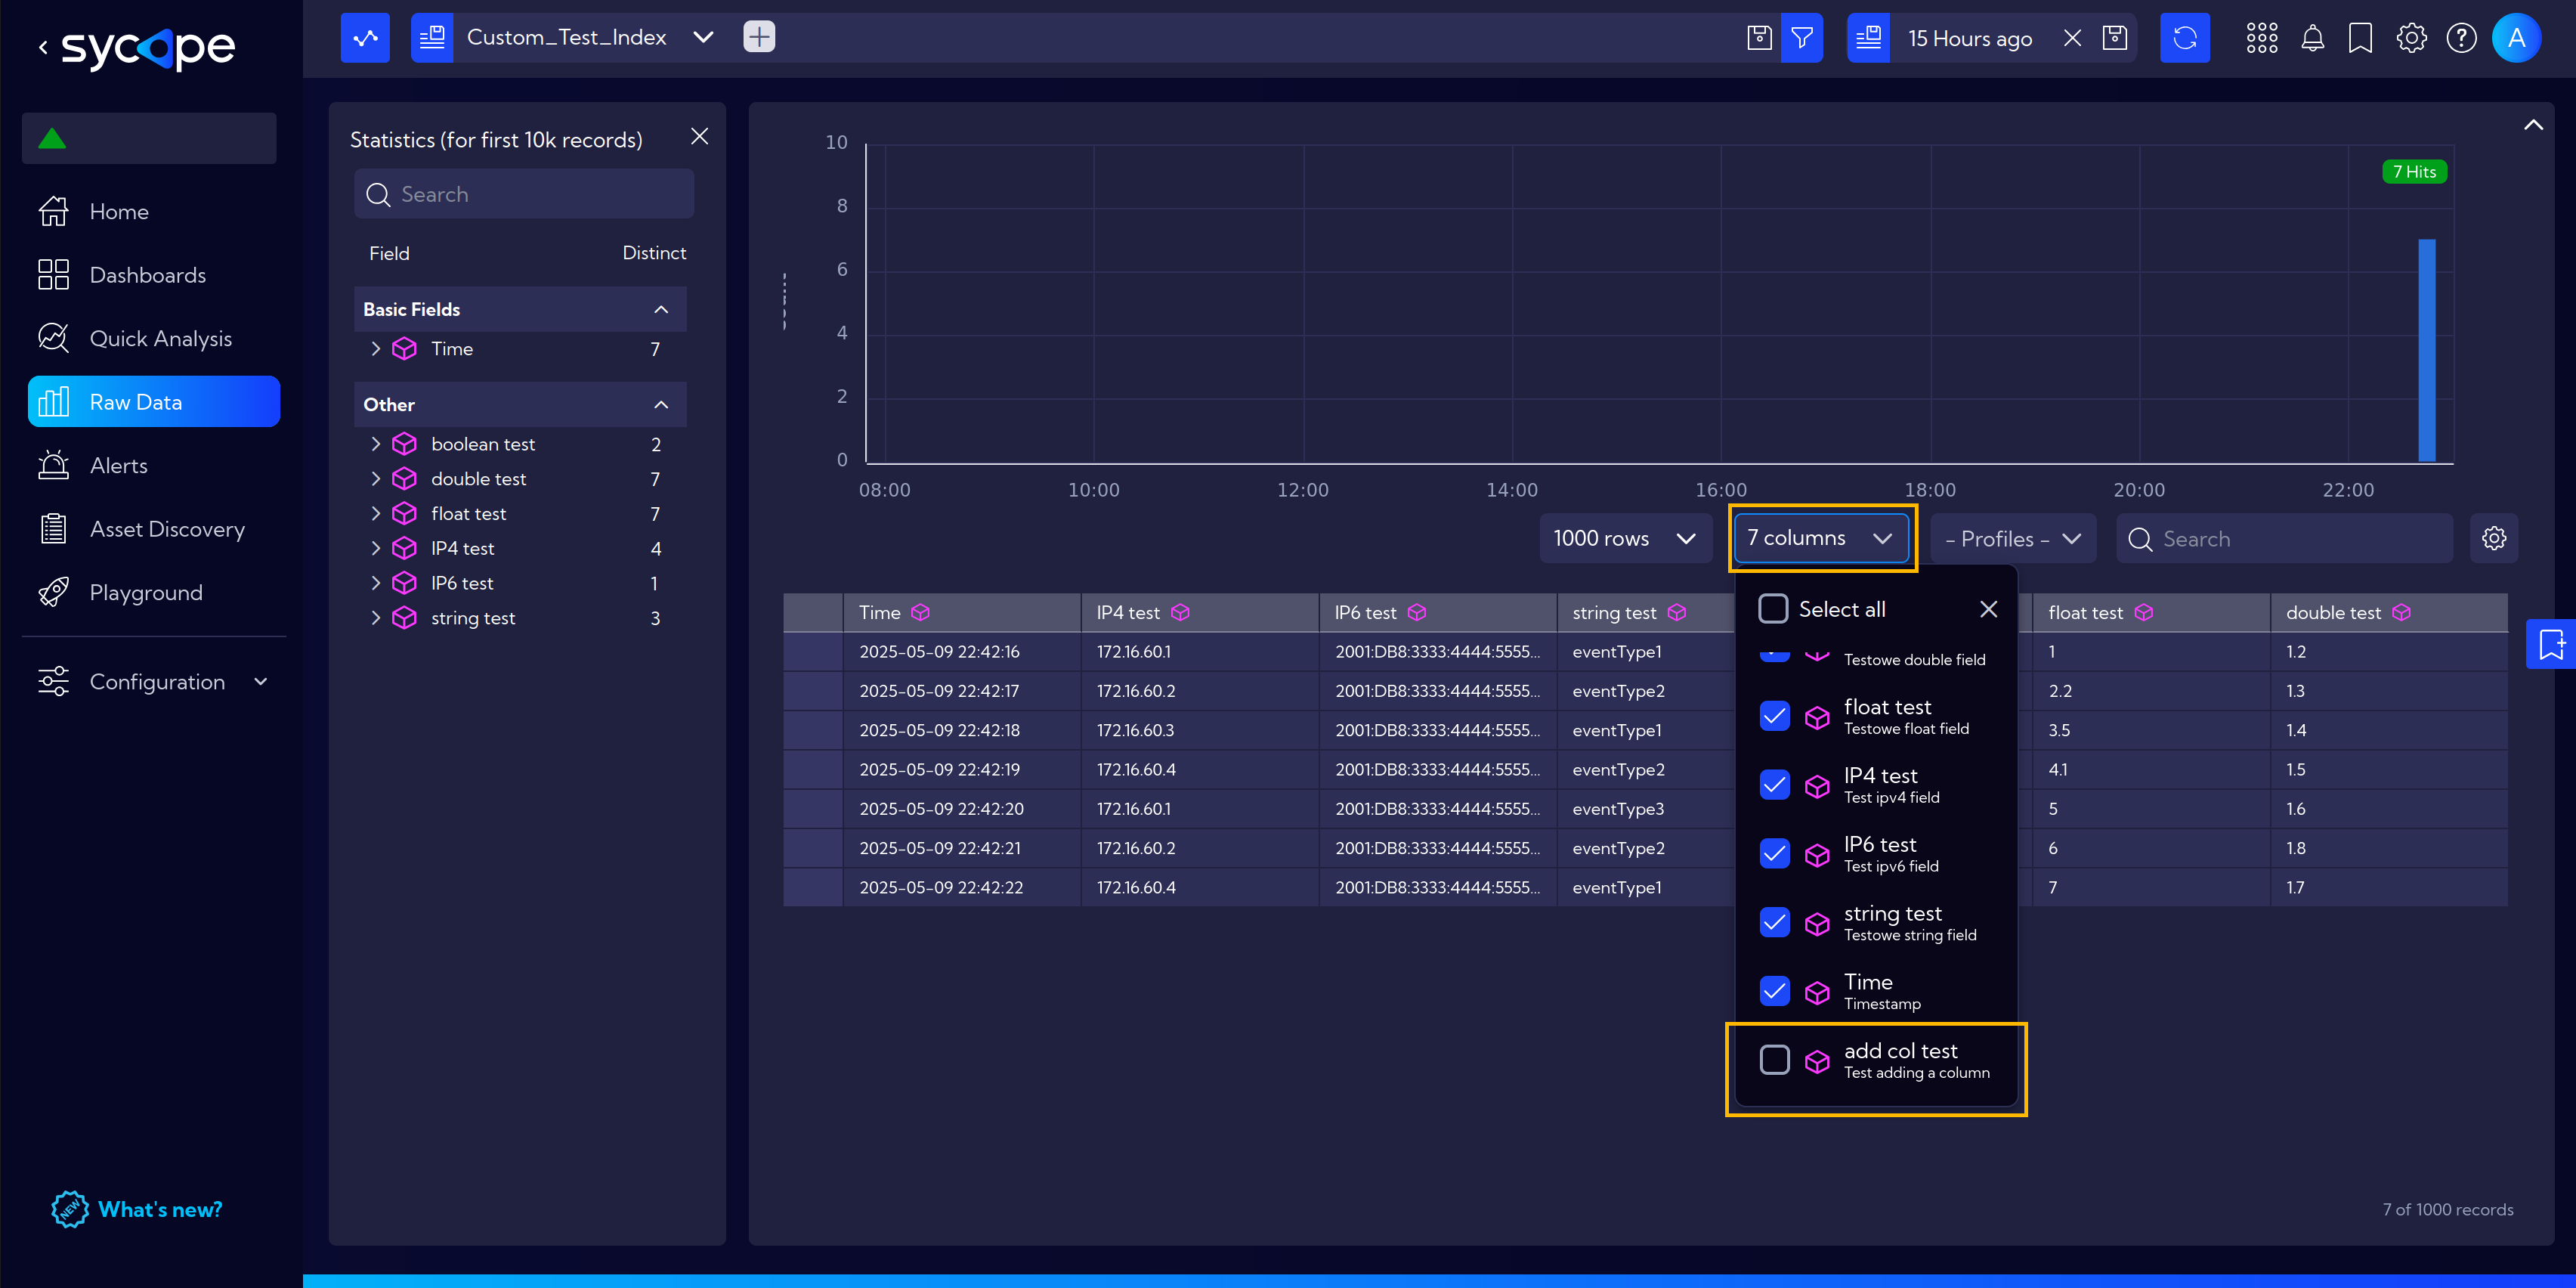
The modification was successful, and our index now includes the additional column:
Data Injection into the Index
Sending data to a custom index is shown in the example below.
To do this, just create a payload with the data you want to send and submit it.
Use the example as a reference.
Remember that data can only be injected into custom indexes - the system will not allow you to add data to built-in indexes, such as netflow.
columns = [
        "timestamp",
        "test_string",
        "test_ip4",
        "test_ip6",
        "test_float",
        "test_double",
        "test_boolean",
    ]

input = [
    [
        1746823336771,
        "eventType1",
        "172.16.60.1",
        "2001:db8:3333:4444:5555:6666:7777:8888",
        1,
        1.2,
        True,
    ],
    [
        1746823337771,
        "eventType2",
        "172.16.60.2",
        "2001:db8:3333:4444:5555:6666:7777:8888",
        2.2,
        1.3,
        False,
    ],
    [
        1746823338771,
        "eventType1",
        "172.16.60.3",
        "2001:db8:3333:4444:5555:6666:7777:8888",
        3.5,
        1.4,
        False,
    ],
]

payload = {
    "columns": columns,
    "indexName": CUSTOM_INDEX_NAME,
    "sortTimestamp": True,
    "rows": input,
}
request = session.post(HOST + "/npm/api/v1/index/inject", json=payload, verify=False)
request.json()
# Output
{'status': 200, 'code': 'OK'}
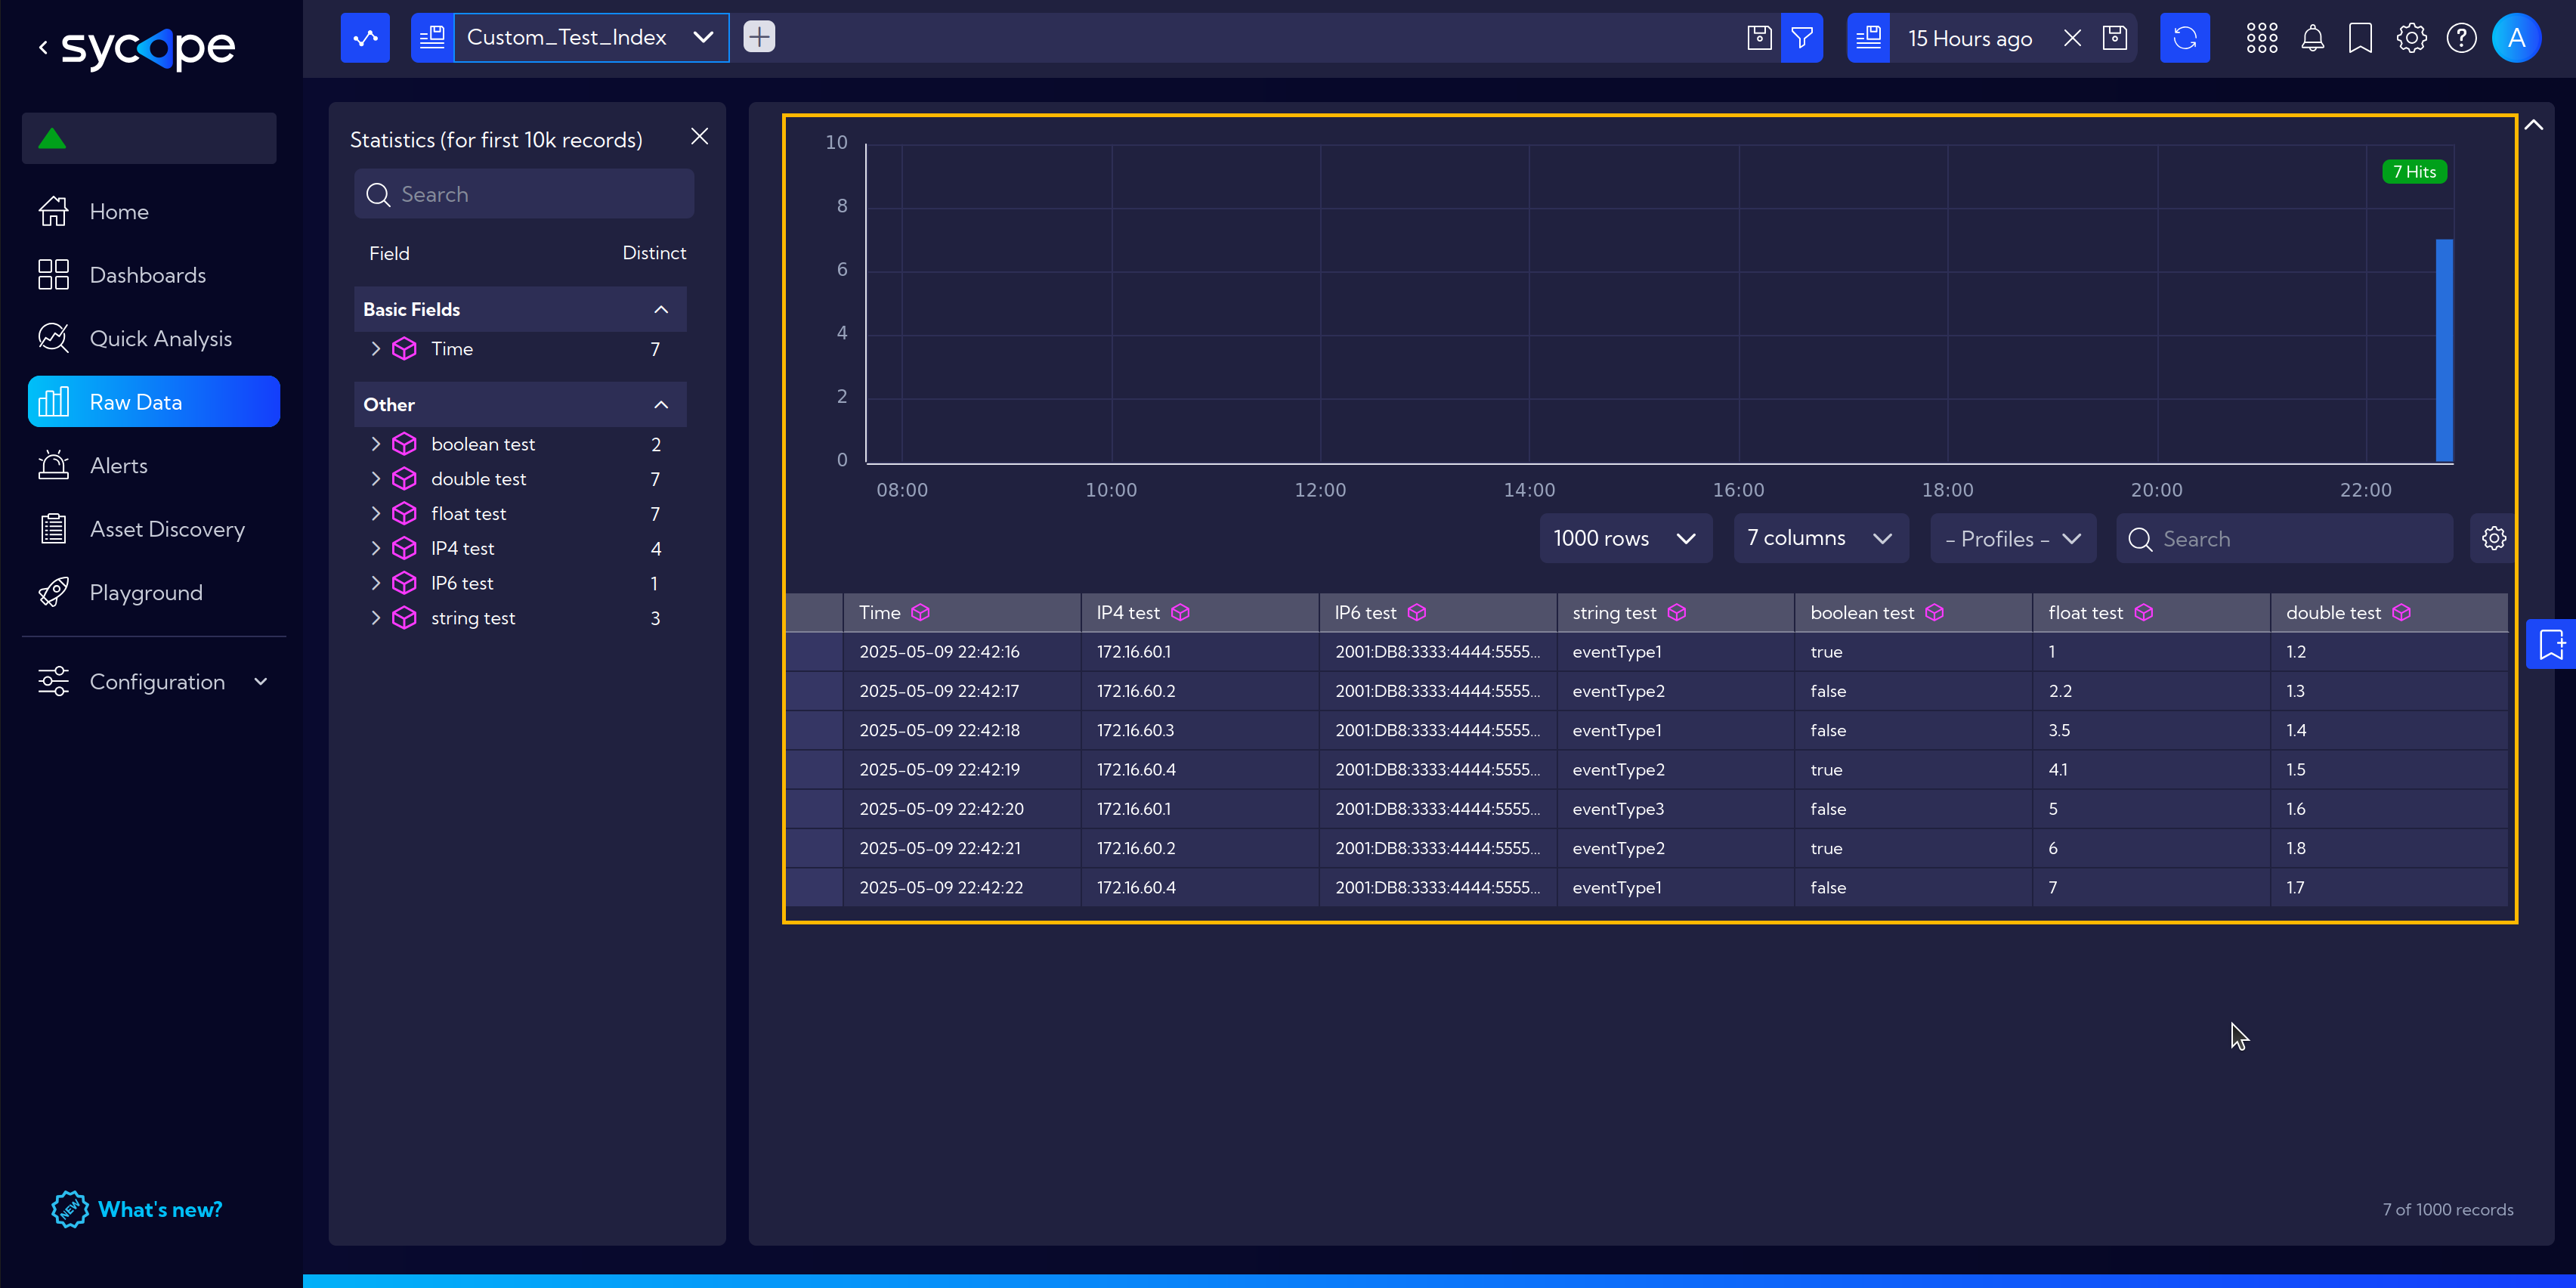
The data was sent successfully, and we can now view it in Sycope:
Delete an Index
Deleting an index is quite straightforward - all you need is to send the appropriate request with an index ID.
INDEX_ID = "65ac6a43-8173bfdf-d1815c2c"

request = session.delete(HOST+f"/npm/api/v1/config-element-index/user-index/{INDEX_ID}", verify=False)
request.json()
# Output
{'status': 200, 'code': 'OK'}